by Scott Ammerman
Quadratec Channel Correspondent
If you spend a lot of time under your Jeep, you start to notice things that could (and should) be a little better protected. Nestled up inside the frame, between the exhaust and rear driveshaft, sits your evaporative emissions control canister - just waiting to be crushed, pierced or ripped off.
I haven’t bottomed mine out on a rock yet, but I have had to cut a thick tree branch out from under my Rubicon that was jammed between the exhaust and canister. I could have easily torn it clean off, causing damage to the canister, sensor or lines in the process.

It’s not a very practical place for something made out of plastic to live, but adding some vital protection isn’t very difficult.
While replacement evap canisters are a hot item here at Quadratec, I think most folks are happier adding a quick upgrade than making a repair because of damage on the trail.
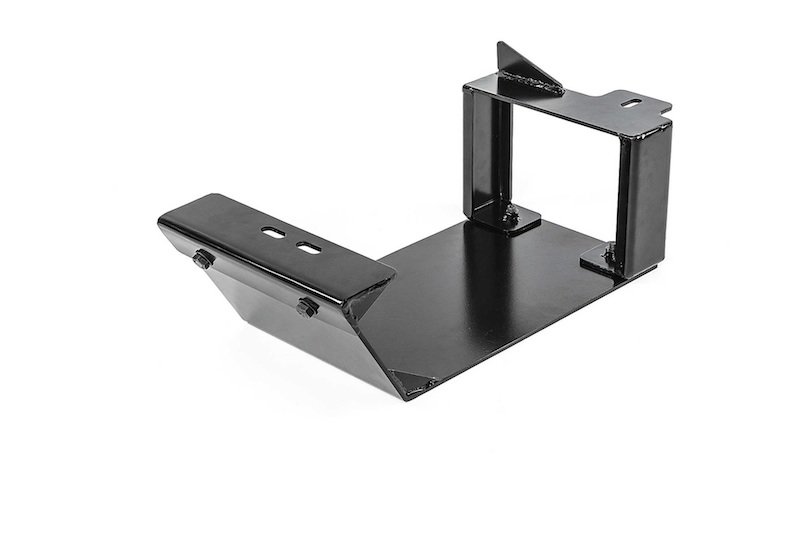
Here comes the Quadratec Evap Skid Plate. Installation time is right around 20 minutes, and only requires a handful of basic tools. We used a lift, but this could easily be done on the ground with a creeper without even having to jack up your Wrangler.
What you will need:
- 16mm socket
- 10” extension is helpful, but not needed
- 6mm Allen bit or the provided Allen key
- Safety glasses (actually wear them this time, danger of falling rust and junk)
Start by removing the 16mm bolt holding the rear canister bracket to the crossmember. The instructions tell you to remove the lines and wiring, but I was able to sneak the rear bracket into place without doing any of that extra work. You just need to hook it up and over the lines and rotate it in with the bolt hole in the right place. If you don’t have enough slack in the lines, refer to the provided instructions.

Run the factory bolt back in, but don’t tighten it all the way down just yet.

The front bracket is where the adjustment comes from. Remove the front two 16mm bolts and slide the bracket behind the mounting tab.

Install and tighten the two front factory bolts, making sure the bracket has enough clearance on both sides before fully tightening.

Mount the front of the skid plate to the bracket using the provided 16mm bolts and washers. Before fully tightening, make sure the rear bracket lines up with the two countersunk holes in the rear of the skid plate. Tighten the rear canister mounting bolt now, while you have an easy shot at the bolt.

Install and tighten the two 6mm Allen bolts in the rear of the skid plate, then tighten the front 16mm bolts.

With everything installed, you’re ready to hit the trail again - with a little extra peace of mind!


