by Scott Ammerman
Quadratec Channel Correspondent
Since upgrading to a Rock Krawler 2.5” mid-arm suspension kit and larger tires, Project Snake Eyes has encountered a litany of new obstacles during its travels. Rocks, dead fall wood, stumps and rutted stream beds have offered little resistance to forward progress, but at full articulation the tires are contacting the factory flares and pulling them away from the Jeep.

Since suffering UV damage from the sun since 2008, the factory flares have degraded to an ashy gray color, and are becoming detached from the body in several places from the tires scrubbing against them. I’ve tried several different products to improve their appearance, but they’re always one rainstorm away from being ugly again. An upgrade to better rock crawling flares was needed, and since mid-width bumpers are in the works, a flat style flare set with ample clearance was needed.

There are several options on the market for JK-model flat flares, but most are made of metal. Since traveling through uncut wooded areas in the Pocono Mountains with very narrow gaps between trees, I’ve knocked the flares against enough objects to know that a rigid fender wasn’t the best fit for what I need my Rubicon to accomplish. The risk of an impact being transferred to the sheet metal of the body was just too high.
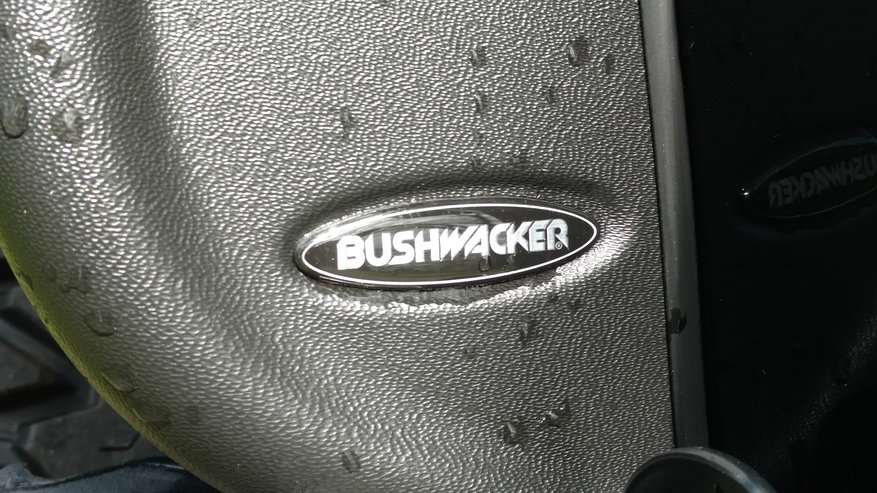
Bushwacker Flat Style Flares are engineered with this type of necessity in mind. They are molded with a Dura-Flex TPO material that adds a great deal more flexibility when compared to the factory ABS flares. This compound has the added advantage of being fully UV protected, eliminating the chance of them reverting to that chalky finish of the originals.
They are a perfect balance of tire coverage and clearance as well, and the fit and finish of each flare is flawless. They also exactly match the matte black textured finish of the factory components.
These Bushwacker Flat Style Flares are compatible with factory inner fender liners, and they upgrade the factory marker light to an LED side marker to conform to inspection laws. Add in the fact they are fully covered under Bushwacker’s Limited Lifetime Warranty, and you have a product you know will look great and perform for years to come.
No modifications or drilling of the body will be required for installation, and only a few basic tools are needed.
Tools and supplies:
- 10mm socket
- ½” socket
- 11/32” socket
- ½” wrench
- 8” socket extension
- #2 Phillips head screwdriver
- Trim removal tool (seriously, buy one if you have a Jeep.)
- Diagonal cutters
- Drill with 5/16” bit
- Utility knife, Dremel grinder or rasp file
- Air saw, hacksaw, jigsaw, die grinder or other cutting device for trimming fender liners
- Grease pencil, tire crayon, or permanent marker for marking fender liners
- Wire crimping tool and wire stripper
- Heat gun (or small lighter, only used to melt heat shrink for wiring connectors)
- Needle nosed pliers or Vice Grips
- Shop towels or rags and spray cleaner
- Scratch awl for centering clips, or a similar small metal tool (I used a small screwdriver)
- Safety glasses to use while cutting fender liners (trust me, you’ll want these)
Recommended additional tools and supplies for higher mileage Jeeps:
- Touch up paint spray in your Jeep’s body color
- Rust Reformer black spray paint
- Masking tape
- Spark plugs if you’re due for them on a 3.8L engine (Yes, really! Read on to see why.)
Installation procedure:
Normally, the best practice for this type of installation would be to do one corner at a time. In my case, my factory flares were hiding some paint damage and surface rust.

It made sense to deal with this all at once, so these instructions are going to focus on preparing all similar parts for installation as a set. It made more sense to focus on all parts of the same type with all the tools out. Also, since I wasn’t working in a garage and had to contend with sporadic rain, it gave me something to do inside the garage.
Removing the factory flares and fender liners is a fairly quick task. They come off the body attached to each other, but will then be split apart for trimming.
We will start with the front flares first. Disconnect the front corner marker light from inside the fender before you begin, and tuck it out of the way.

Remove the 4 metal fasteners above the tire with a 10mm socket.

One towards the rear (aft of the shock tower) has a collar on the fastener that threads into a stud on the body.

Start with the front sides near the headlight, and pull slowly to release the clips, moving towards the rear.

If you feel a bit of resistance, double check that no additional non factory hardware was added to keep the flares secure. Don’t worry about the plastic shrapnel, Bushwacker included all new parts to replace the clips you’re breaking.

In my case, the previous owner (or used car lot) had used a couple of sheet metal screws to keep the trailing edge of the front flares against the body, since several of the clips were already broken. One had pulled out, the other was discovered when I removed the flare as it ripped out of the metal.


Remove the remnants of the plastic clips from the body, as well as the steel spring clips up towards the front and on the fender support bracket.

Now, a note about spark plugs:
If you haven’t replaced your plugs yet, or even if they’re nearly due for replacement, now is the easiest time to replace the rearmost passenger side #5 spark plug on the 3.8L models.
It’s a straight shot with the fender liner removed on the passenger side, and I couldn’t get my big paws anywhere near it from the top. In fact, I replaced the other 5 plugs the week before installing the Bushwacker flares, noticing what a tight spot that last plug was in. I noticed how much easier it would be with that out of the way, and tactically procrastinated.

As it turns out, I wasn’t the only one who had that difficulty. With 125k on the odometer, I thought I might still be on the first set. The plug in this cylinder was a different brand and was far more worn than the other spark plugs. It sounds like someone took their Jeep in for a tune up and didn’t get everything they paid for.
With the front flares removed, we can move on to the rear ones. These are held on exclusively with push clips, and just like the fronts, will remove with the fender liner attached to the flare. The heads of these clips are fairly flexible, so if a trim tool seems to be bending them, you can use diagonal cutters to remove them more easily.

The installation hardware from Bushwacker replaces all of these fasteners, so no need to be gentle.

The next step is separating the flares from the fender liners so they can be trimmed. There are a few push clips to remove with a trim tool, and a lot of plastic rivets along the outer edge.

Using a drill and a 5/16” bit, drill out the center of each rivet. As you go, many of the outside rings of the rivets will get stuck on the bit - don’t bother removing these until the end.

I think I had 15 on there by the time I was done. See if you can beat my high score.

The front flares will come apart like this, and the only part you need to save is the liner:

The rear is a simpler design without the corrugated reinforcement the front has:

With all factory flares removed and disassembled, I moved on to painting over the abrasion damage and rust. With a newer Wrangler, this shouldn’t need to happen.

While I waited for the paint to dry, I focused my efforts on the Bushwacker fender supports. These are stamped with D1-D9 and P1-P9 based on which side they are to be installed.
These plastic components are precision drilled after the molding process, and some residual plastic can end up on the back side. These wouldn't prevent installation, but removing this little ridge will make it far easier to center the metal clips during the final steps.

This can be achieved with a variety of tools, anything from piece of emery cloth to a utility knife will work. I had a cordless Dremel with a grinding stone handy, and it worked very well.

Install new spring clips on all the holes you cleaned up according to the Bushwacker directions.

Reinstall the front fender liners with one washer and 10mm bolt removed in the earlier step, using the hole right behind the fender support bracket. These will hold the liners in place for marking.

With the rears, use one of the trim clips you removed if any are salvageable. If not, use one from the Bushwacker hardware kit, but don’t insert it fully.
Mark both the front and rear flares according to Bushwacker’s instructions, everything that extends past the body line needs to be removed.

This is easier than it sounds, but trimming too much will make the liners flop around inside the new fender flares, so cut conservatively and test fit. Cutting too little will push the flares out away from the body, causing a gap - so trial and error is the method here, and go slow. There are a couple of notes on the Bushwacker instructions about spots that don’t exactly fit the body lines, so pay attention to those as you go along.

I used a die grinder with a sanding wheel on it to cut through the liners, but many other tools would also work. This threw a LOT of plastic shrapnel towards my face, so depending on what you’re using, you may want safety glasses on for this step.

Two spots of the rear flares are cut to leave mounting ears in place, and a hole in each must be modified for a perfect fit. This is detailed in the provided instructions, but the end product looks like this:

Your scrap pile will have grown substantially, at this point it will look something like this:

When your liners are clearanced to the point that the Bushwacker flares fit snugly, move on to installing the fender supports. Make sure all the spring clips are in place before attaching these as I mentioned earlier.

These are all marked for location, and held on to the body with a combination of bolts and push clips, so pay close attention to which parts get used on each position.

Holding the blind nuts with a pair of vice grips to get them started by hand is a good idea.
The final part for the front supports is installed with provided push clips.

Pay attention to the notes in the installation instructions about lining the supports up with the style line in the sheet metal, and don’t over-tighten the fasteners causing them to deform the plastic.

Reinstall the front and rear fender liners using a combination of the factory 10mm bolts removed in the first few steps, and new push clips included in the Bushwacker hardware pack.
One part that is slightly different is the way the trimmed fender liner sits at the very front - the plastic gets tucked behind the sheet metal (was in front of it with the original installation) and is held in place with a provided push clip.

With all the supports installed and the liners trimmed and ready to go, move on to the wiring for the front turn signals. Cut the old plug off, leaving enough wiring behind to run out to the new signal location.

Strip the wires and attach the heat shrink bullet connectors found in the hardware kit.

Since the new light is an LED, and the original was incandescent, the polarity has to be correct. In my case, both connections were “black to white”, but I have heard of other installations being the reverse. Once the flares are installed, the wires cannot be easily switched, so check them before you put everything together. Install the LED lights in the front fender flares using an 11/32” socket, a long extension (or nut driver) and a #2 Phillips head screwdriver.

Install the edge trim on all four fender flares by slowly pulling the red tape back a few inches at a time, and pressing firmly to make sure it is fully adhered to the surface.
Wipe down all surfaces above the fender supports with the provided alcohol wipes to clean off any contamination. This will help the adhesion on the body panels for a very clean look. I used a spray bottle of rubbing alcohol and a clean microfiber cloth.

Start by pulling back a couple inches of the red adhesive backing on one end of each fender flare, then install it by partially tightening the provided Phillips head screws in the underside of the fender into the spring clips on the fender supports.

If they don’t totally line up, the scratch awl can be used through the hole in the flare to reposition the spring clips so the screw can be threaded in. Do not fully tighten the screws yet.

Pull the tape back slowly, about 10 inches at a time, and press in firmly on the edge of the flare for about 20 seconds to stick it in place.

As you move along the fender, tighten the screws down below where you’ve removed the tape to keep everything in place.

Once you get to the end, all the screws should be double checked.

When all the fender flares are installed, check for gaps in the adhesive trim and correct them with the provided plastic tool. Slide it under the surface of the trim and press firmly to correct any spots that didn’t quite stick.

Not only have these Bushwacker flat flares considerably increased my tire clearance on Project Snake Eyes, they also look very sharp. Getting rid of all that grey plastic has given it a vastly updated appearance.

These look incredible with the Hyline Offroad mid-width bumpers (including the brand new Ridgeline rear bumper and tire carrier), but would also match well with a stubby setup. Since they don’t come down as low as the factory ones in the front, some front full-width bumpers may look a little out of place.

On the trails at Anthracite Outdoor Adventure Area in Coal Township, Pa., I was able to roll over obstacles without that all-too-familiar crunching noise as the corner tread of my tires grabbed the factory flares.

I am very impressed with these Bushwacker Flat Style Flares, and look forward to putting them to the test in all types of mountain terrain.
Next up, lighting upgrades for Project Snake Eyes. Stay tuned to the Quadratec Channel for updates!


