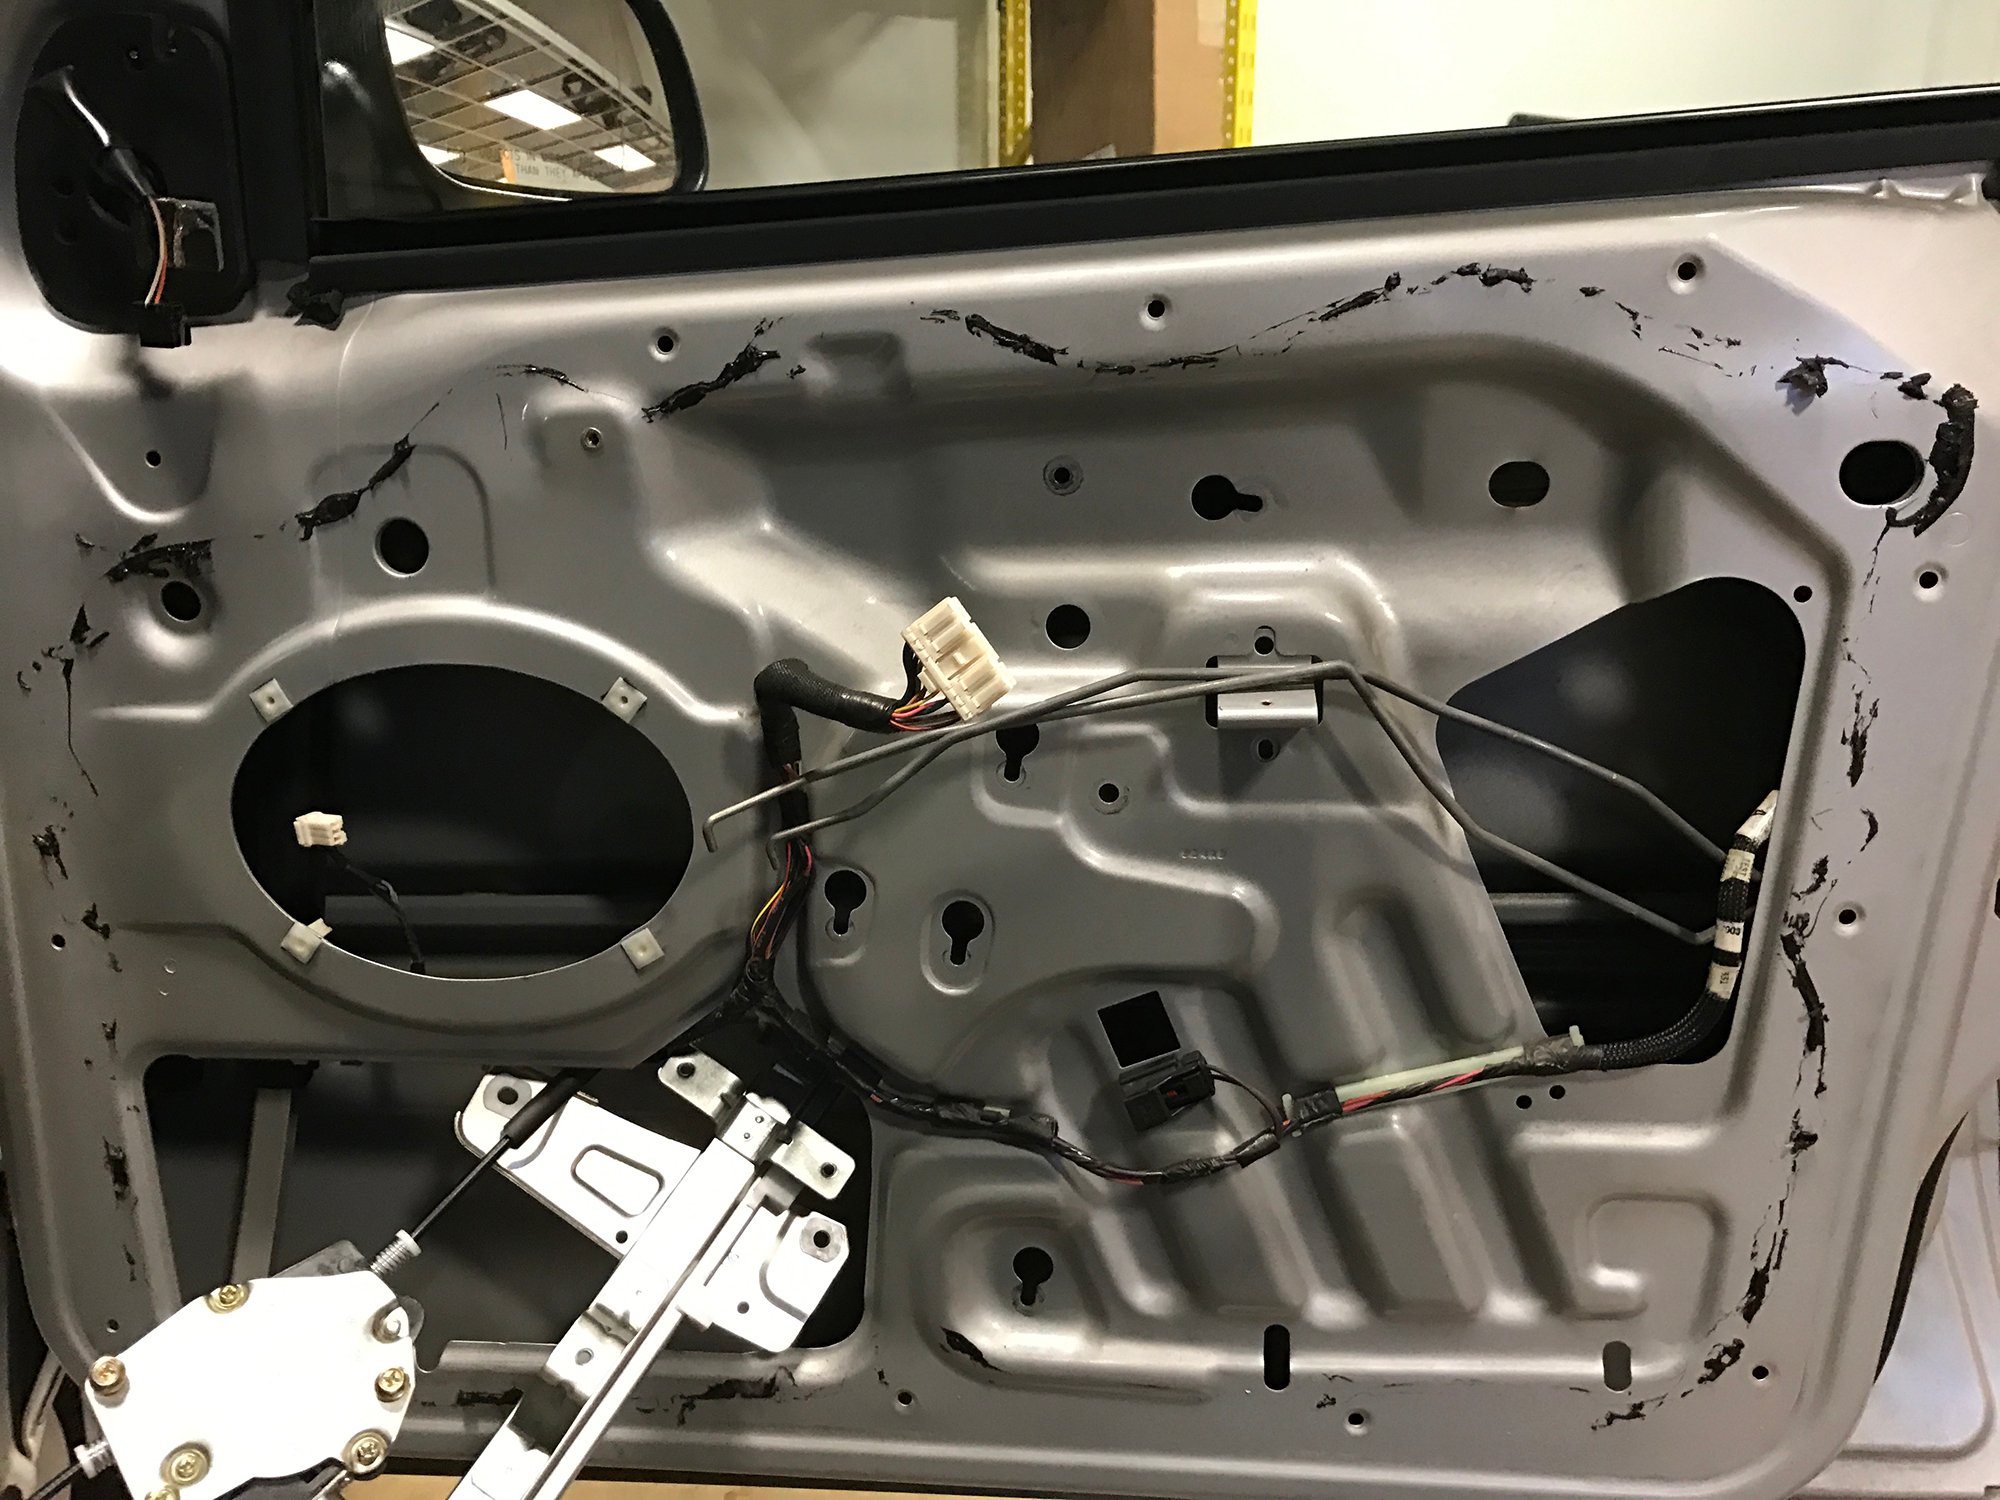
The motor that moves your Jeep's windows up and down is call a window regulator. Over time these motors can become slow or stop working all together. The motor's become worn out, or other parts of the regulator can go bad. A common problem on the 1999-2004 Jeep Grand Cherokee is for the plastic trolley that carries the window up and down to break where the cable that pulls the window attaches. You'll hear a snap when it does break, and then you'll likely watch your window slide down into your door.
Don't panic. The fix to this problem is easy, and only requires a few hand tools, and a new window regulator.
What you will Need
- Window Regulator
- Phillips Screwdriver
- Flat Head Screwdriver
- Torx T15 Driver
- Panel Tool
- Ratchet
- 10mm socket
Instructions
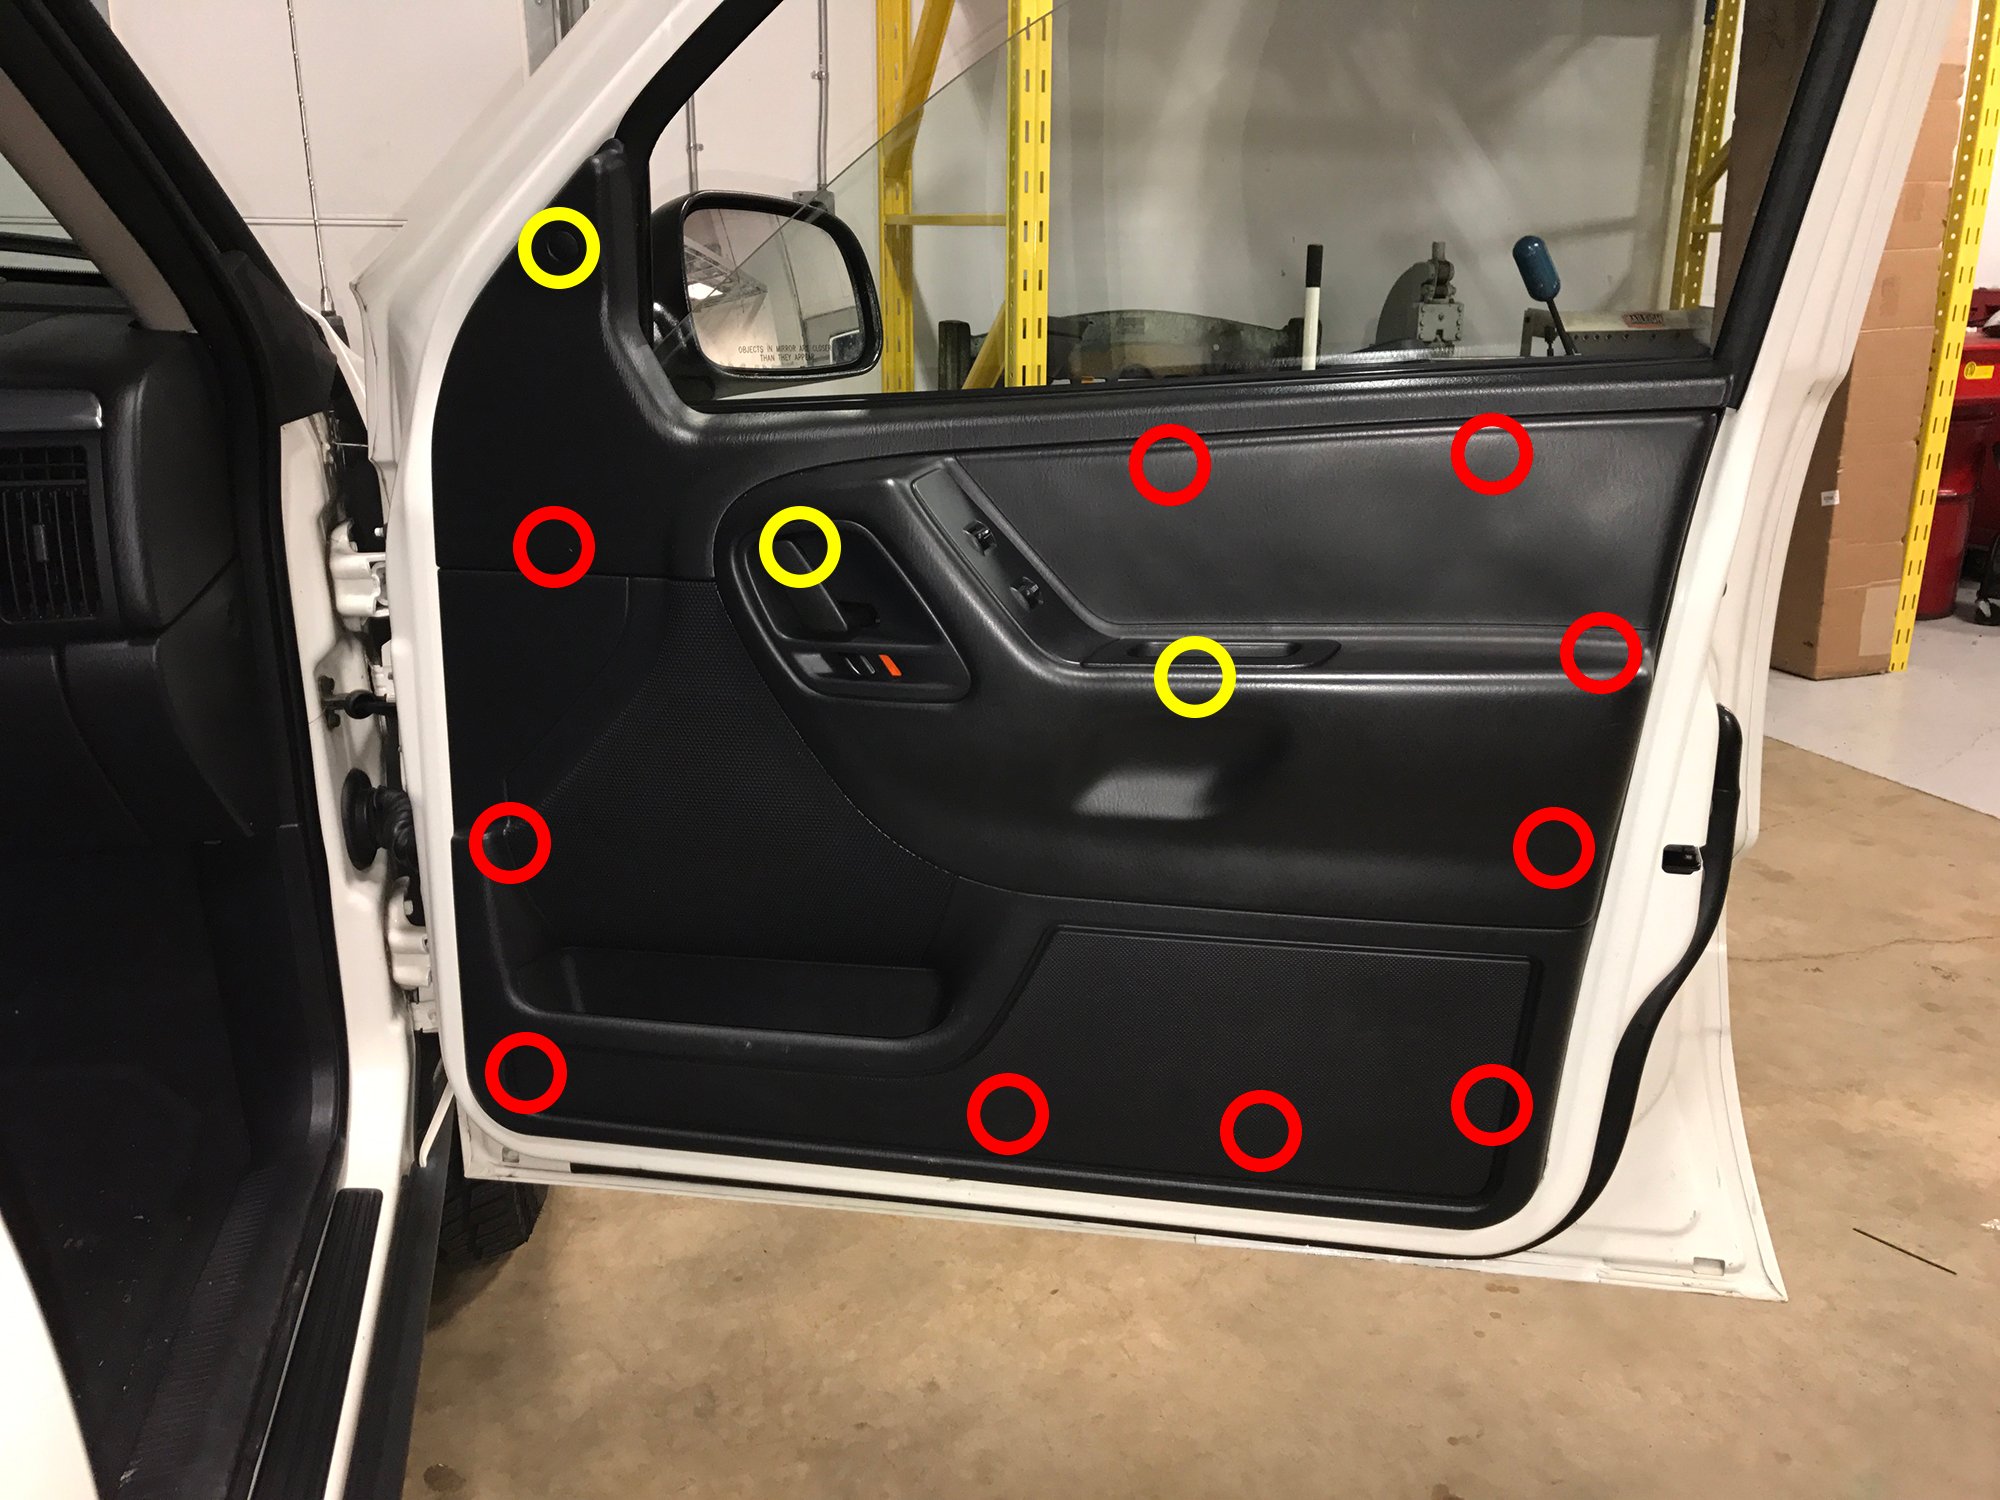
1. Remove the torx screw behind the door handle and the 2 philips screws, one from the arm rest and the other near the side view mirror. The small plastic cover near the side view mirror needs to be removed to expose the second phillips screw. The screws are marked by the yellow circles in the image.
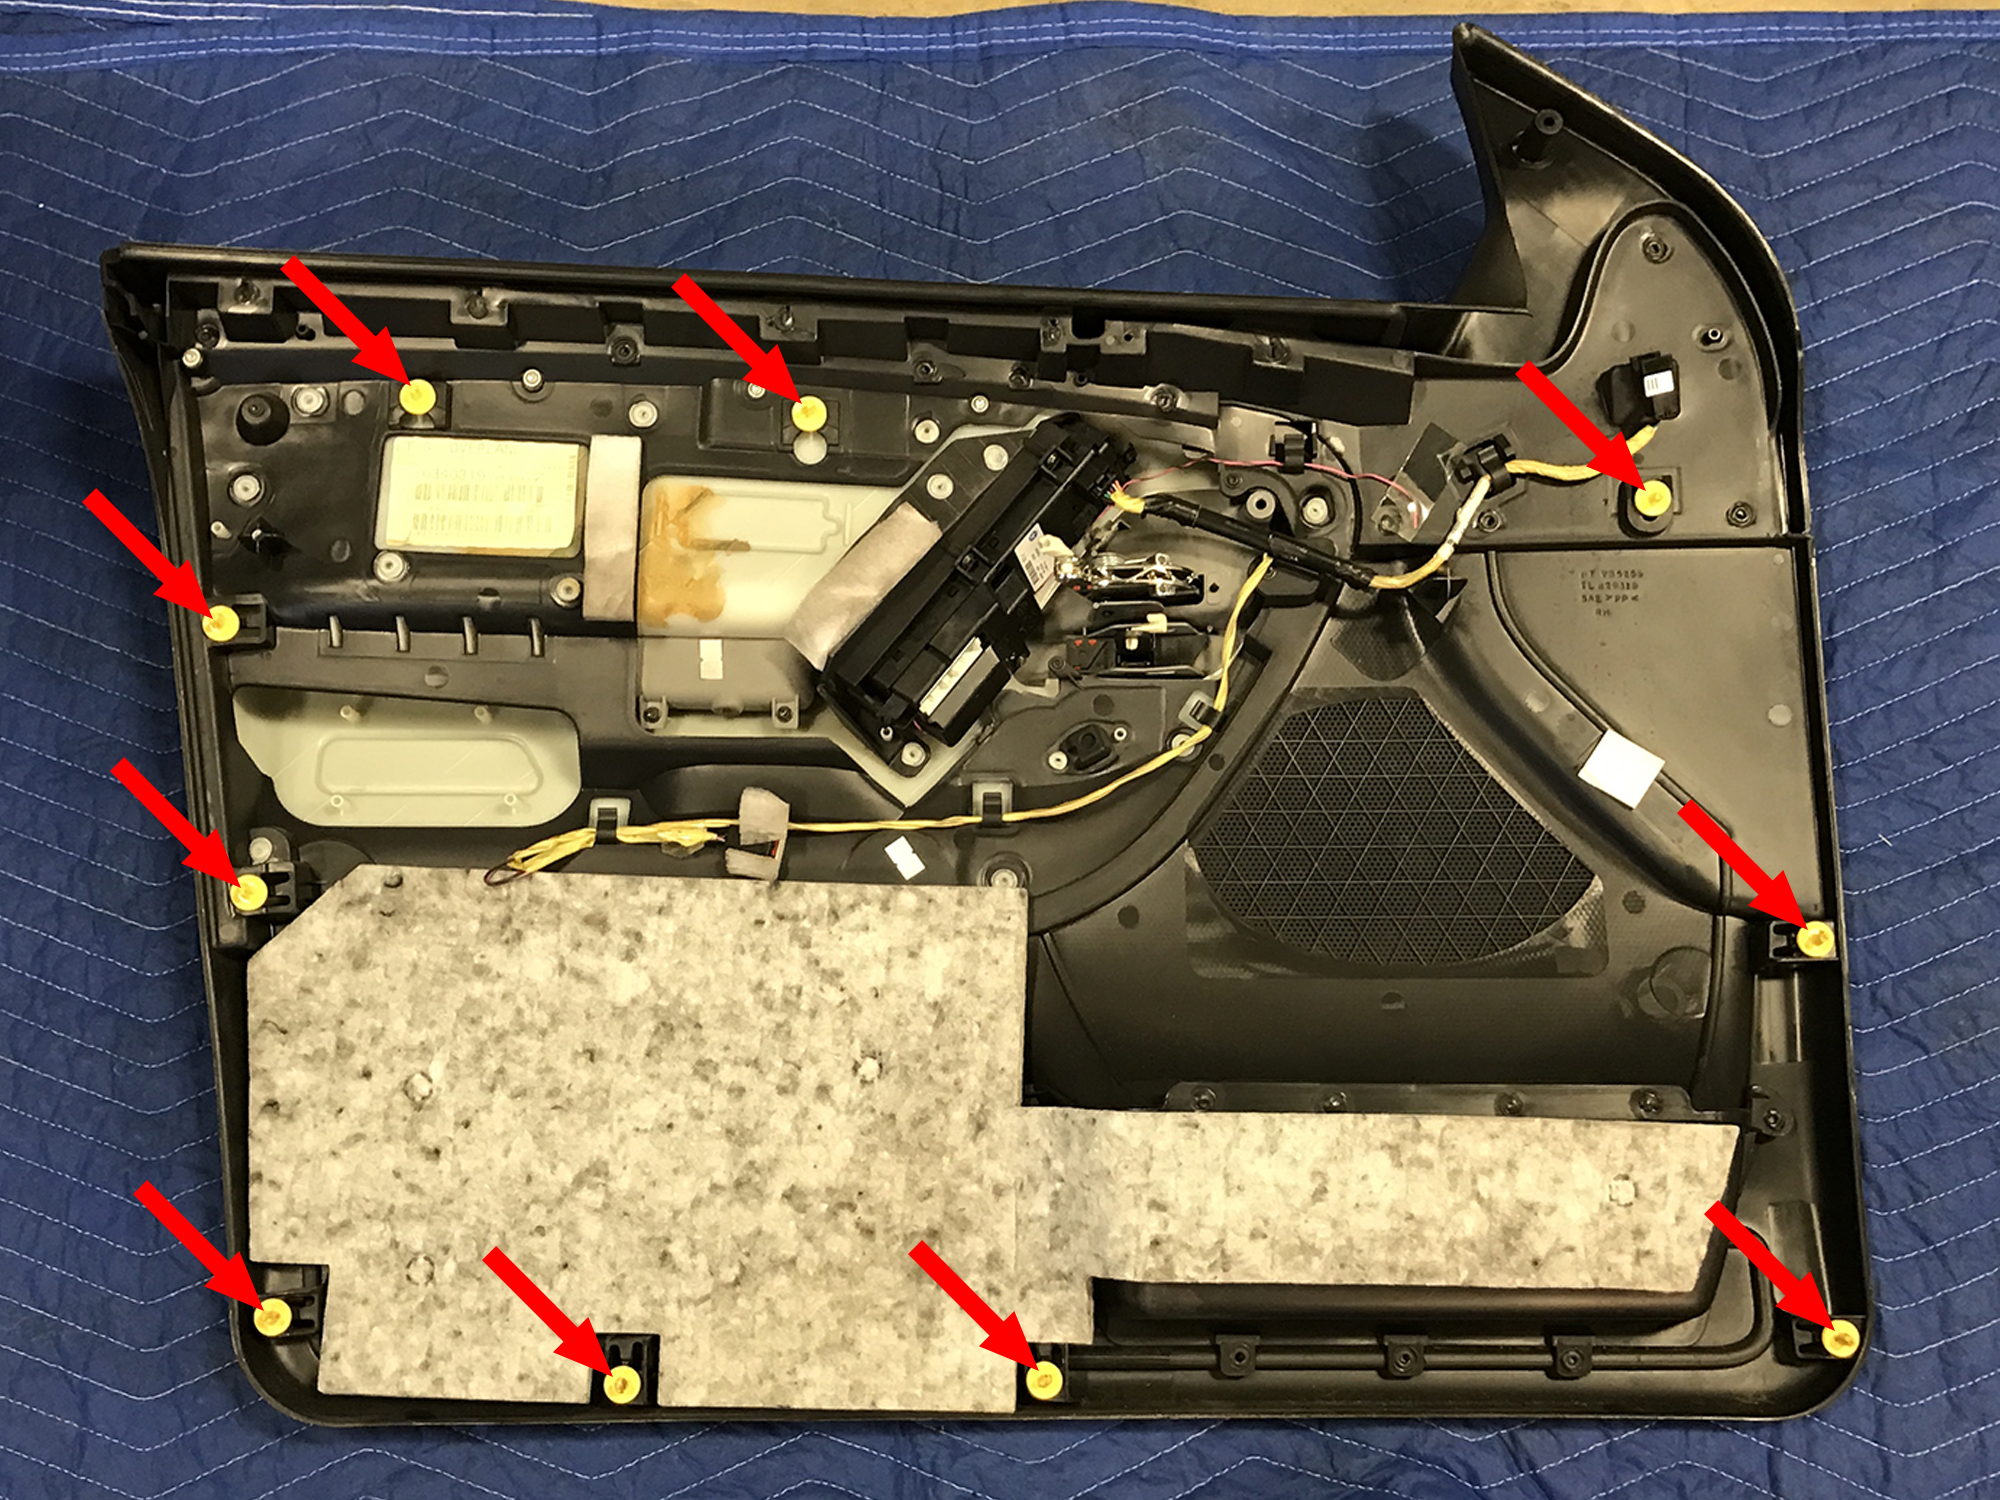
2. Using a panel tool, pry the door panel away from the door at the 10 locations marked with a red circle where the panel is secured with clips. This make take a little effort to pop the clips free.
3. Lift the door panel from the inside window wipe channel and look down behind the panel. Unclip the latch and lock rods from the door handle tabs. Also disconnect the two wiring harness plugs. One near the door lock rods and the other near the side view mirror.
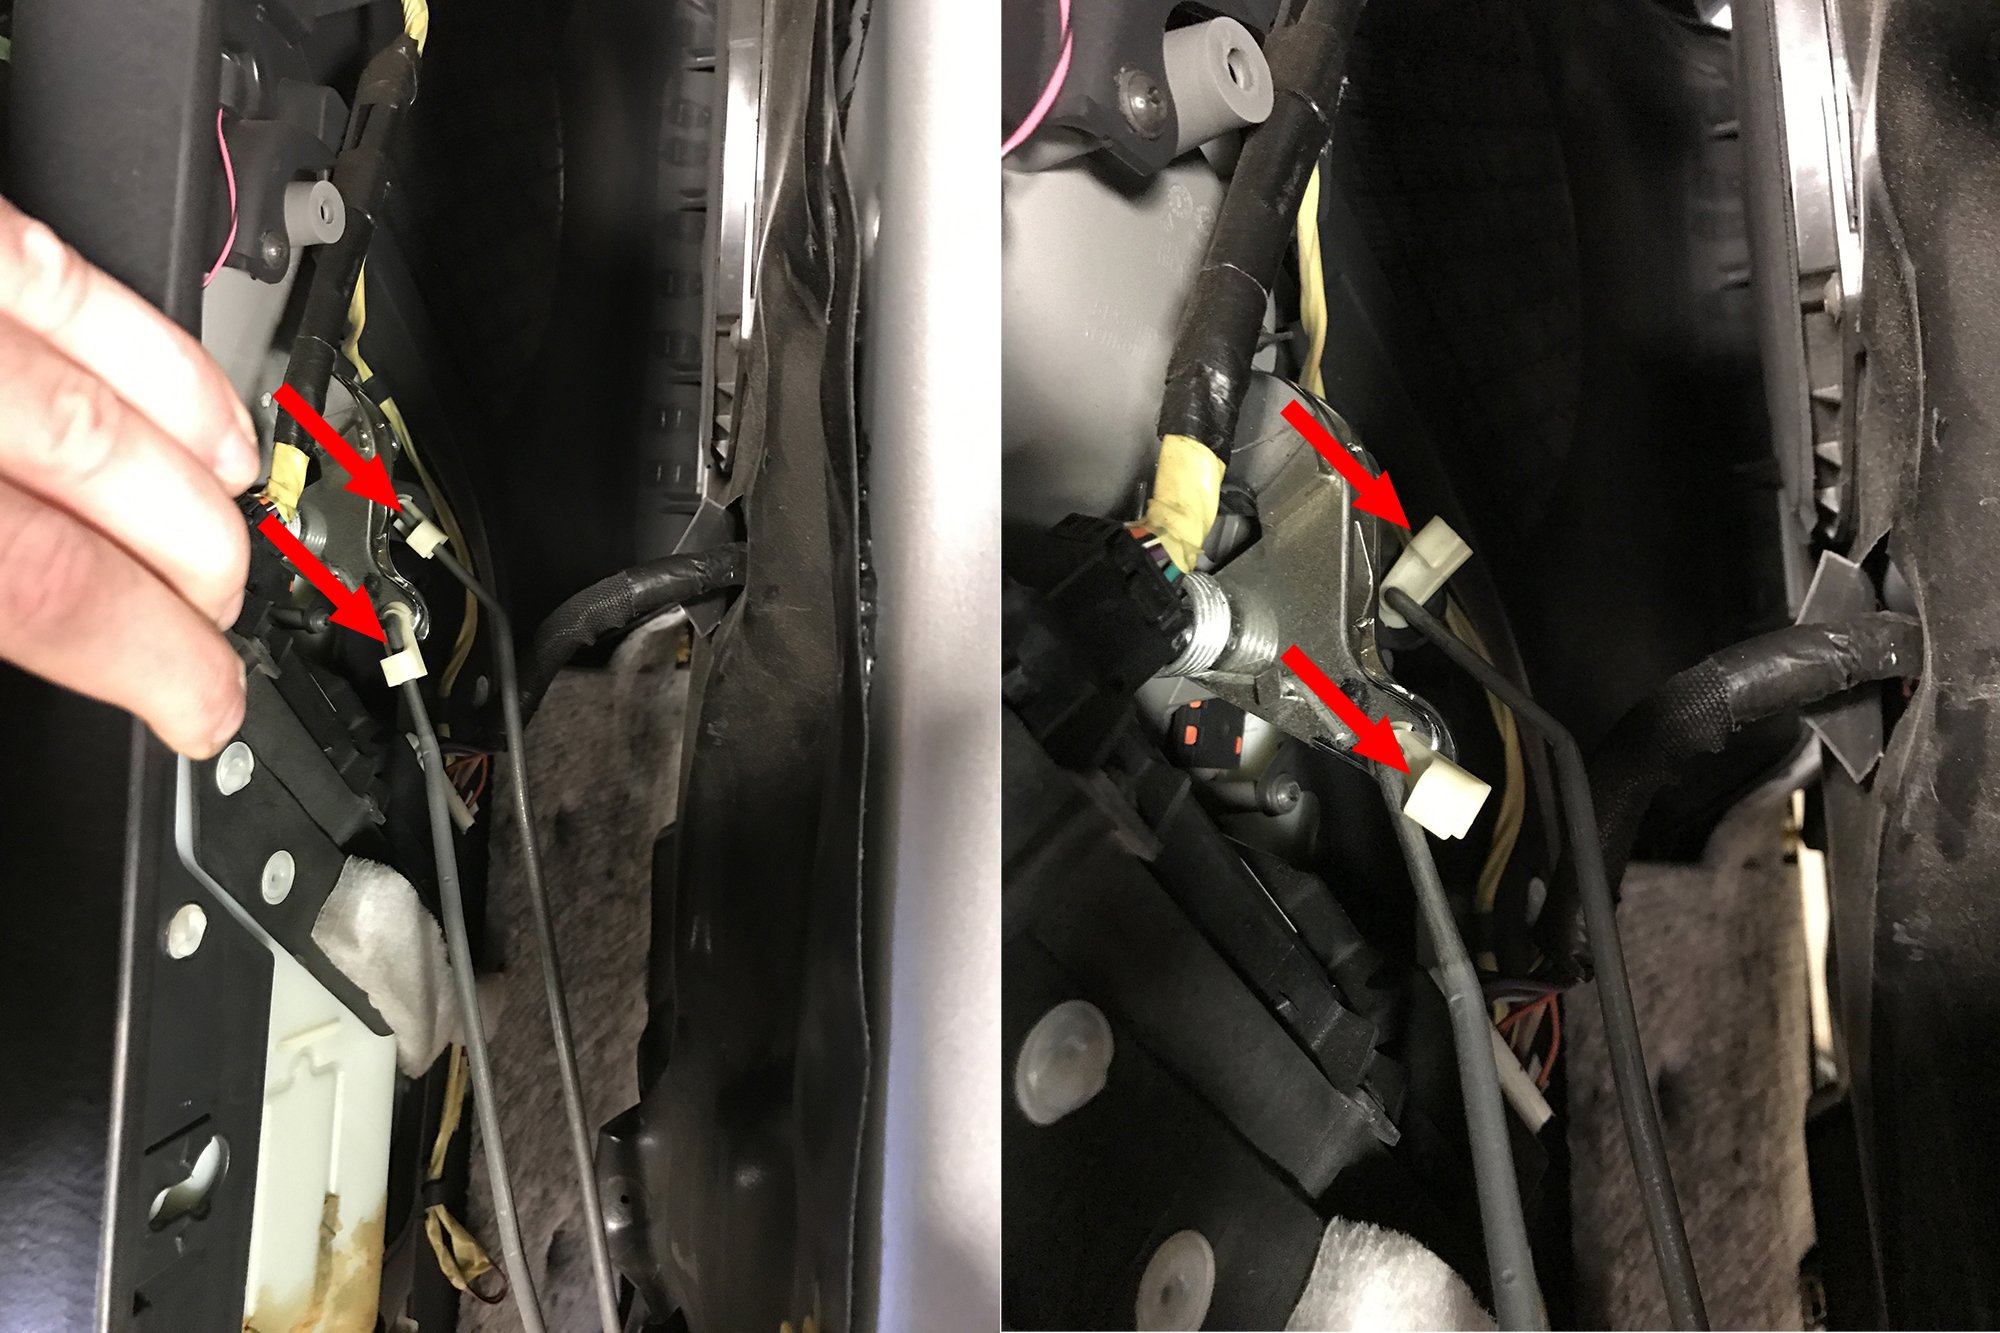
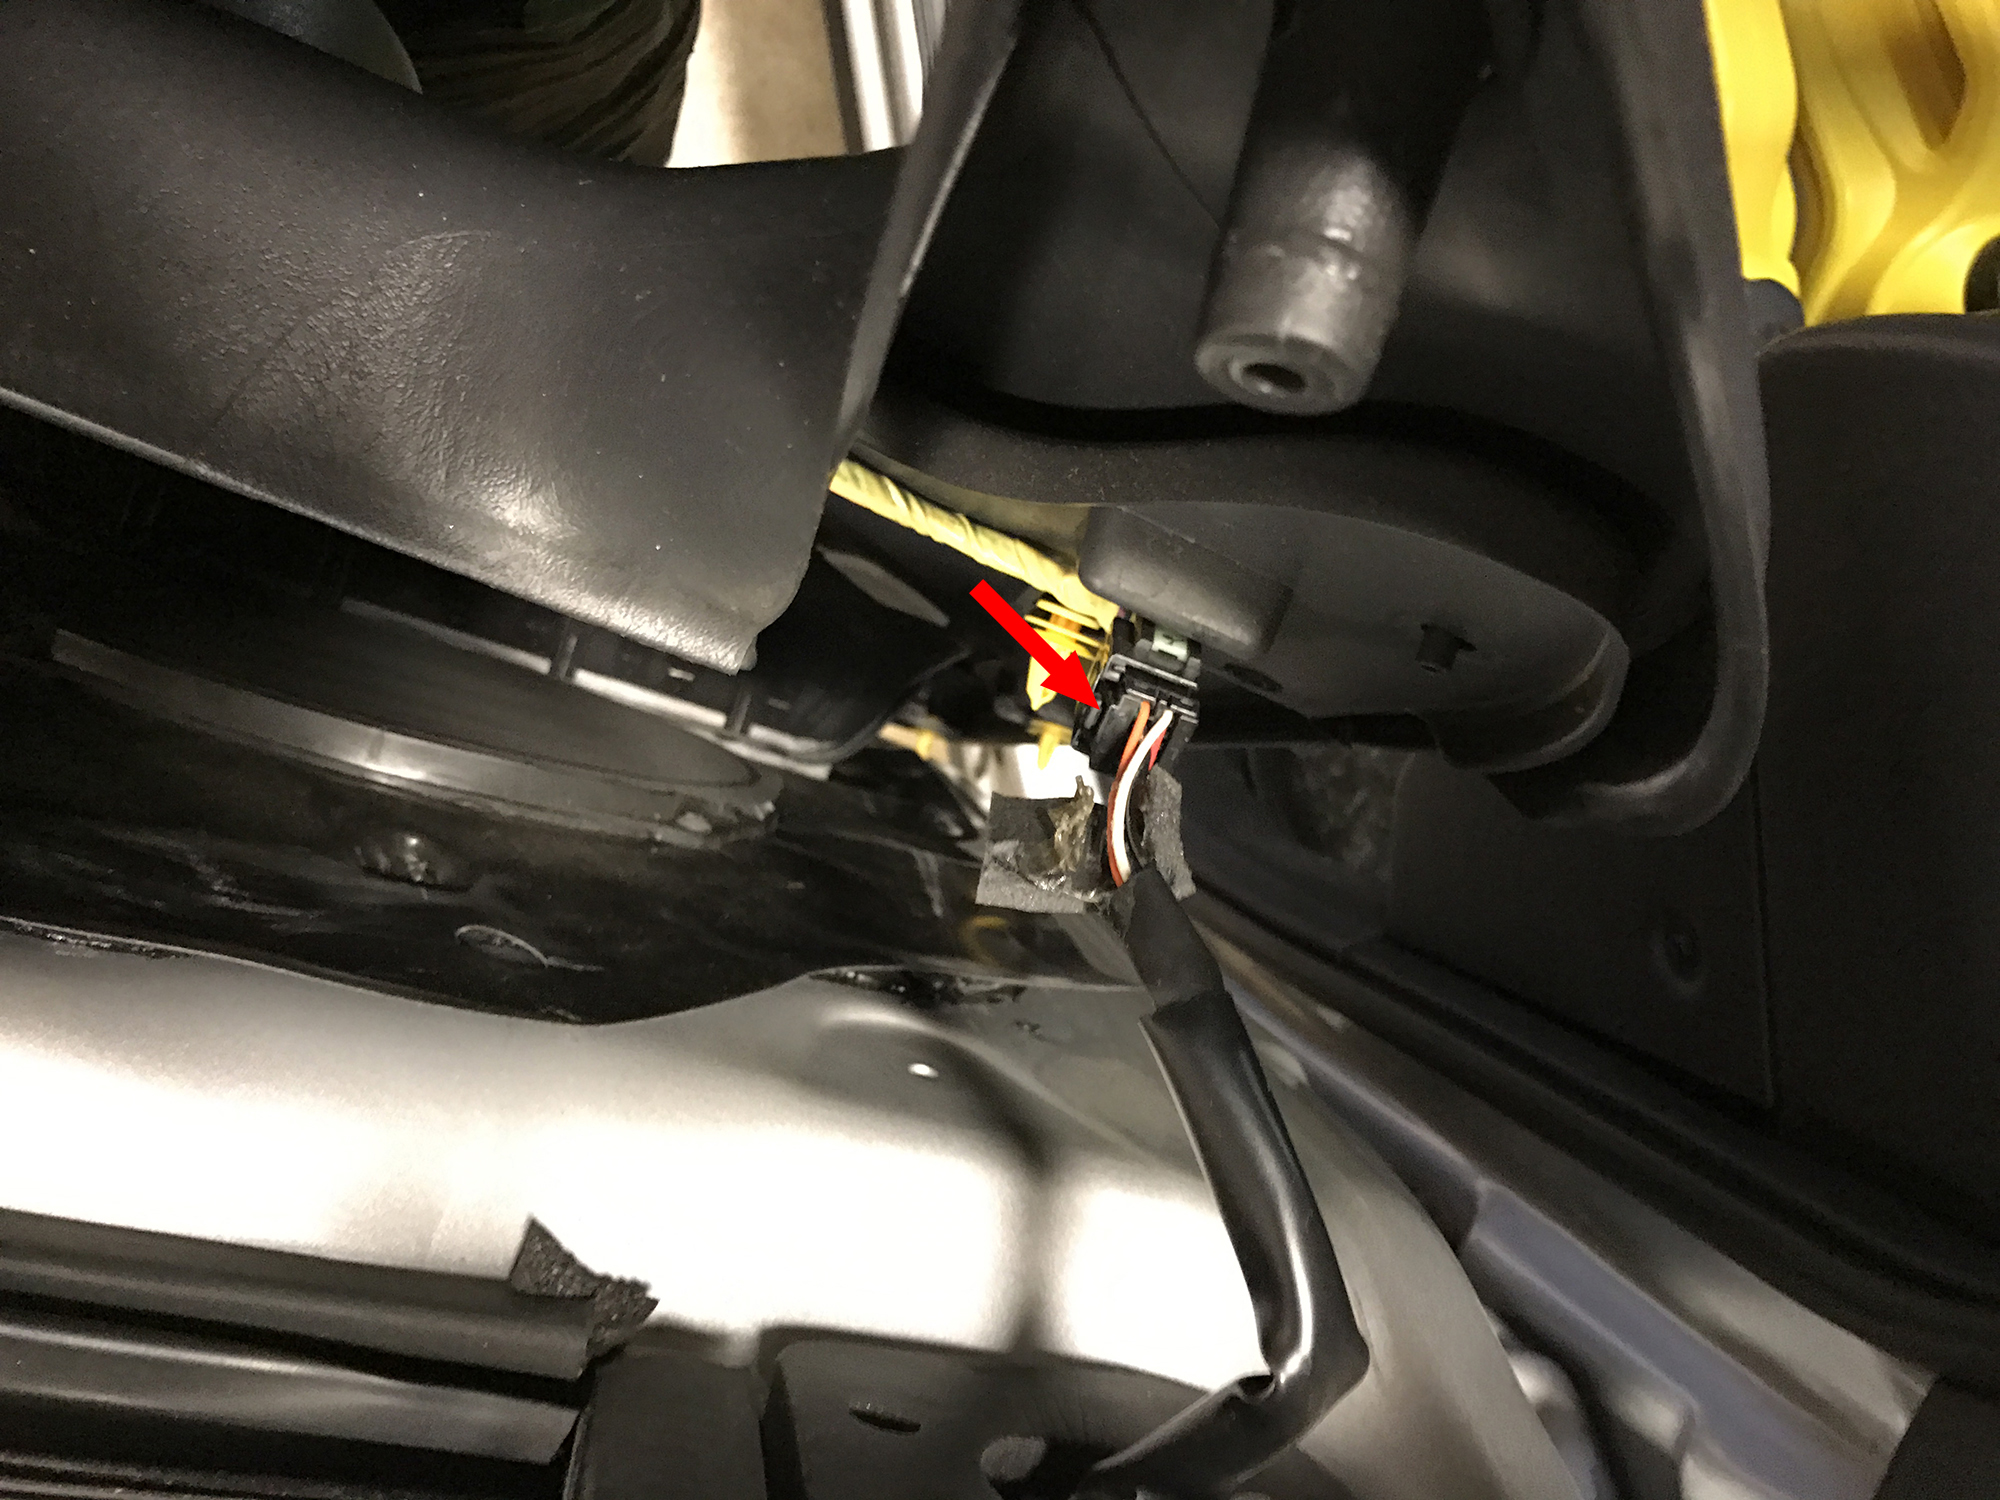
4. Now your door panel should be completely disconnected and you can set it aside. If any of the clips broke in step 2 don't worry they're replaceable. They're pretty inexpensive, so just replacing them all isn't a bad idea. They have a tendency to wear out and become loose over time, so putting new clips on will ensure your door panels are tightly secured and rattle free.
Crown Automotive 6507686AA Interior Door Trim Fasteners
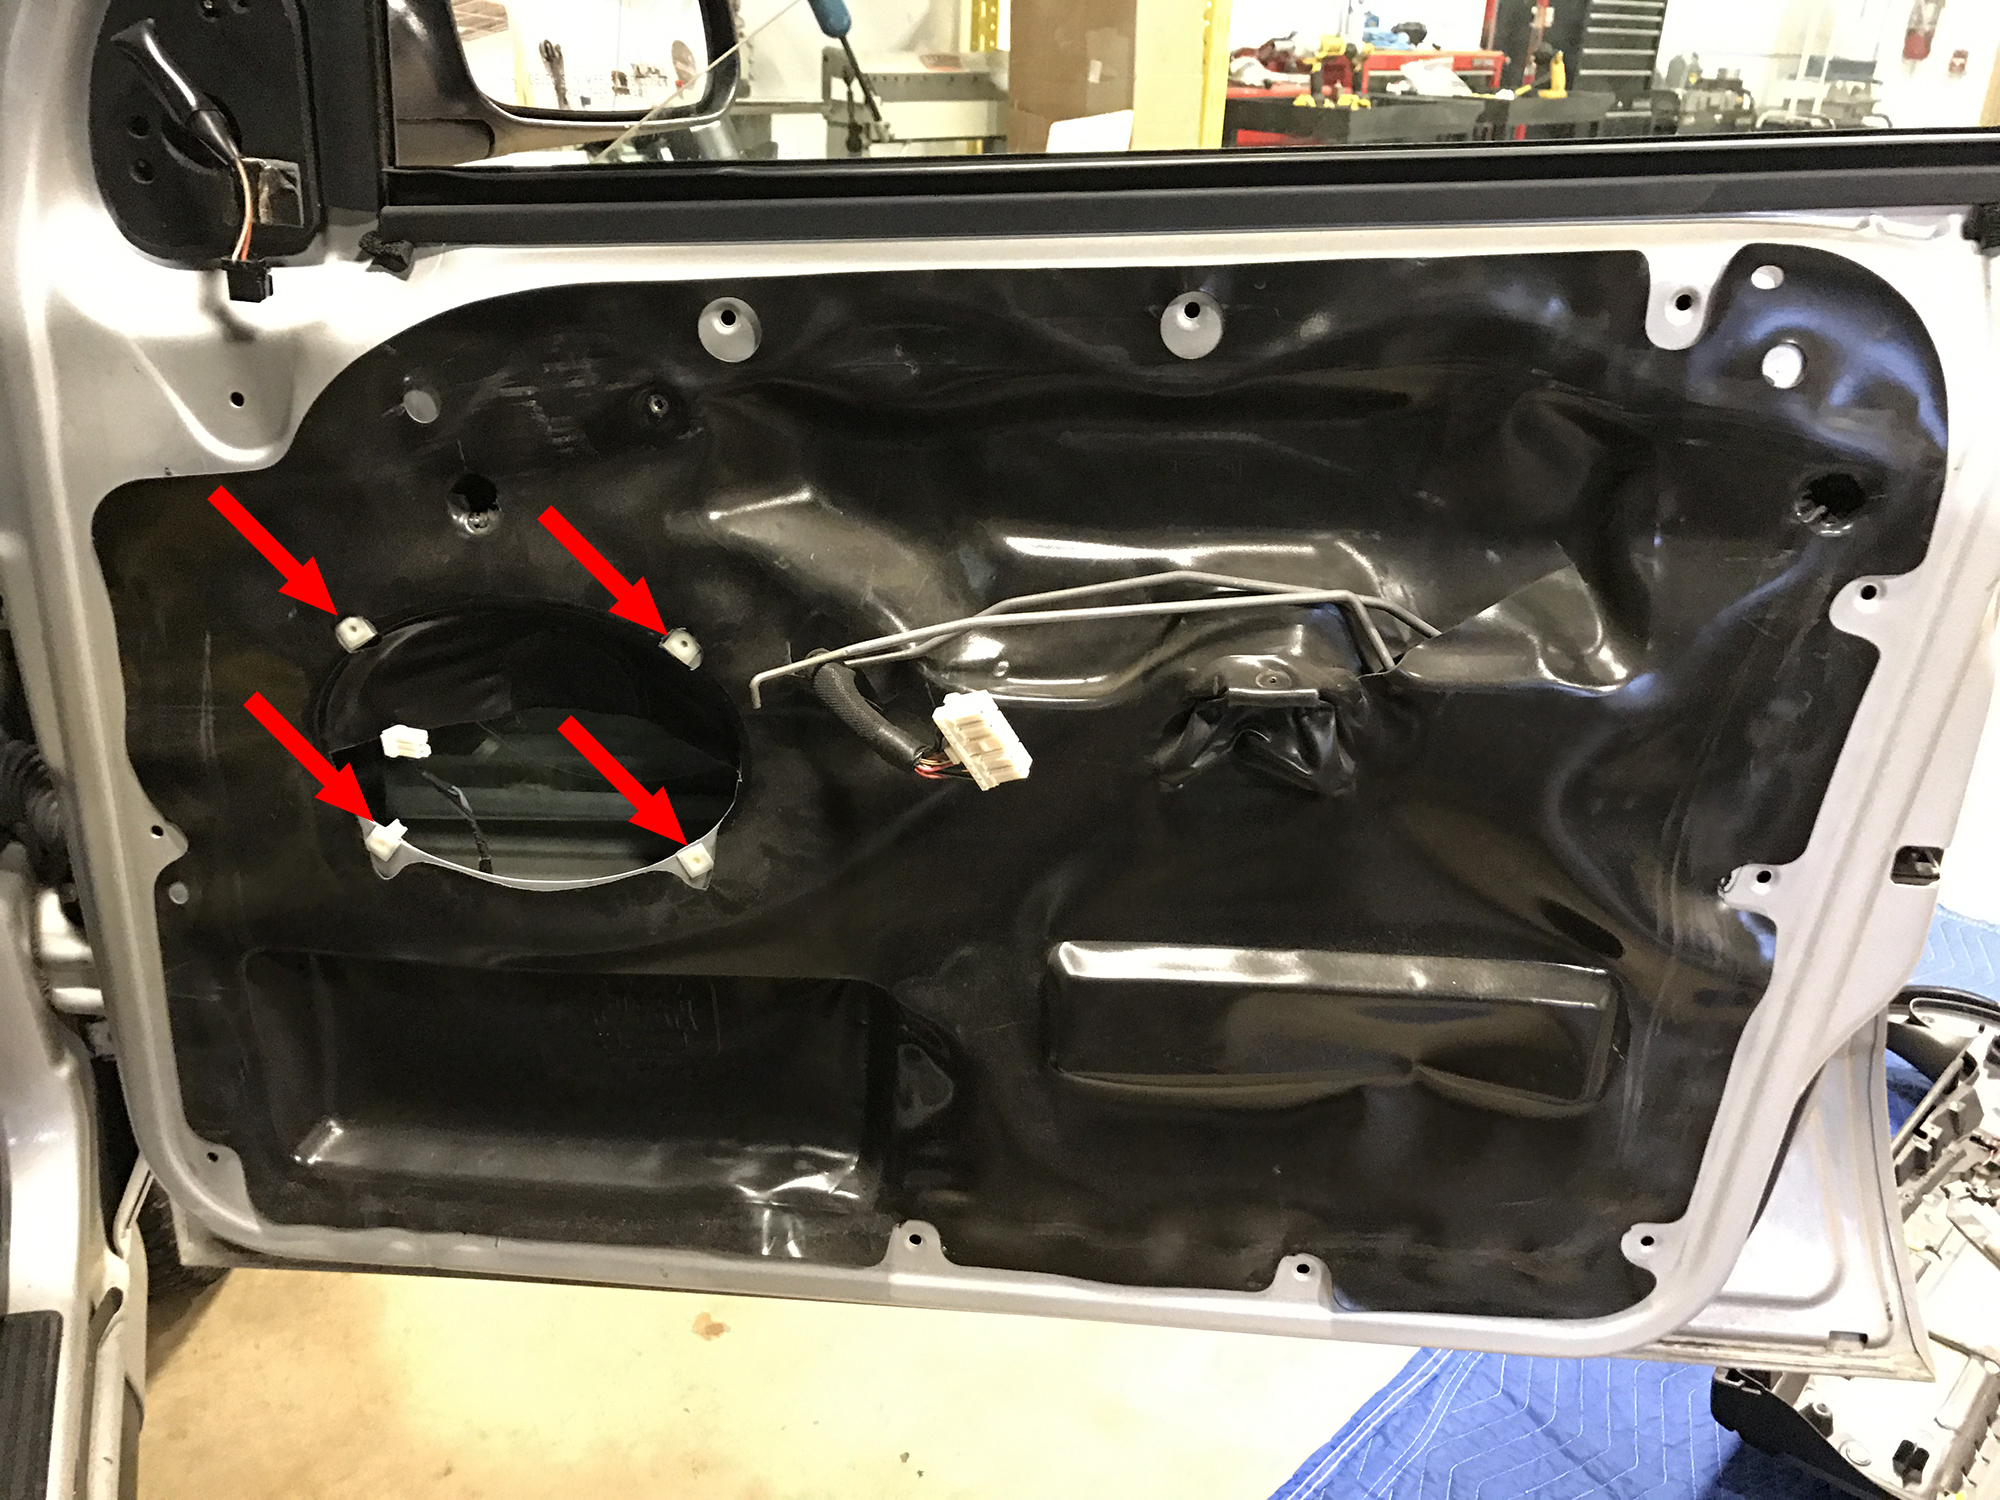
5. Remove the speaker by removing the 4 screws. Then unplug and set the speaker aside. This will give you better access to reach in and replace the window regulator.
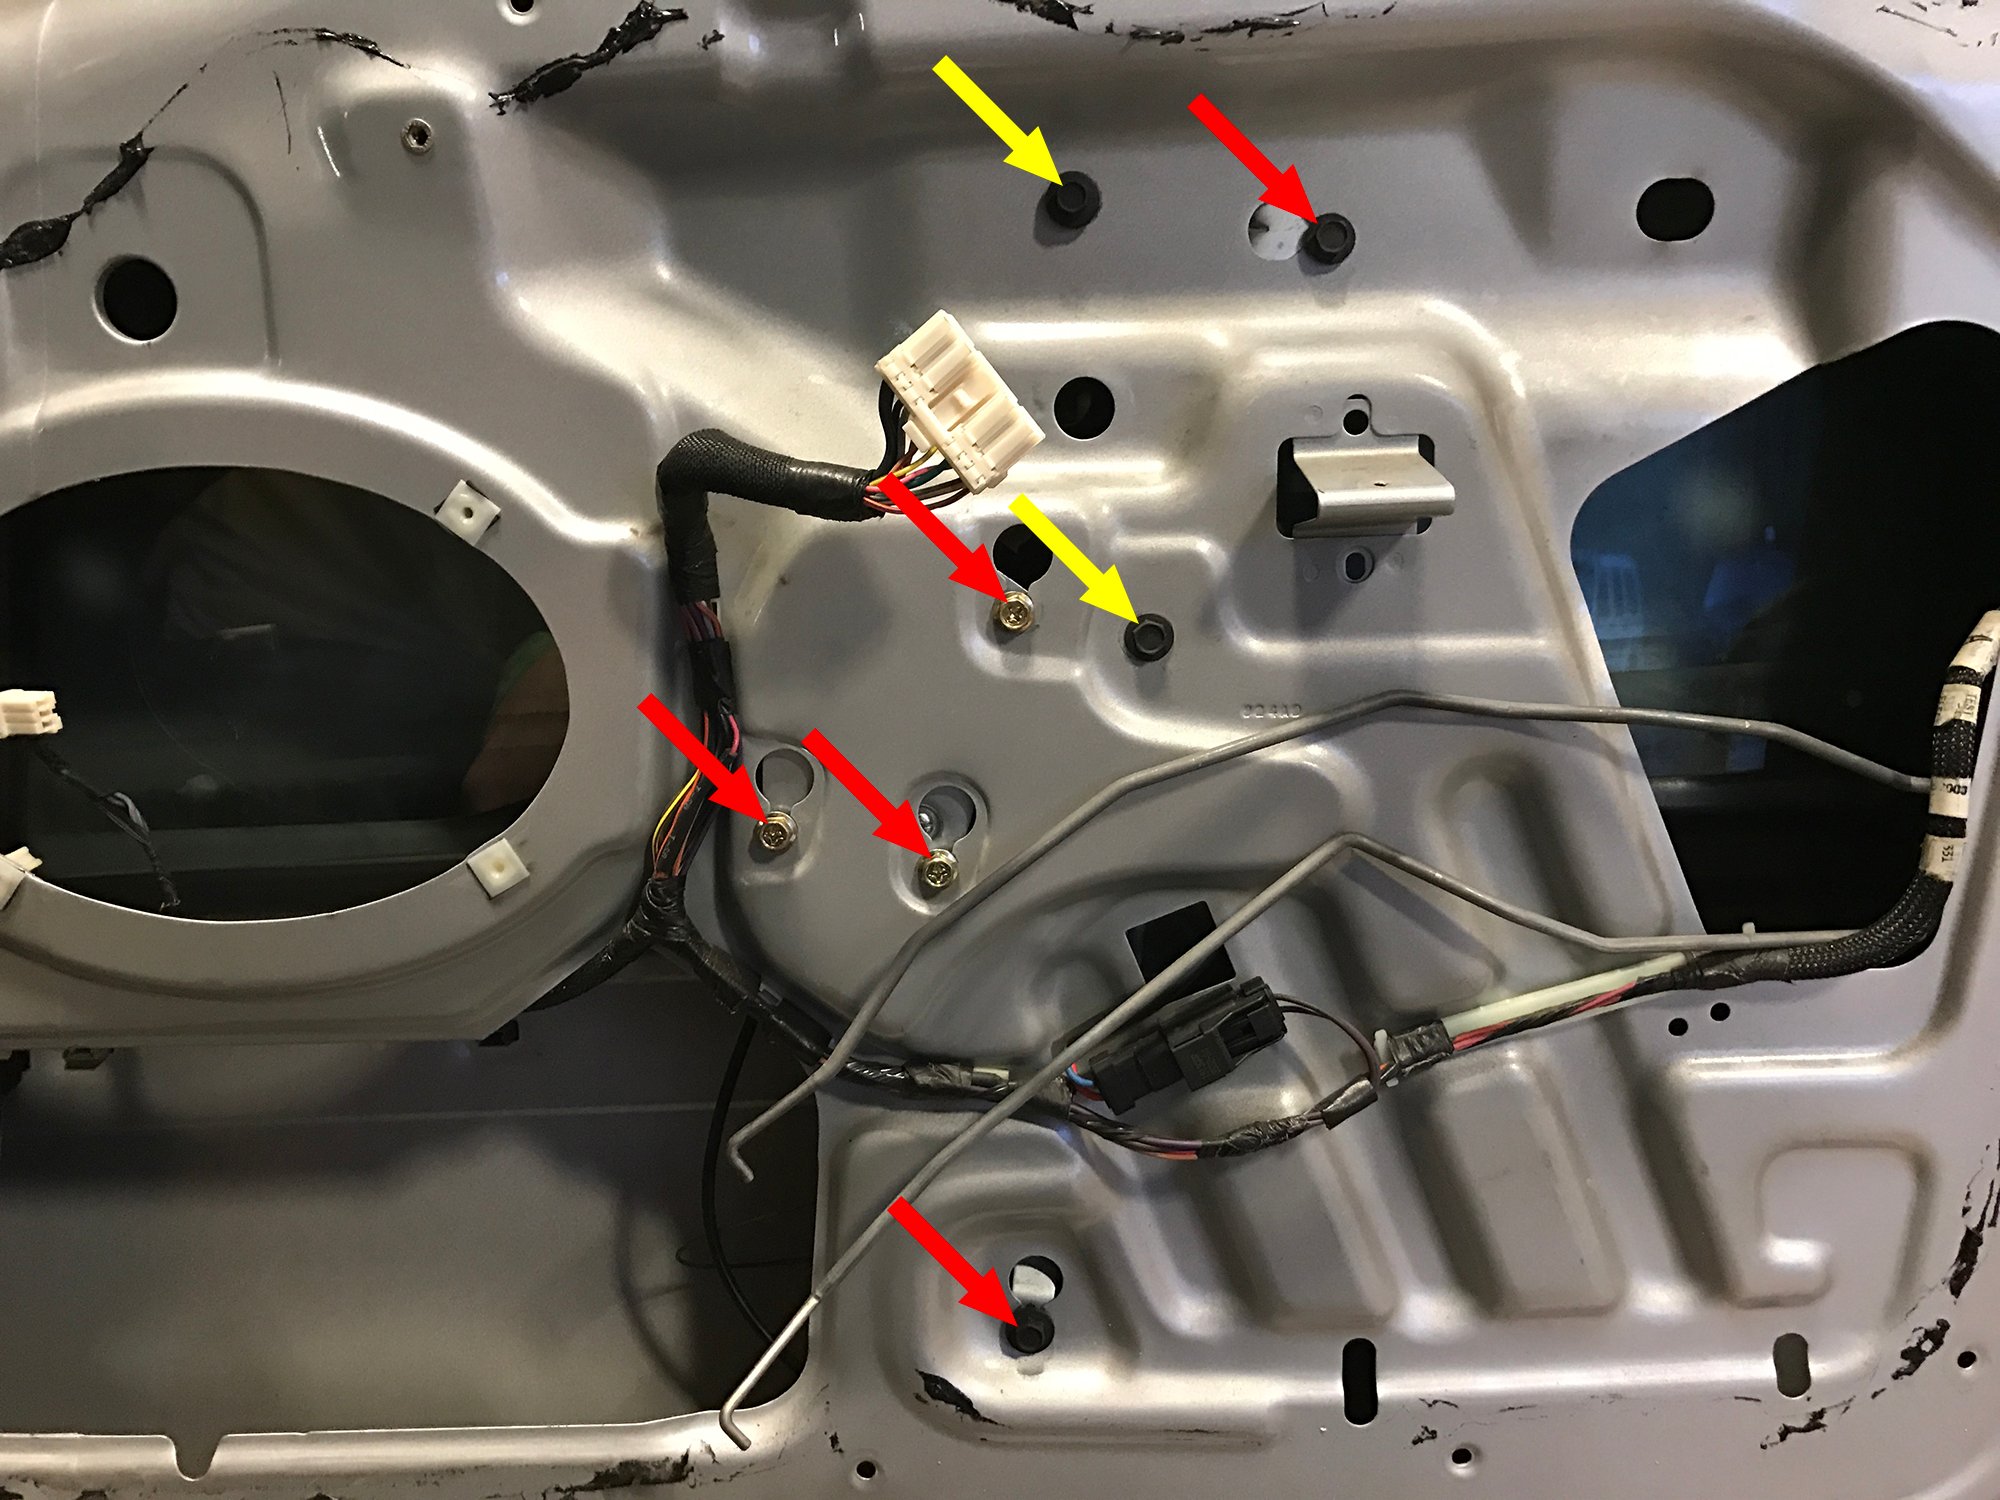
6. Peel the plastic moisture barrier away from the door. The adhesive will remain tacky so you can reapply it when you're done. Once it's out of the way, you'll be able to see the 4 black bolts that hold the window regulator track and the 3 gold bolts that secure the regulator motor. Using a 10mm socket, completely remove the 2 marked by the yellow arrows. The rest can simply be loosened and then lifted up and pushed out of the key hole slot when removing the regulator.
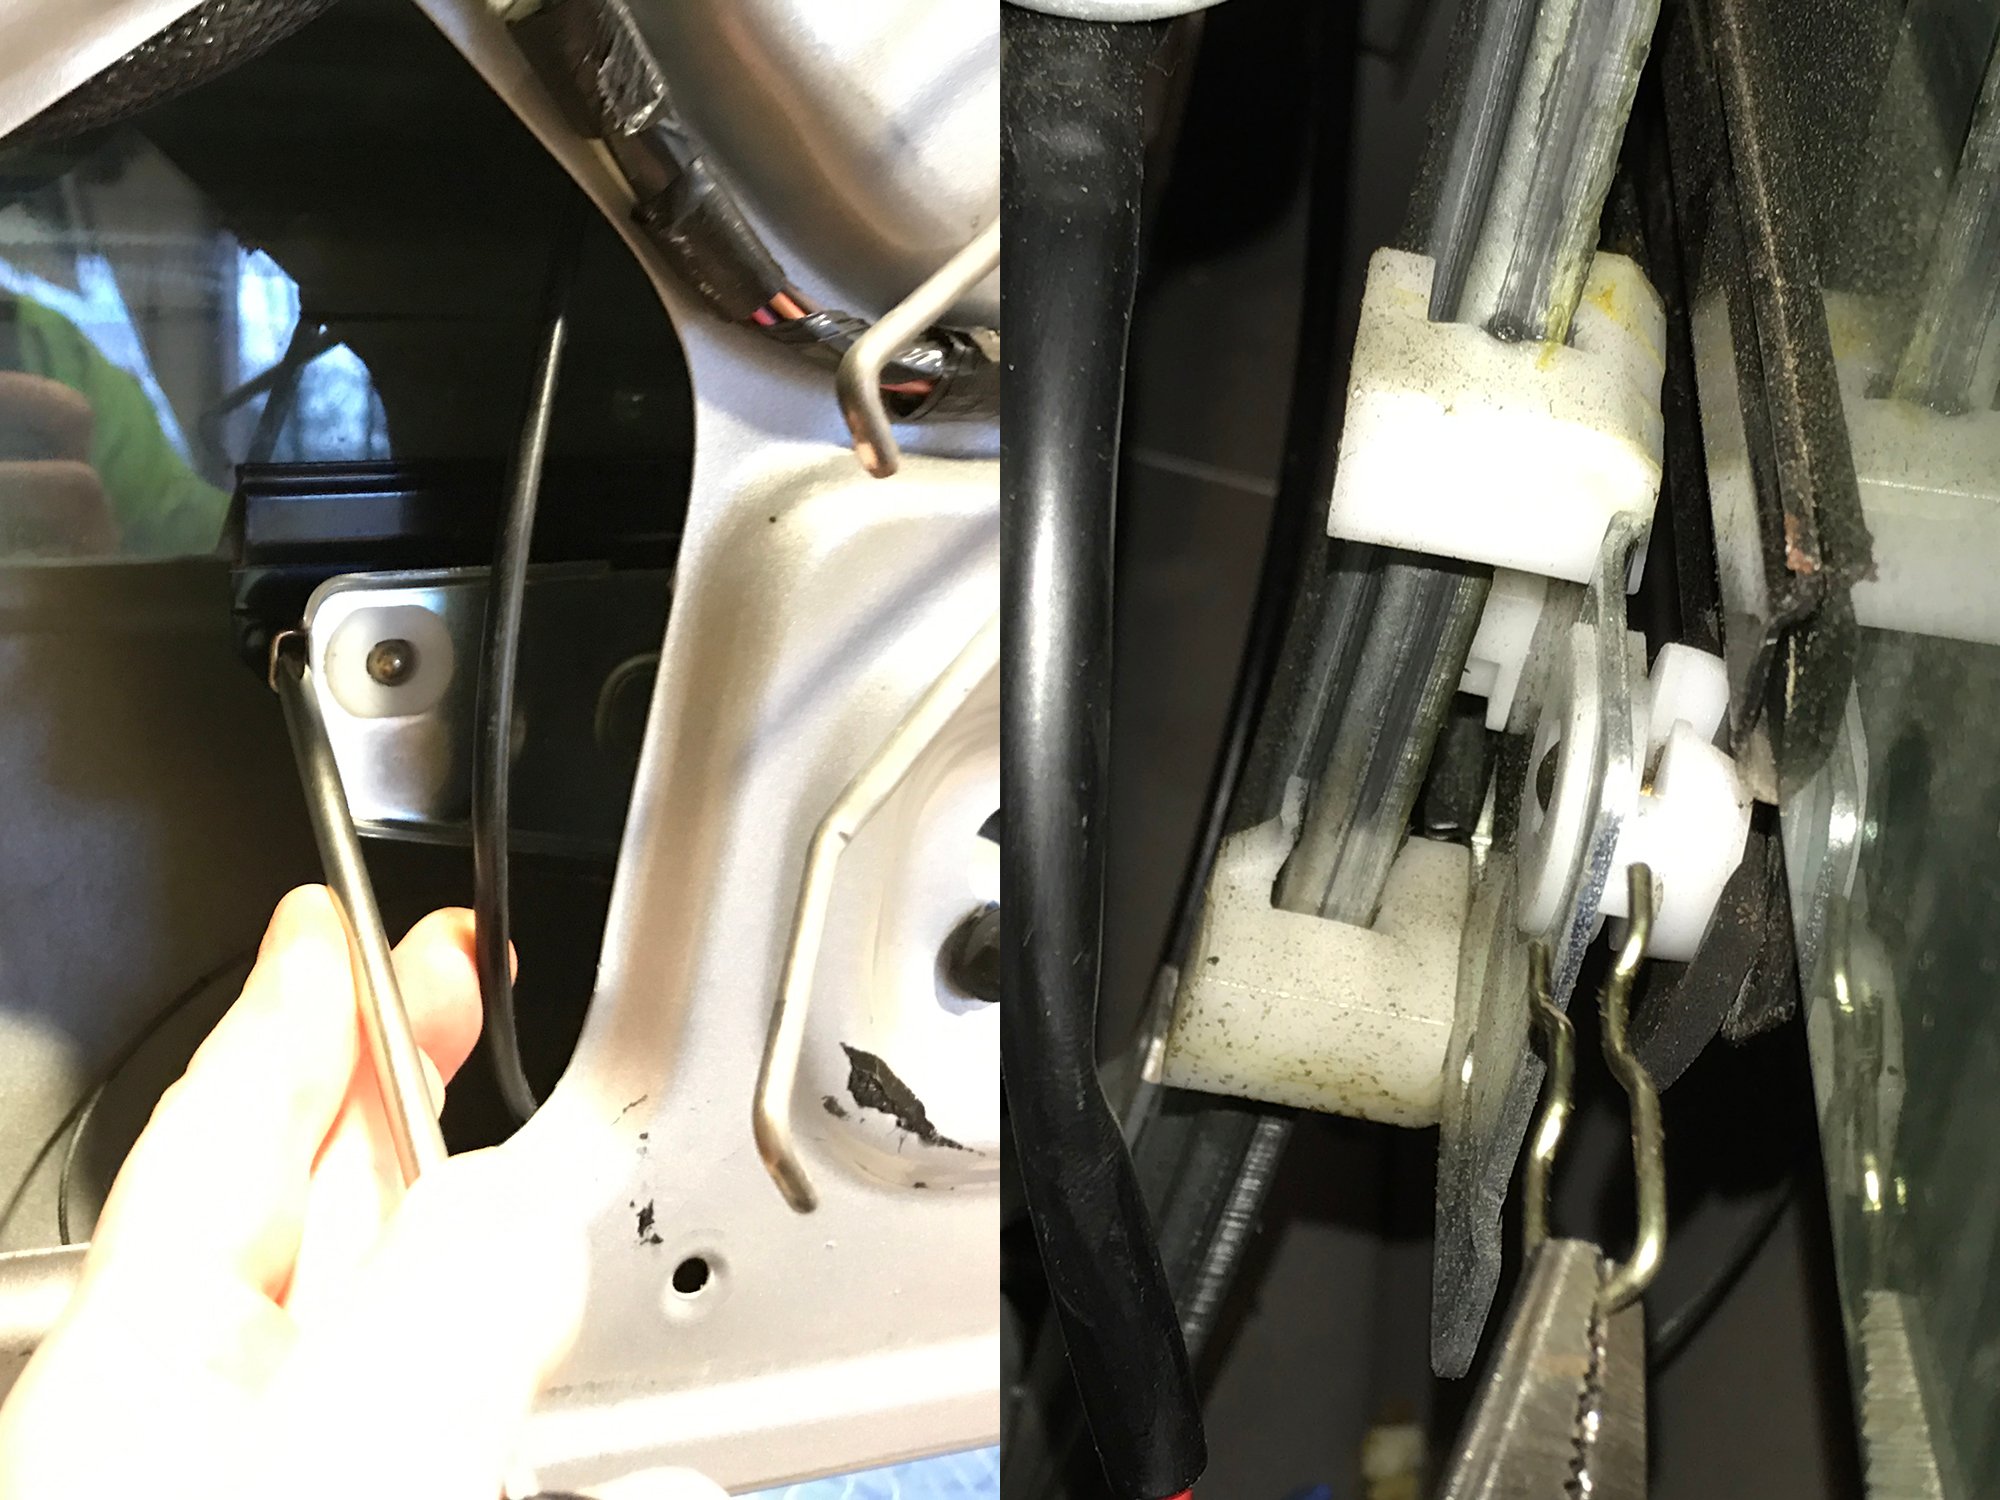
7. There are 2 clips that need to be removed that secure the window glass to the carriage on the regulator track. You can simply pry the one towards the front side of the door off using a screw driver. To access the on near the outer edge of the door, reach through the cutout in the door and remove the clip using a pair of needle nose pliers.
8. Unplug the regulator electrical harness and push the connector through the opening in the door panel.
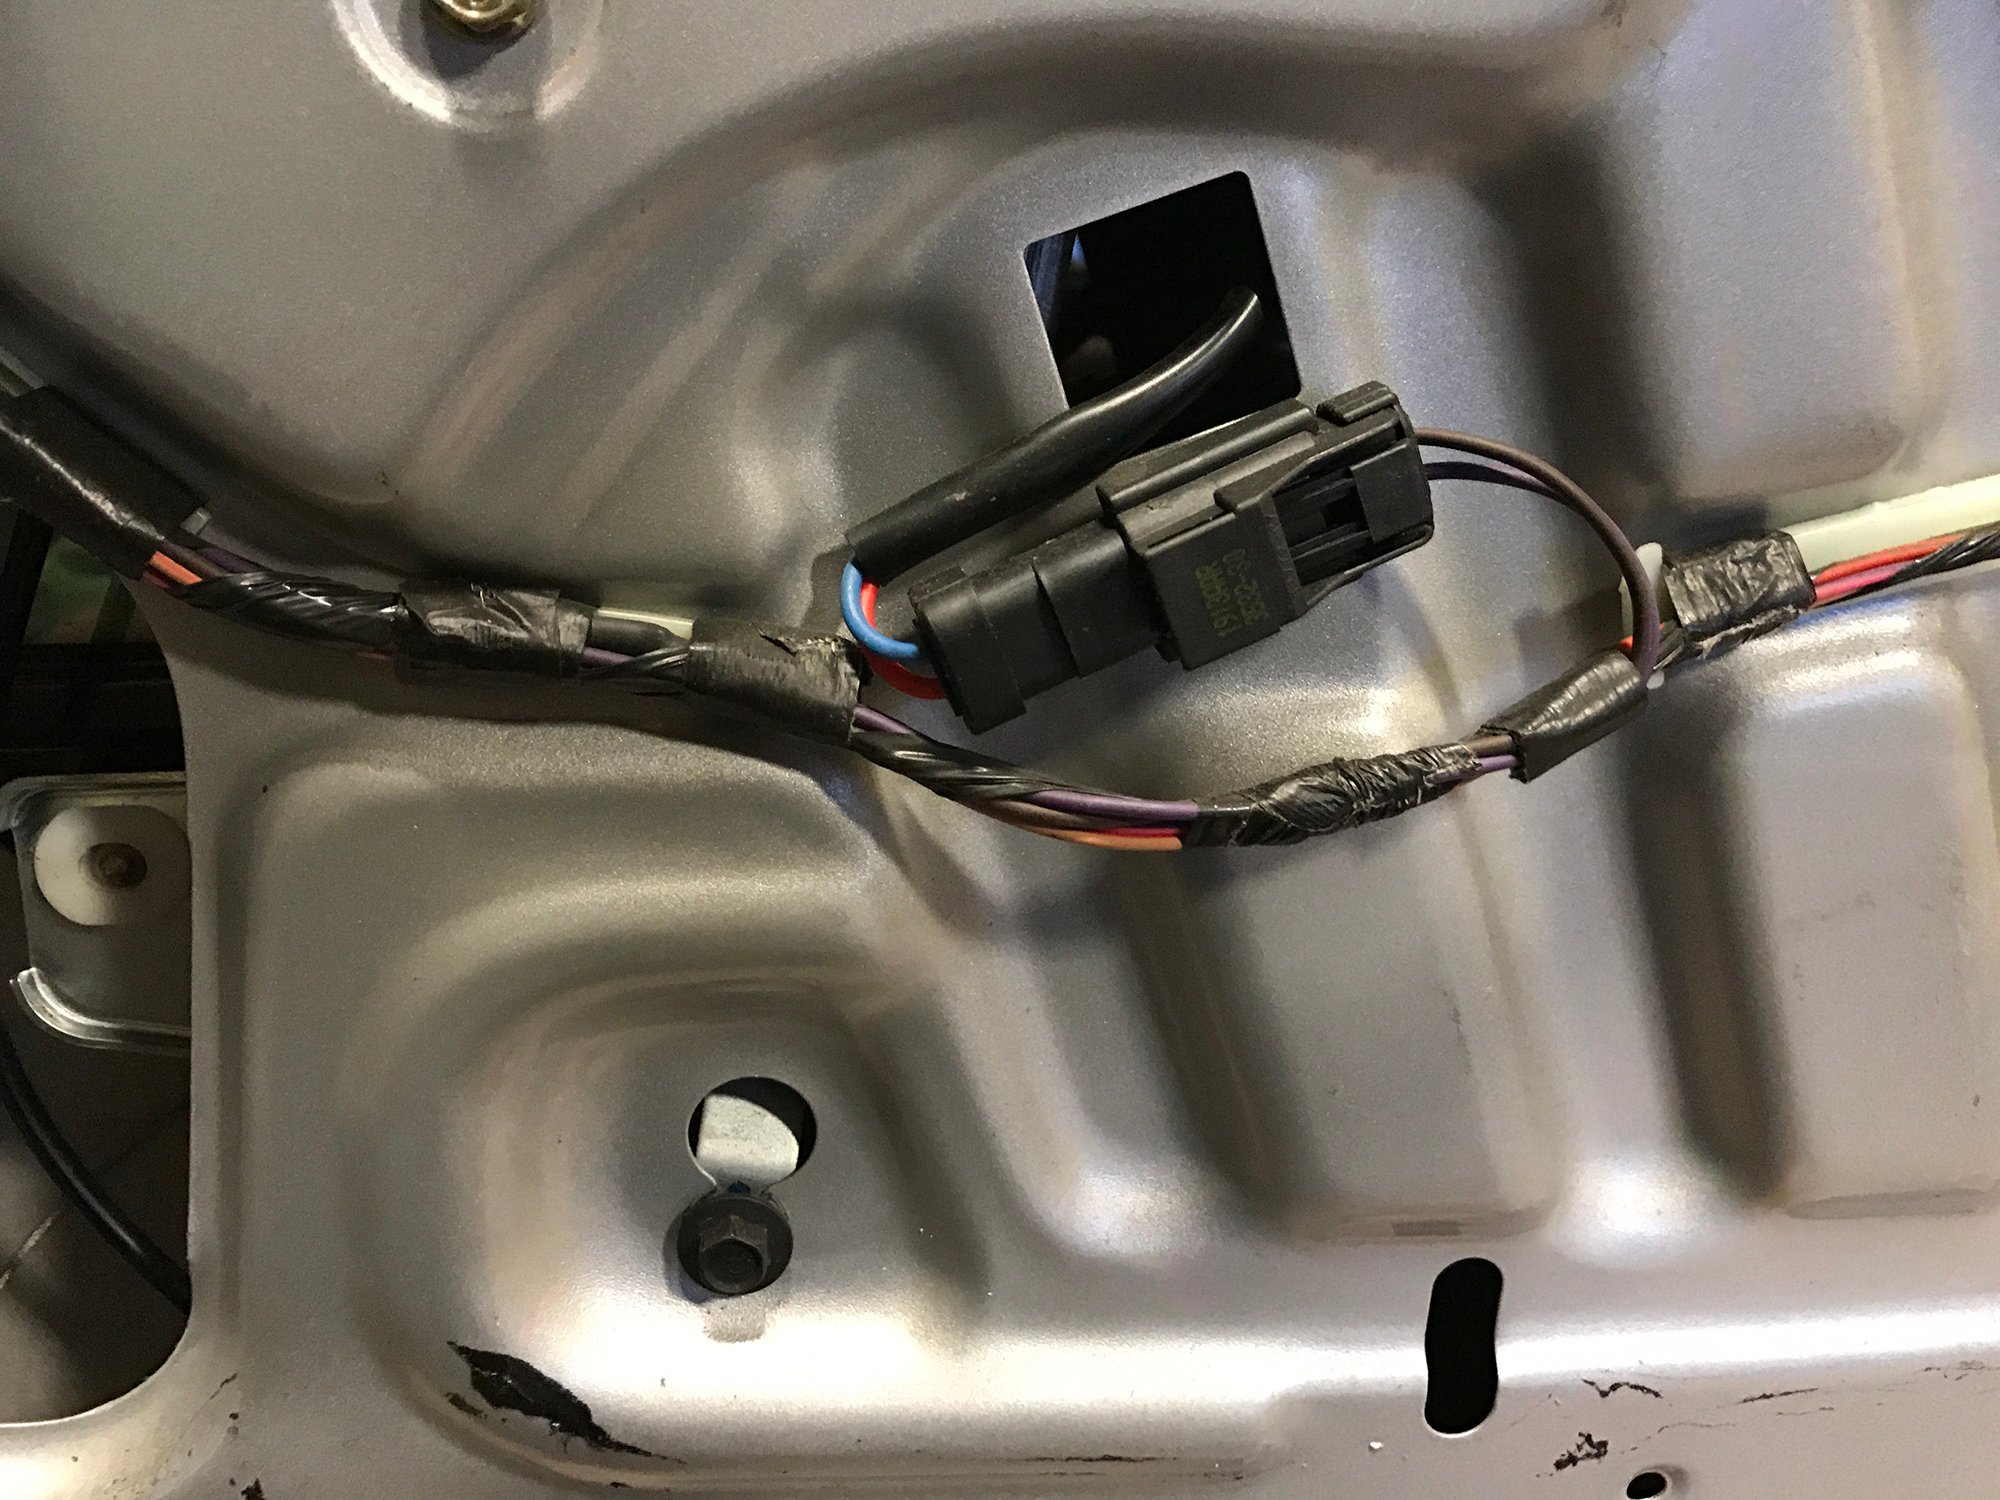
9. Reach through the large lower opening in the door panel, and remove the regulator motor, carriage and track. It can be helpful to lift the glass up in the window track to make some extra room. This step can be a little tricky, but you just have to keep moving the motor assembly around until you can fit it through the lower door panel opening easily.
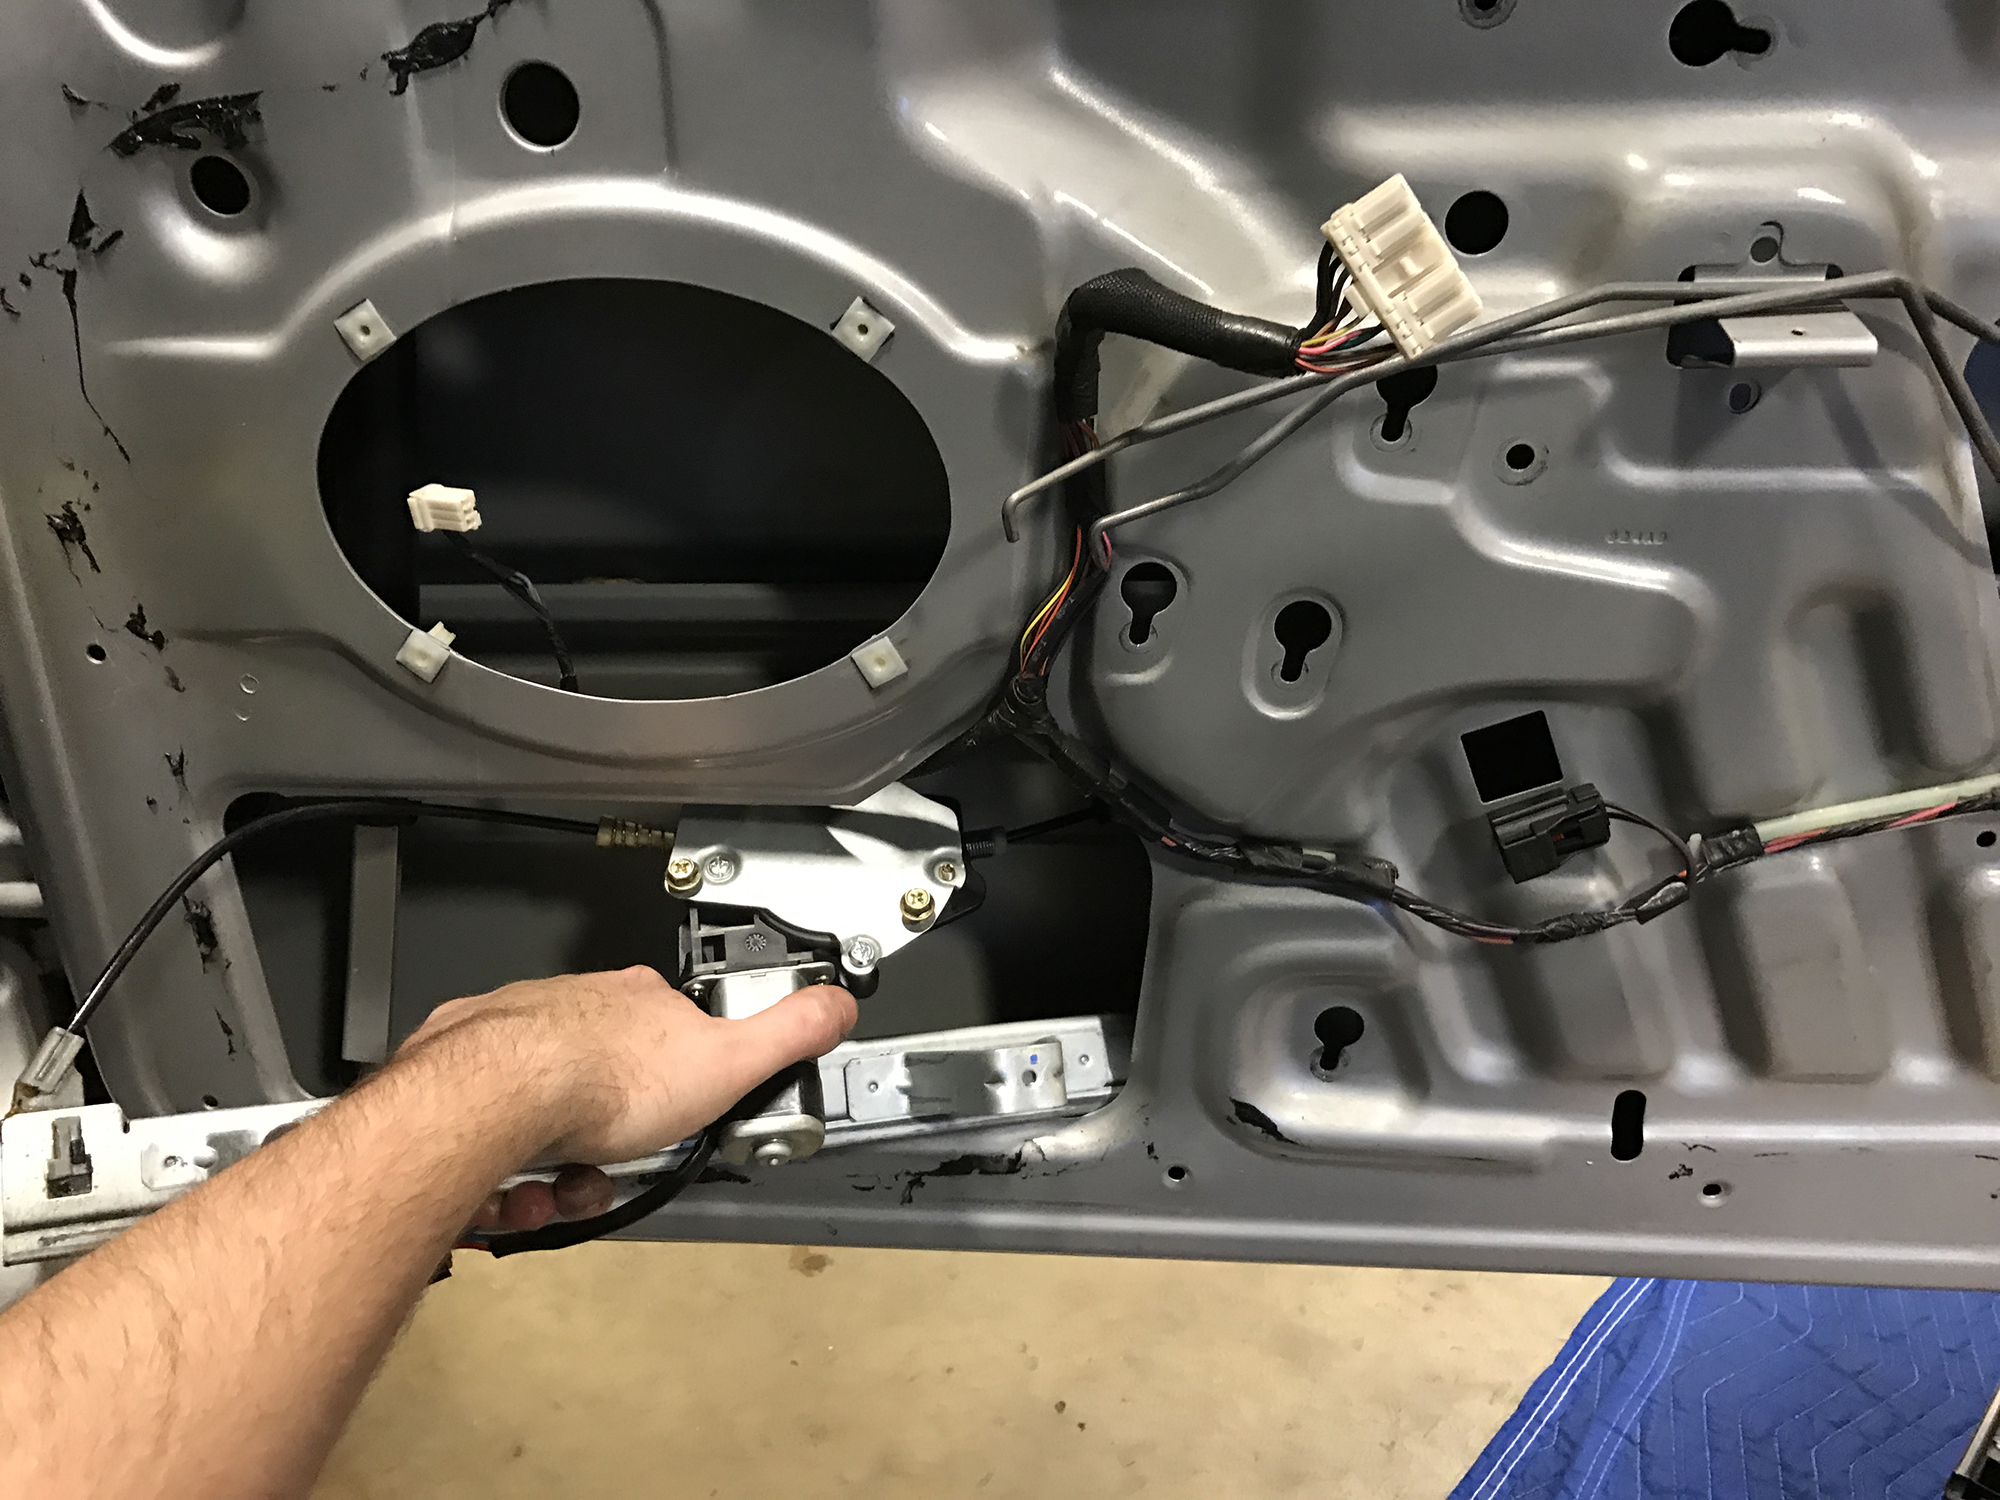
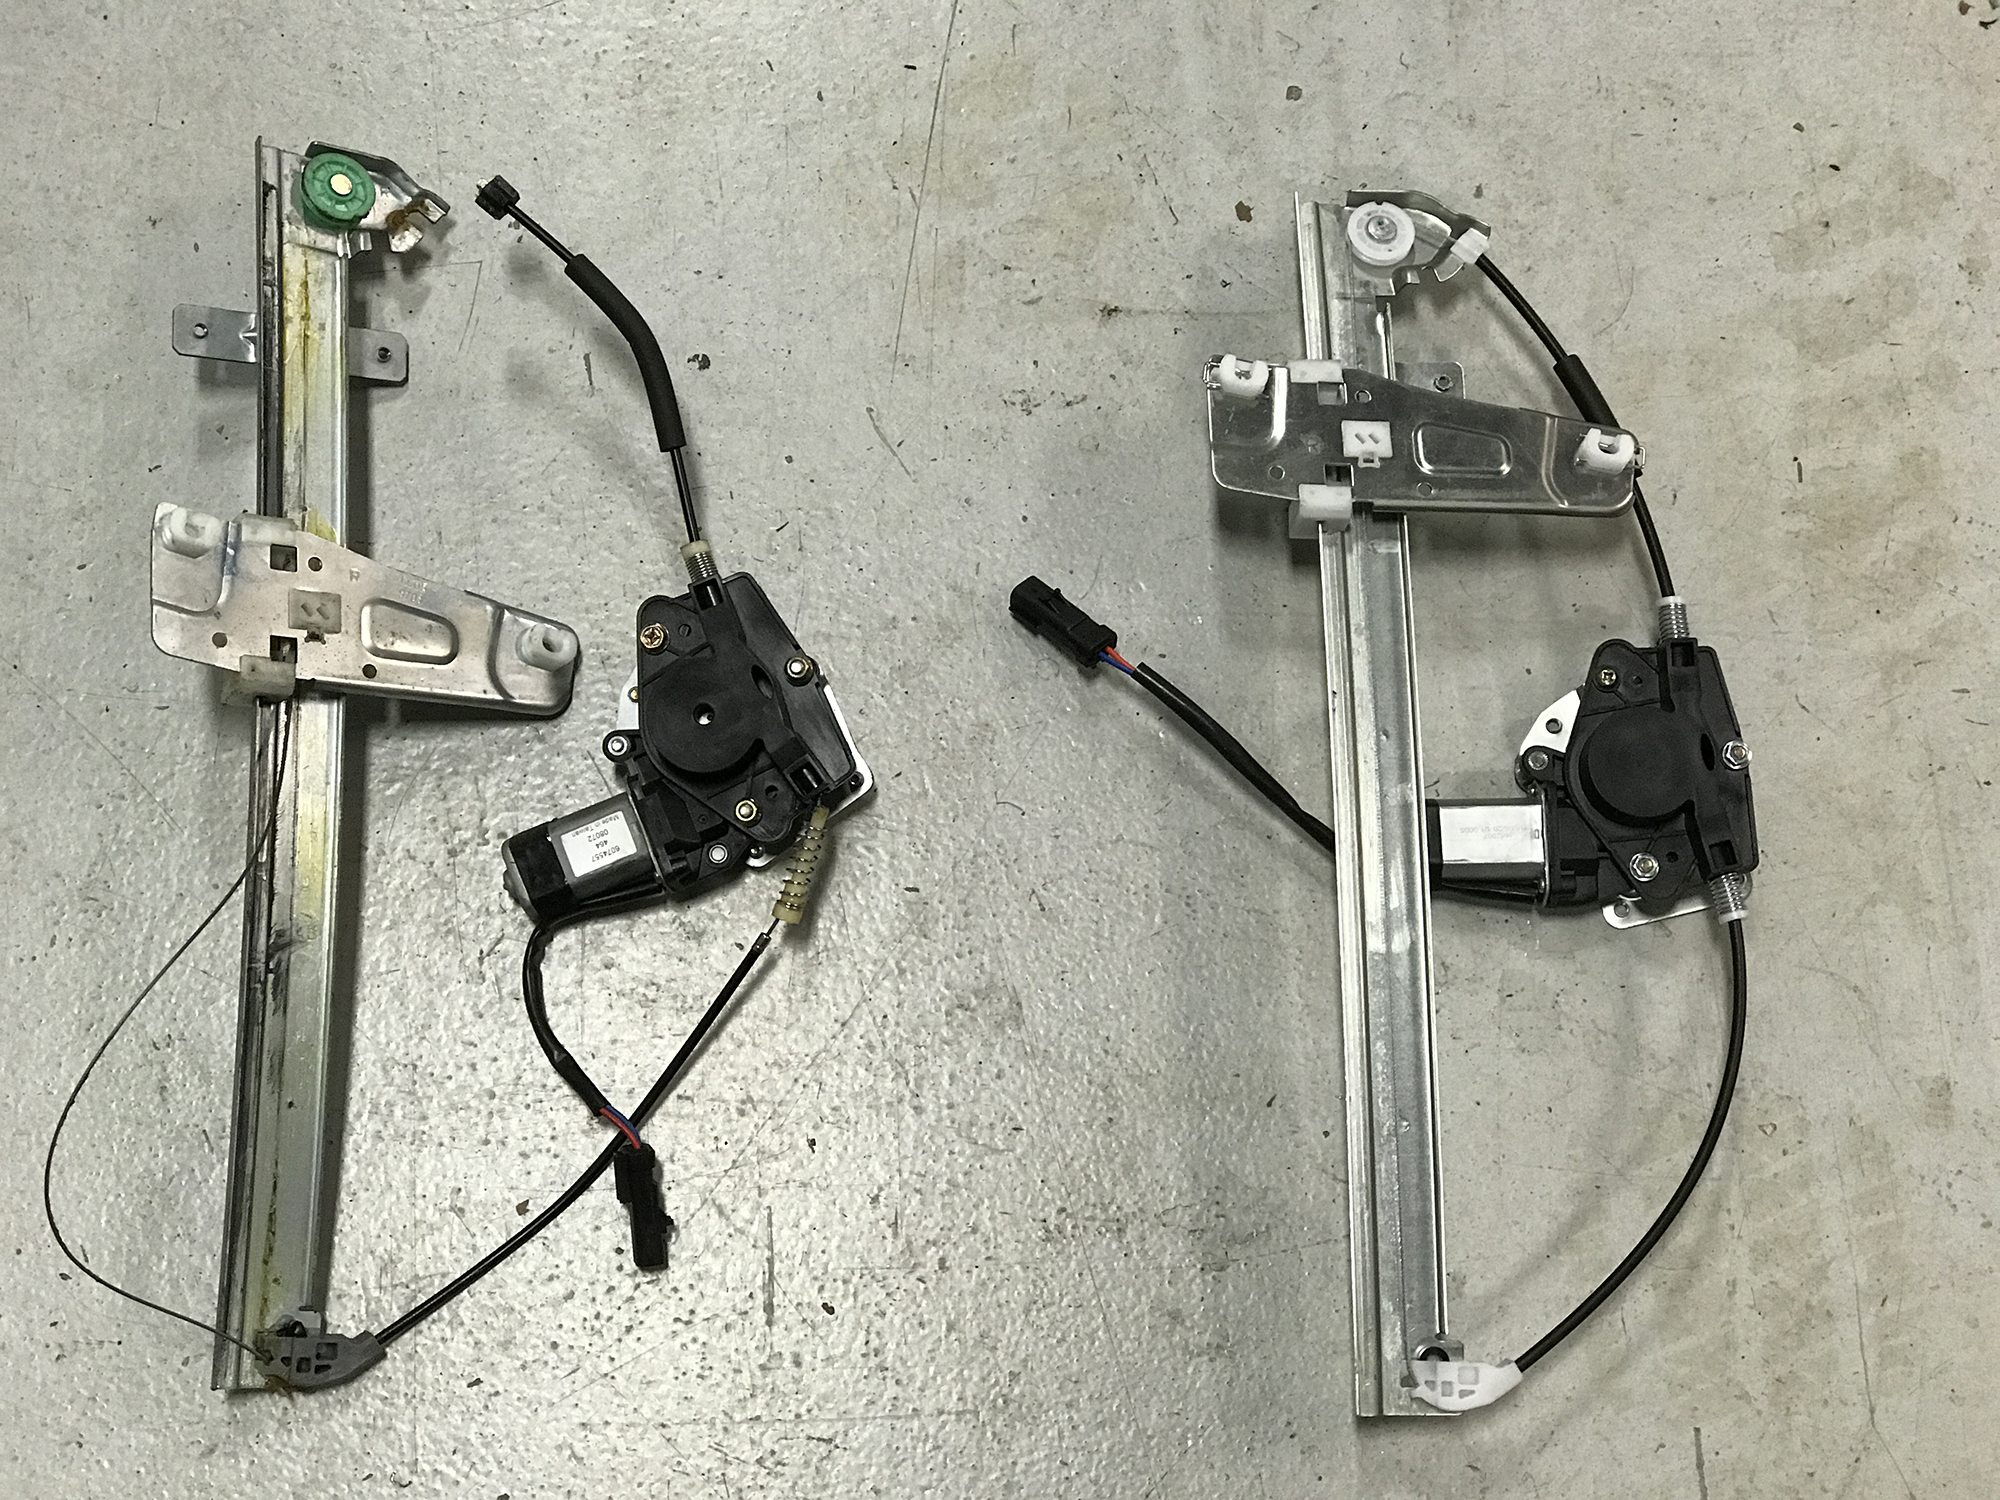
10. Here you can see the old and the new regulator. Notice where the plastic clips that connect to the steel cable on the original carriage that moves the glass up and down have broken. This is what caused the window to fall down into the door when the regulator fails.
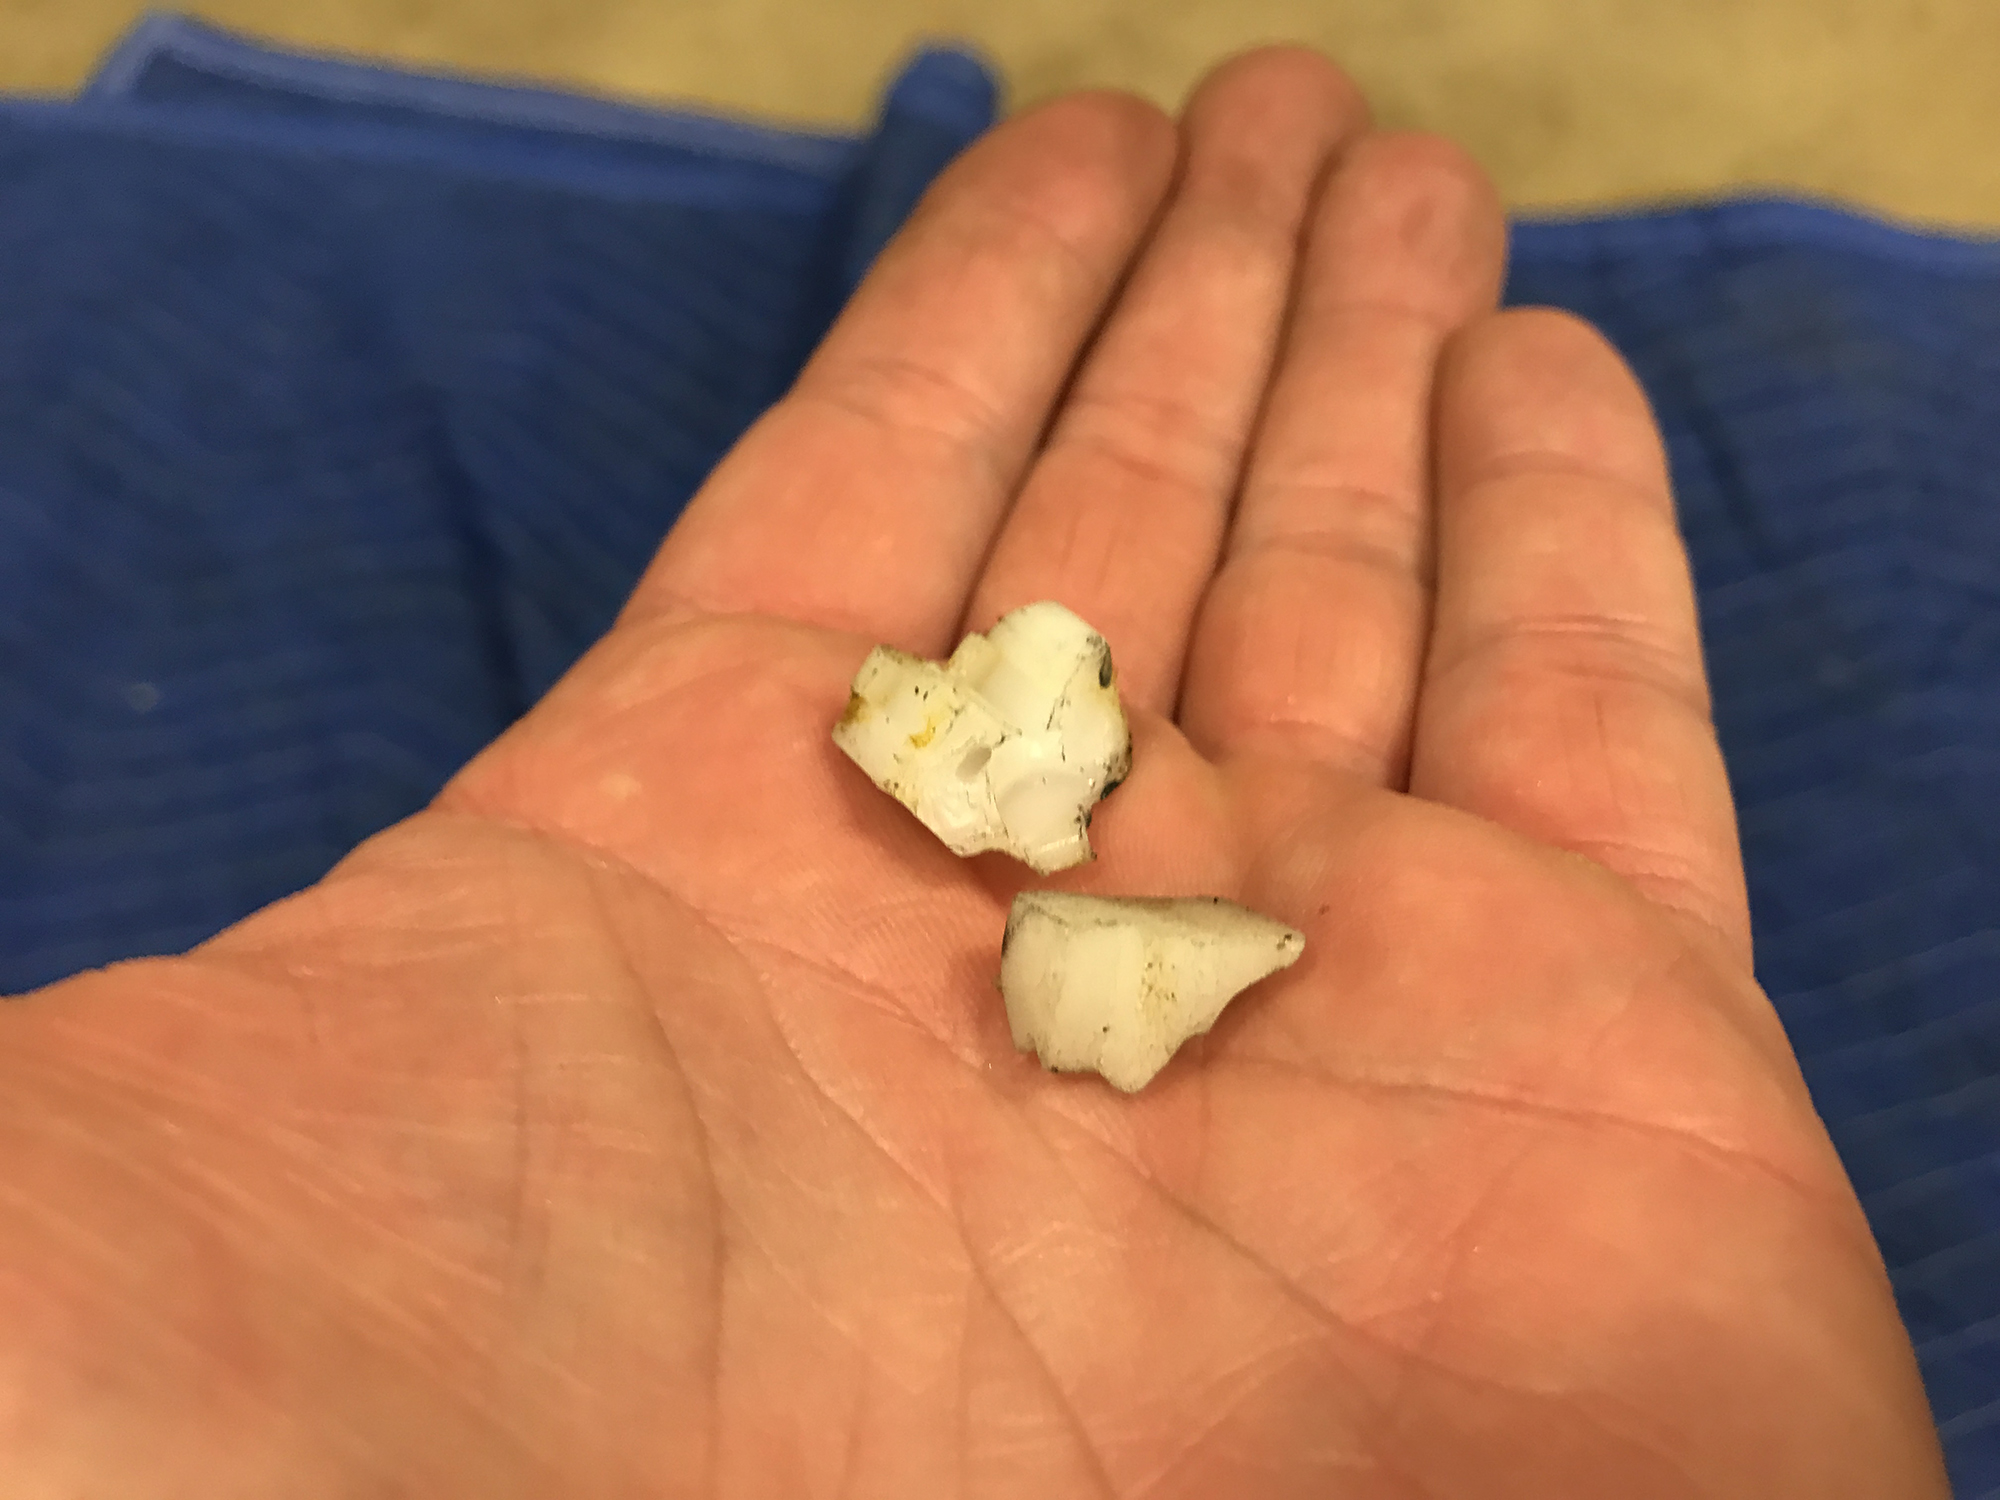
11. I found the broken plastic pieces still in the bottom of the door. Make sure to remove them, to avoid them rattling around in the futures.
12. Install the new regulator in the reverse way that you removed the original one. Just like the removal, it make take a few tries to find just the right angle to insert the motor into the door. It can be helpful if you start the bolts into the new regulator, so you can rest it into the keyhole slots once it's inserted into the door. Then simply follow all the previous steps in reverse to hook up the electrical connector, reapply the weather barrier, and re-install the speaker and door panel.
