by Rick Rotondo
Quadratec Channel Correspondent
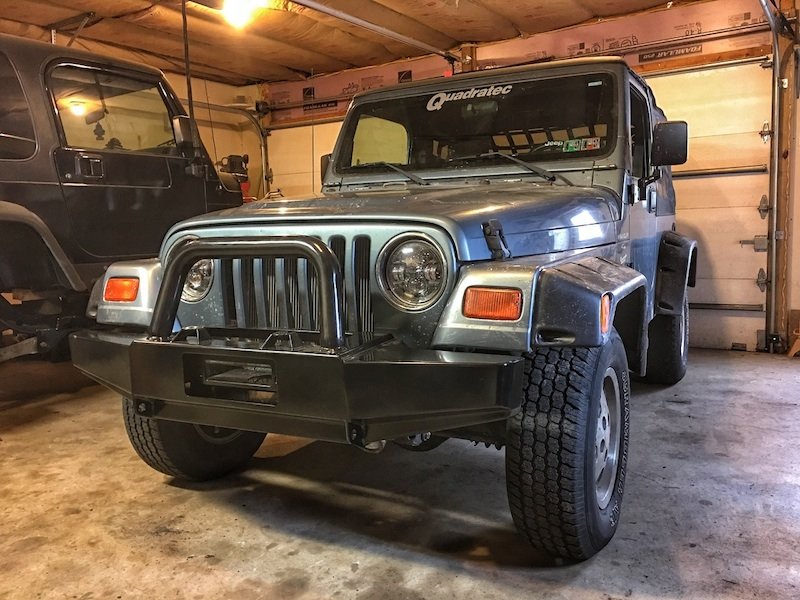
As my eldest TJ Wrangler hits 20 years old, problems with the Jeep’s frame are beginning to crop up. Those who live in salt/rust belt areas with older vehicles can certainly identify with this issue. Typically the first sections of frame to rust & rot are the transfer case crossmember area, the rear lower control arm mounts, and the central body mounts. In this instance, my 1998 TJ with 190,000 miles has all of the above.
In the past, a fix for these issues required custom fabrication using flat metal stock and the metal had to be cut to size and shape. If you’ve ever been involved with this, you know it is incredibly time consuming and arduous. And for those who do not have the ability to cut, weld and do this repair themselves, the cost really was prohibitive for a vehicle of this age.
Thankfully there is an easier way these days.
Auto Rust Technicians, a company specializing in cost-effective, frame-saving repair kits, allows TJ, YJ, and CJ owners access to proper frame repair sections. This saves time, money, and can give new life to a Jeep which may have otherwise been headed to the scrap heap.
Here is a step-by-step process to repair a TJ Wrangler driver side rear control arm frame section. You can find this part here to purchase. Note - this repair is ONLY recommended for those who have advanced knowledge and experience cutting, grinding and welding. Instructions are for use with a vehicle on the ground, so if you have a lift then please proceed accordingly.
First, please refer to the 'Instructions for Installing' safety sheet prior to starting this project as very important safety information is listed on this sheet.
Then, safely jack up the vehicle and support all four corners with quality jack stands. You can choose to do this from the axles or frame, but supporting from the frame is recommended - just make sure you have enough room to work.
Remove the rear wheels/tires.

Use a floor jack to lift the rear axle.
Unbolt the upper and lower control arms from the side on which you are working. If doing both sides, only do this one side at a time.

Unbolt the sway bar link from the frame. You can also remove the shock if you need to move the axle further back for additional work space.

Mark the frame above the original bolthole locations, and above where you are cutting the frame. Allow a 1" overlap - minimum. You can now begin cutting away the rotting portion of your frame as per the photos and info in the instructions. Make sure to cut off the frame side of the sway bar mount and any other pieces on the backside of the frame that will prevent installation of the replacement frame section. Also cut away the factory lower and upper control arm mounts. DO NOT cut the body mount! Also, be careful not to cut the brake hose and fuel lines.

Take the replacement frame section and mock up in place.

Trace the replacement frame section where you will be welding, along the old frame with a marker or marking pen. This will help you know where to grind the frame prior to welding.

Use your grinder/grinding tool to remove the frame coating down to bare, clean metal.
Place the replacement frame section back in the proper location. Confirm measurements as per the instructions.
Confirm measurements, again.
Tack weld the replacement frame section into place.

Confirm distances one last time.
Fully weld replacement frame section into place, then allow to cool.

Once cooled, prime, paint or otherwise (Bedliner, POR-15) properly finish the area.

Once the welded area is finished up, it is time for the reinstall process starting with the upper and lower control arms using supplied hardware. Auto Rust also recommends using Loctite on these bolts/nuts. Next, comes the sway bar link bolt and, if applicable, the shock bolt. Remember to torque all hardware to proper specs. Then re-mount all wheels/tires.
Now it is time to jack up the vehicle and remove jack stands, then put vehicle back on the ground for a test drive.
Finally, Auto Rust Technicians recommends to inspect all work after one day, or one mile, and then monthly.
-----
Quadratec's Mod Monday appears every week on the Quadratec Channel. Have a specific mod you've done, and think others will like? Send it in to [email protected].