by Scott Ammerman
Torque Correspondent
The Jeep Wrangler JK Rubicon automatic disconnect sway bar is a convenient way to gain more articulation while driving off-road. In function, it is very similar to aftermarket quick disconnect sway bar end links people purchase for their Jeeps, but with the convenience of push-button actuation rather than having to remove pins and tie the end links up out of the way.
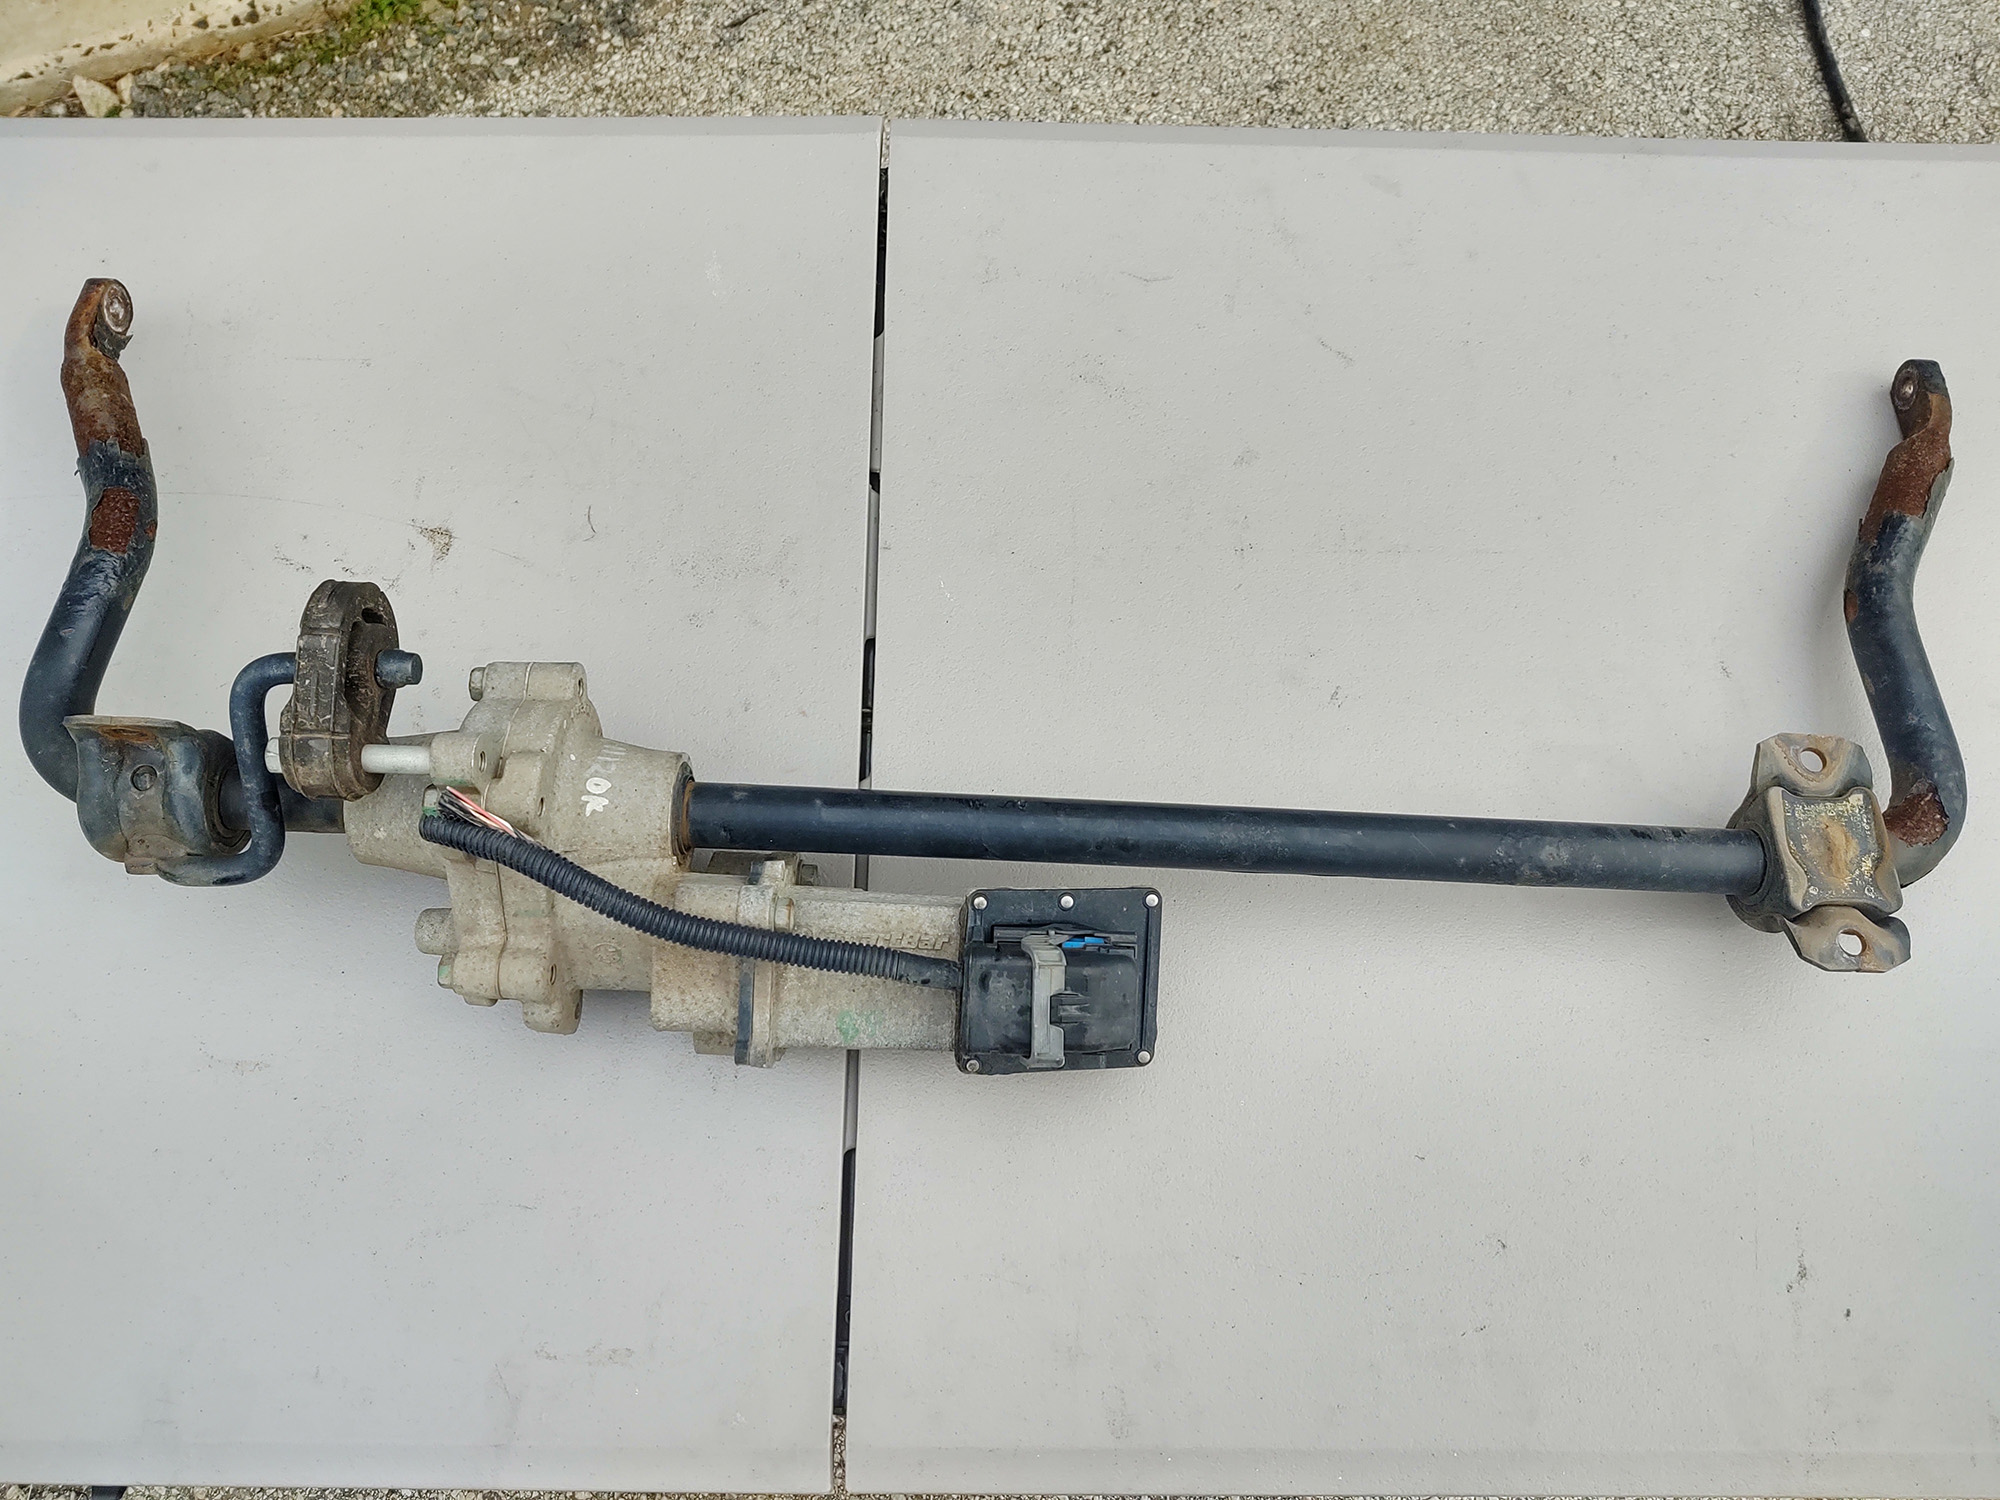
Unfortunately, this type of system is not without complications. The wiring harness connection is located behind the front bumper, and has been known to not be completely impervious to water intrusion. In fact, the advertised fording depth limit of the JK is above the electrical connector.
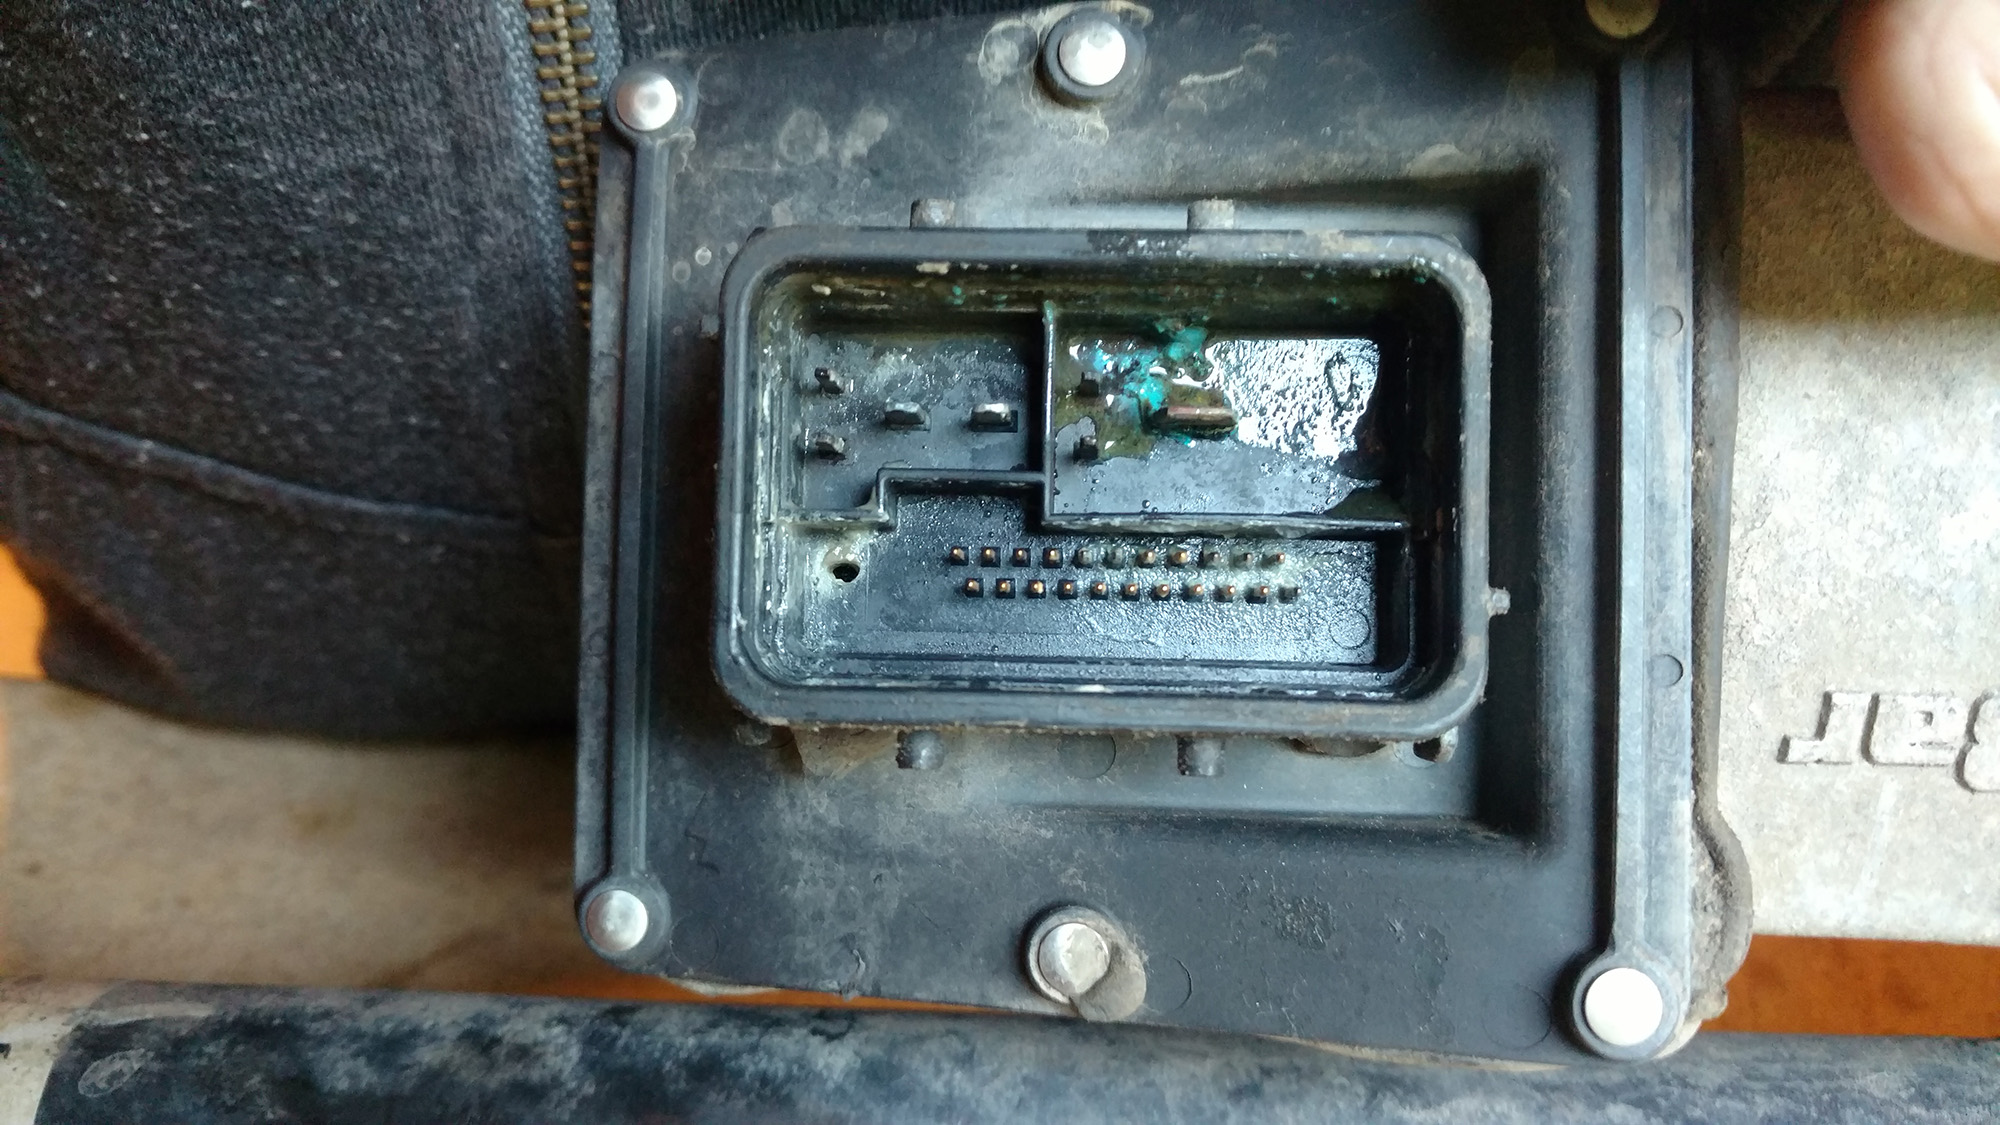
If water, grime and salt water get past the o-ring seal for the connector, those things can all cause issues with electrical resistance, and actually end up in the sway bar actuator itself through a small hole (in the lower left of this picture) inside the actuator housing socket. This connector had a corrosion issue, but the inside of the actuator motor itself was flooded and destroyed.
Those familiar with how electricity works, know it doesn't always play nice with water. Keeping this connector packed with dielectric grease can keep corrosion at bay, but isn't always a rock solid solution.
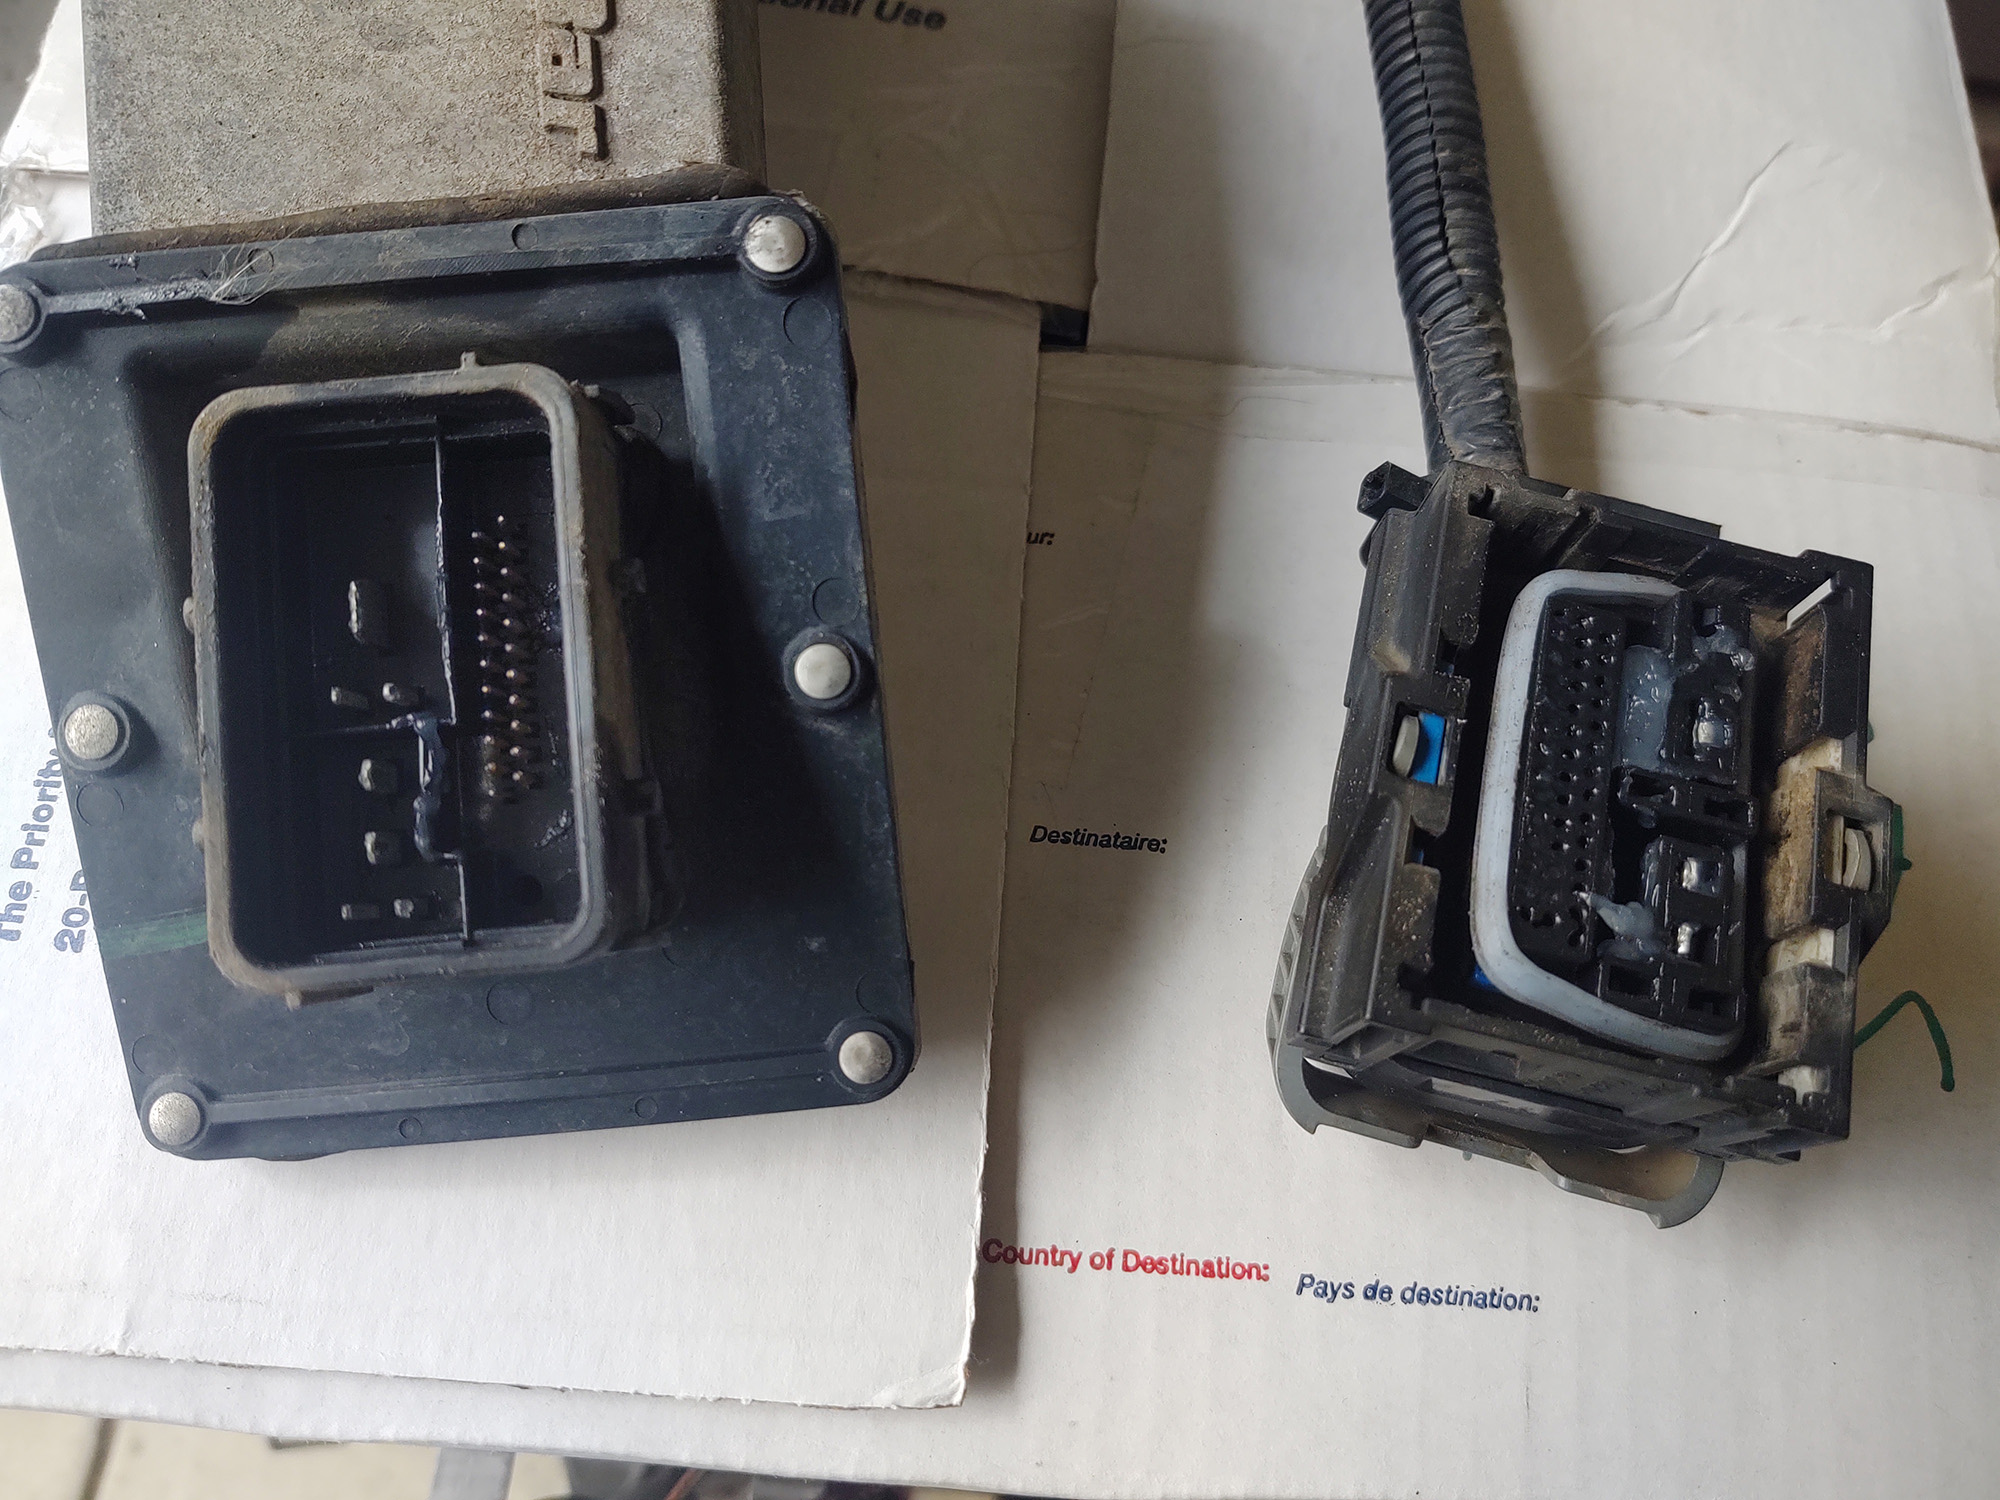
If you've arrived at this article because you have a flashing sway bar light in your instrument cluster, I can provide you with some troubleshooting advice below to see if it can be corrected.
If it turns out there is no correction, Evo Manufacturing has come up with a more budget friendly solution to restore functionality without having to replace the entire automatic sway bar unit because of electronic malfunction.
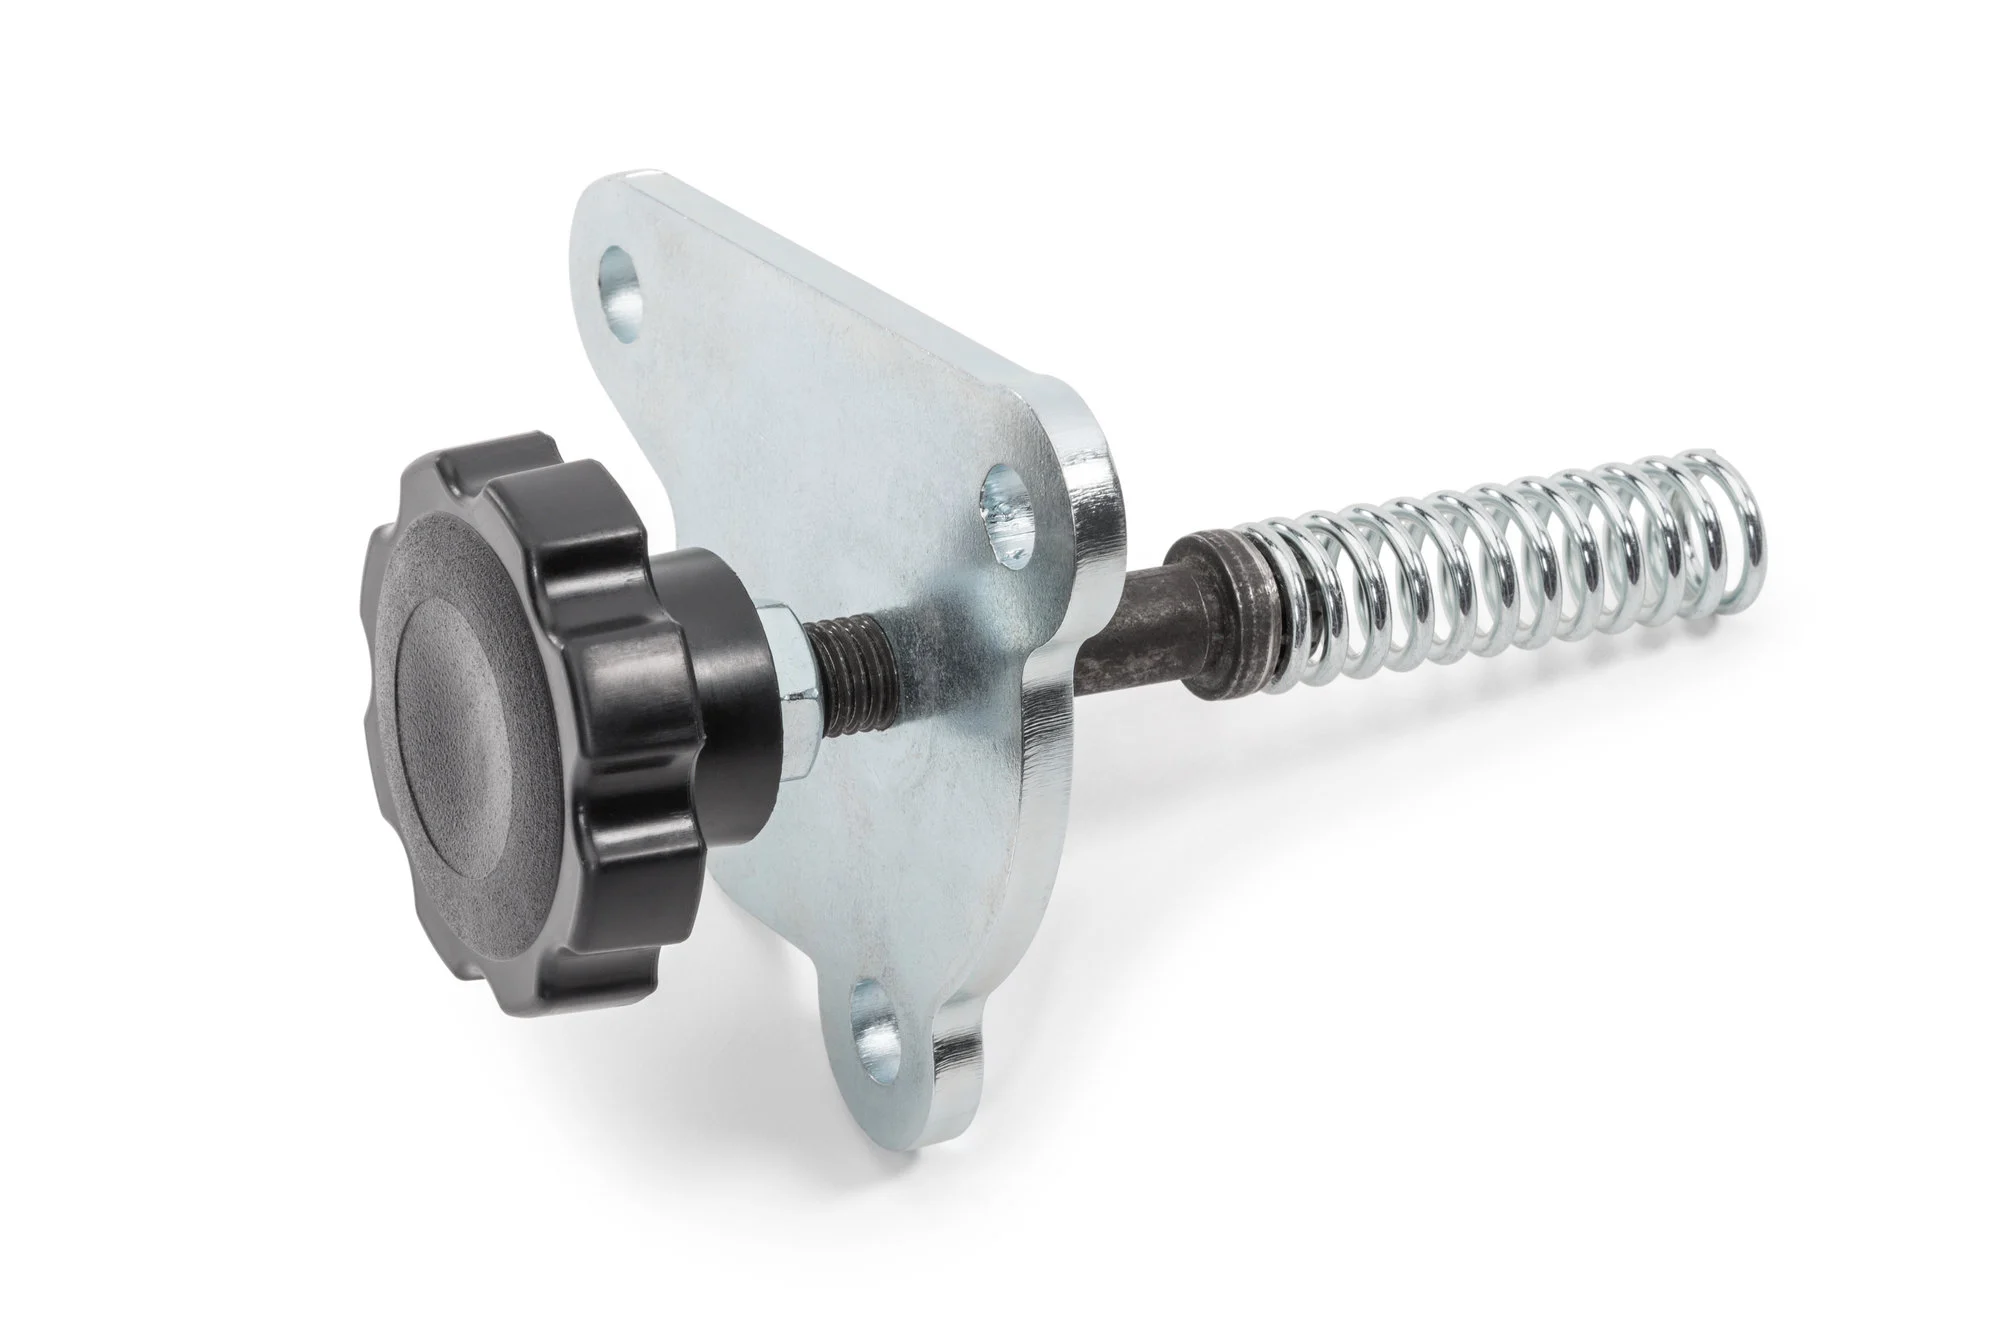
The EVO Manufacturing NoLimits Manual Sway Bar Disconnect System installs in place of the actuator motor using the three original factory bolts. No wiring is required, so if you have no intention of going back to the factory setup at a later date, you can cut the connector off and tape the wires. With a few turns of the knob, the normal operation of the automatic disconnect sway bar can be restored.
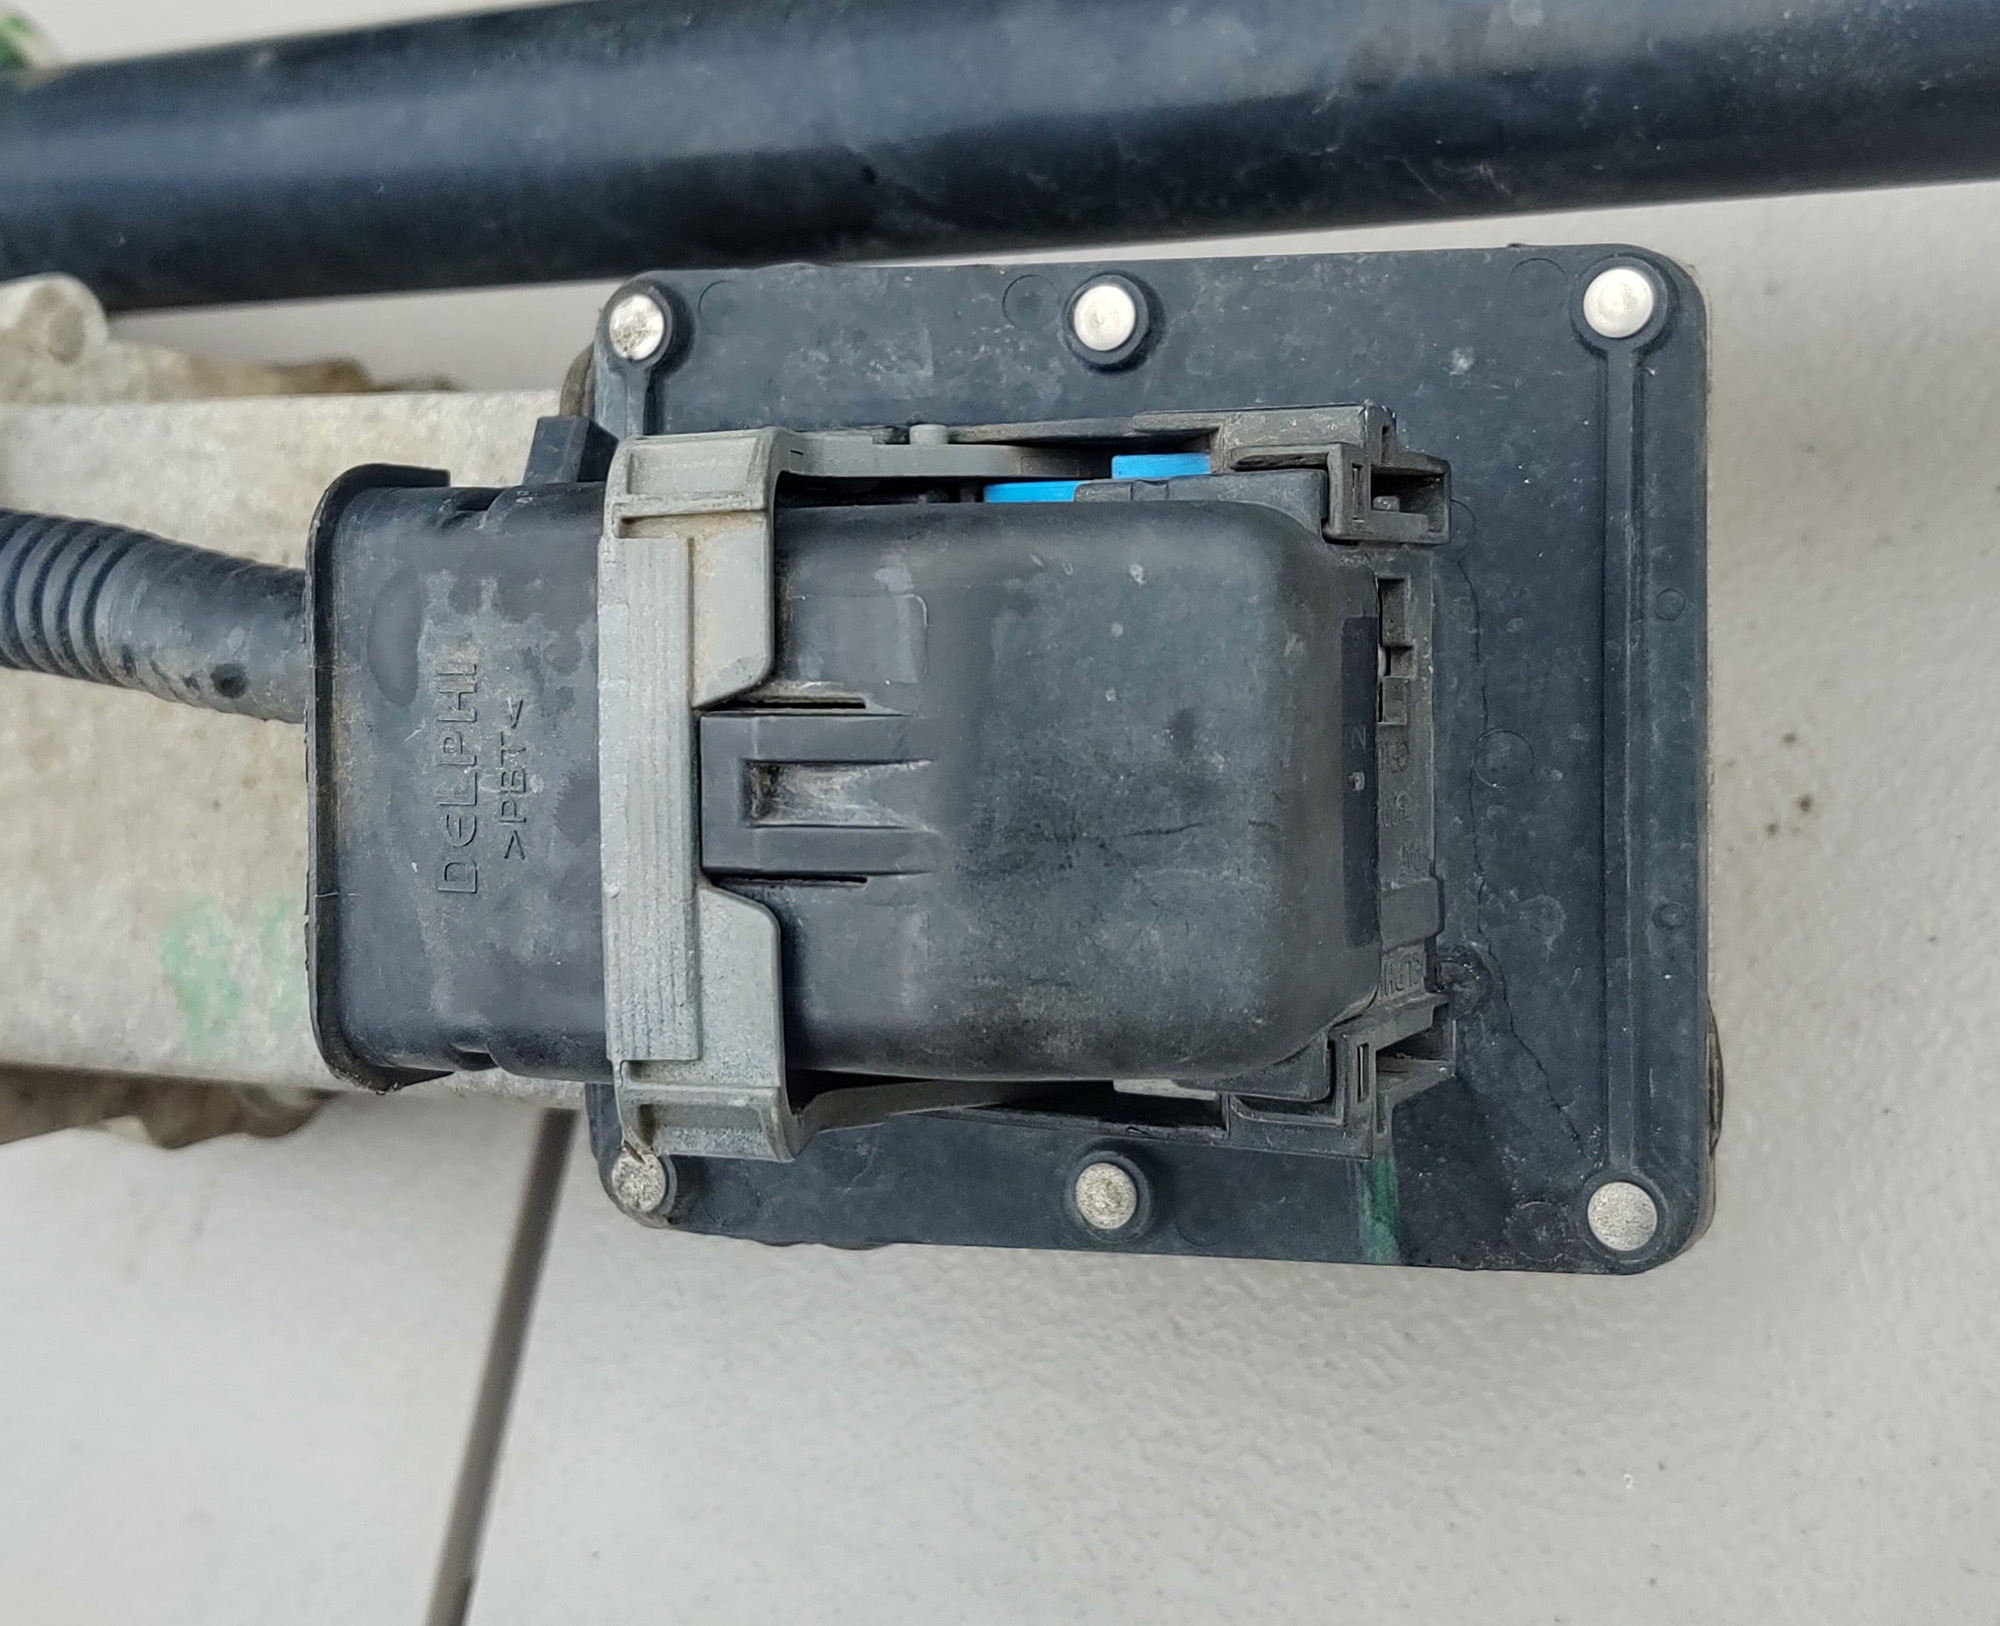
The connector itself has a bail lever that has to be pulled towards the driver’s side to allow it to be removed. The lever is the gray part, and it needs to be pulled over the little black ridge in the center to be able to move. When you remove the connector, and notice a lot of wetness inside the connector (or even a few ounces of water trapped inside), there is a good chance that corrosion has started to take hold. If the connector looks melted around any of the pins on either side, it is unlikely to work again after cleaning.
If all the connections look okay, but are just dirty, the unit can be sprayed clean with some electric parts cleaner, then packed with dielectric grease and reconnected. If corrosion is present on the actuator side pins, it can be scrubbed off with a small brass brush if you exercise caution to not bend any of the pins. When cleaning the wiring harness connector, the vehicle battery needs to be disconnected so you do not short any connections.
After reconnecting everything, and the sway bar fault light still remains on, then an electrical issue persists. Typically, this signifies a problem with either the harness plug or the actuator. Occasionally, there could be an issue with the wiring if the harness has been rubbed through or chewed by rodents. Overall though, this system is difficult to diagnose because pinouts for the connector are very hard to come by. If you suspect an issue on the wiring side, you could take it to an vehicle electrical system specialist, or your local Jeep dealer, to check further.
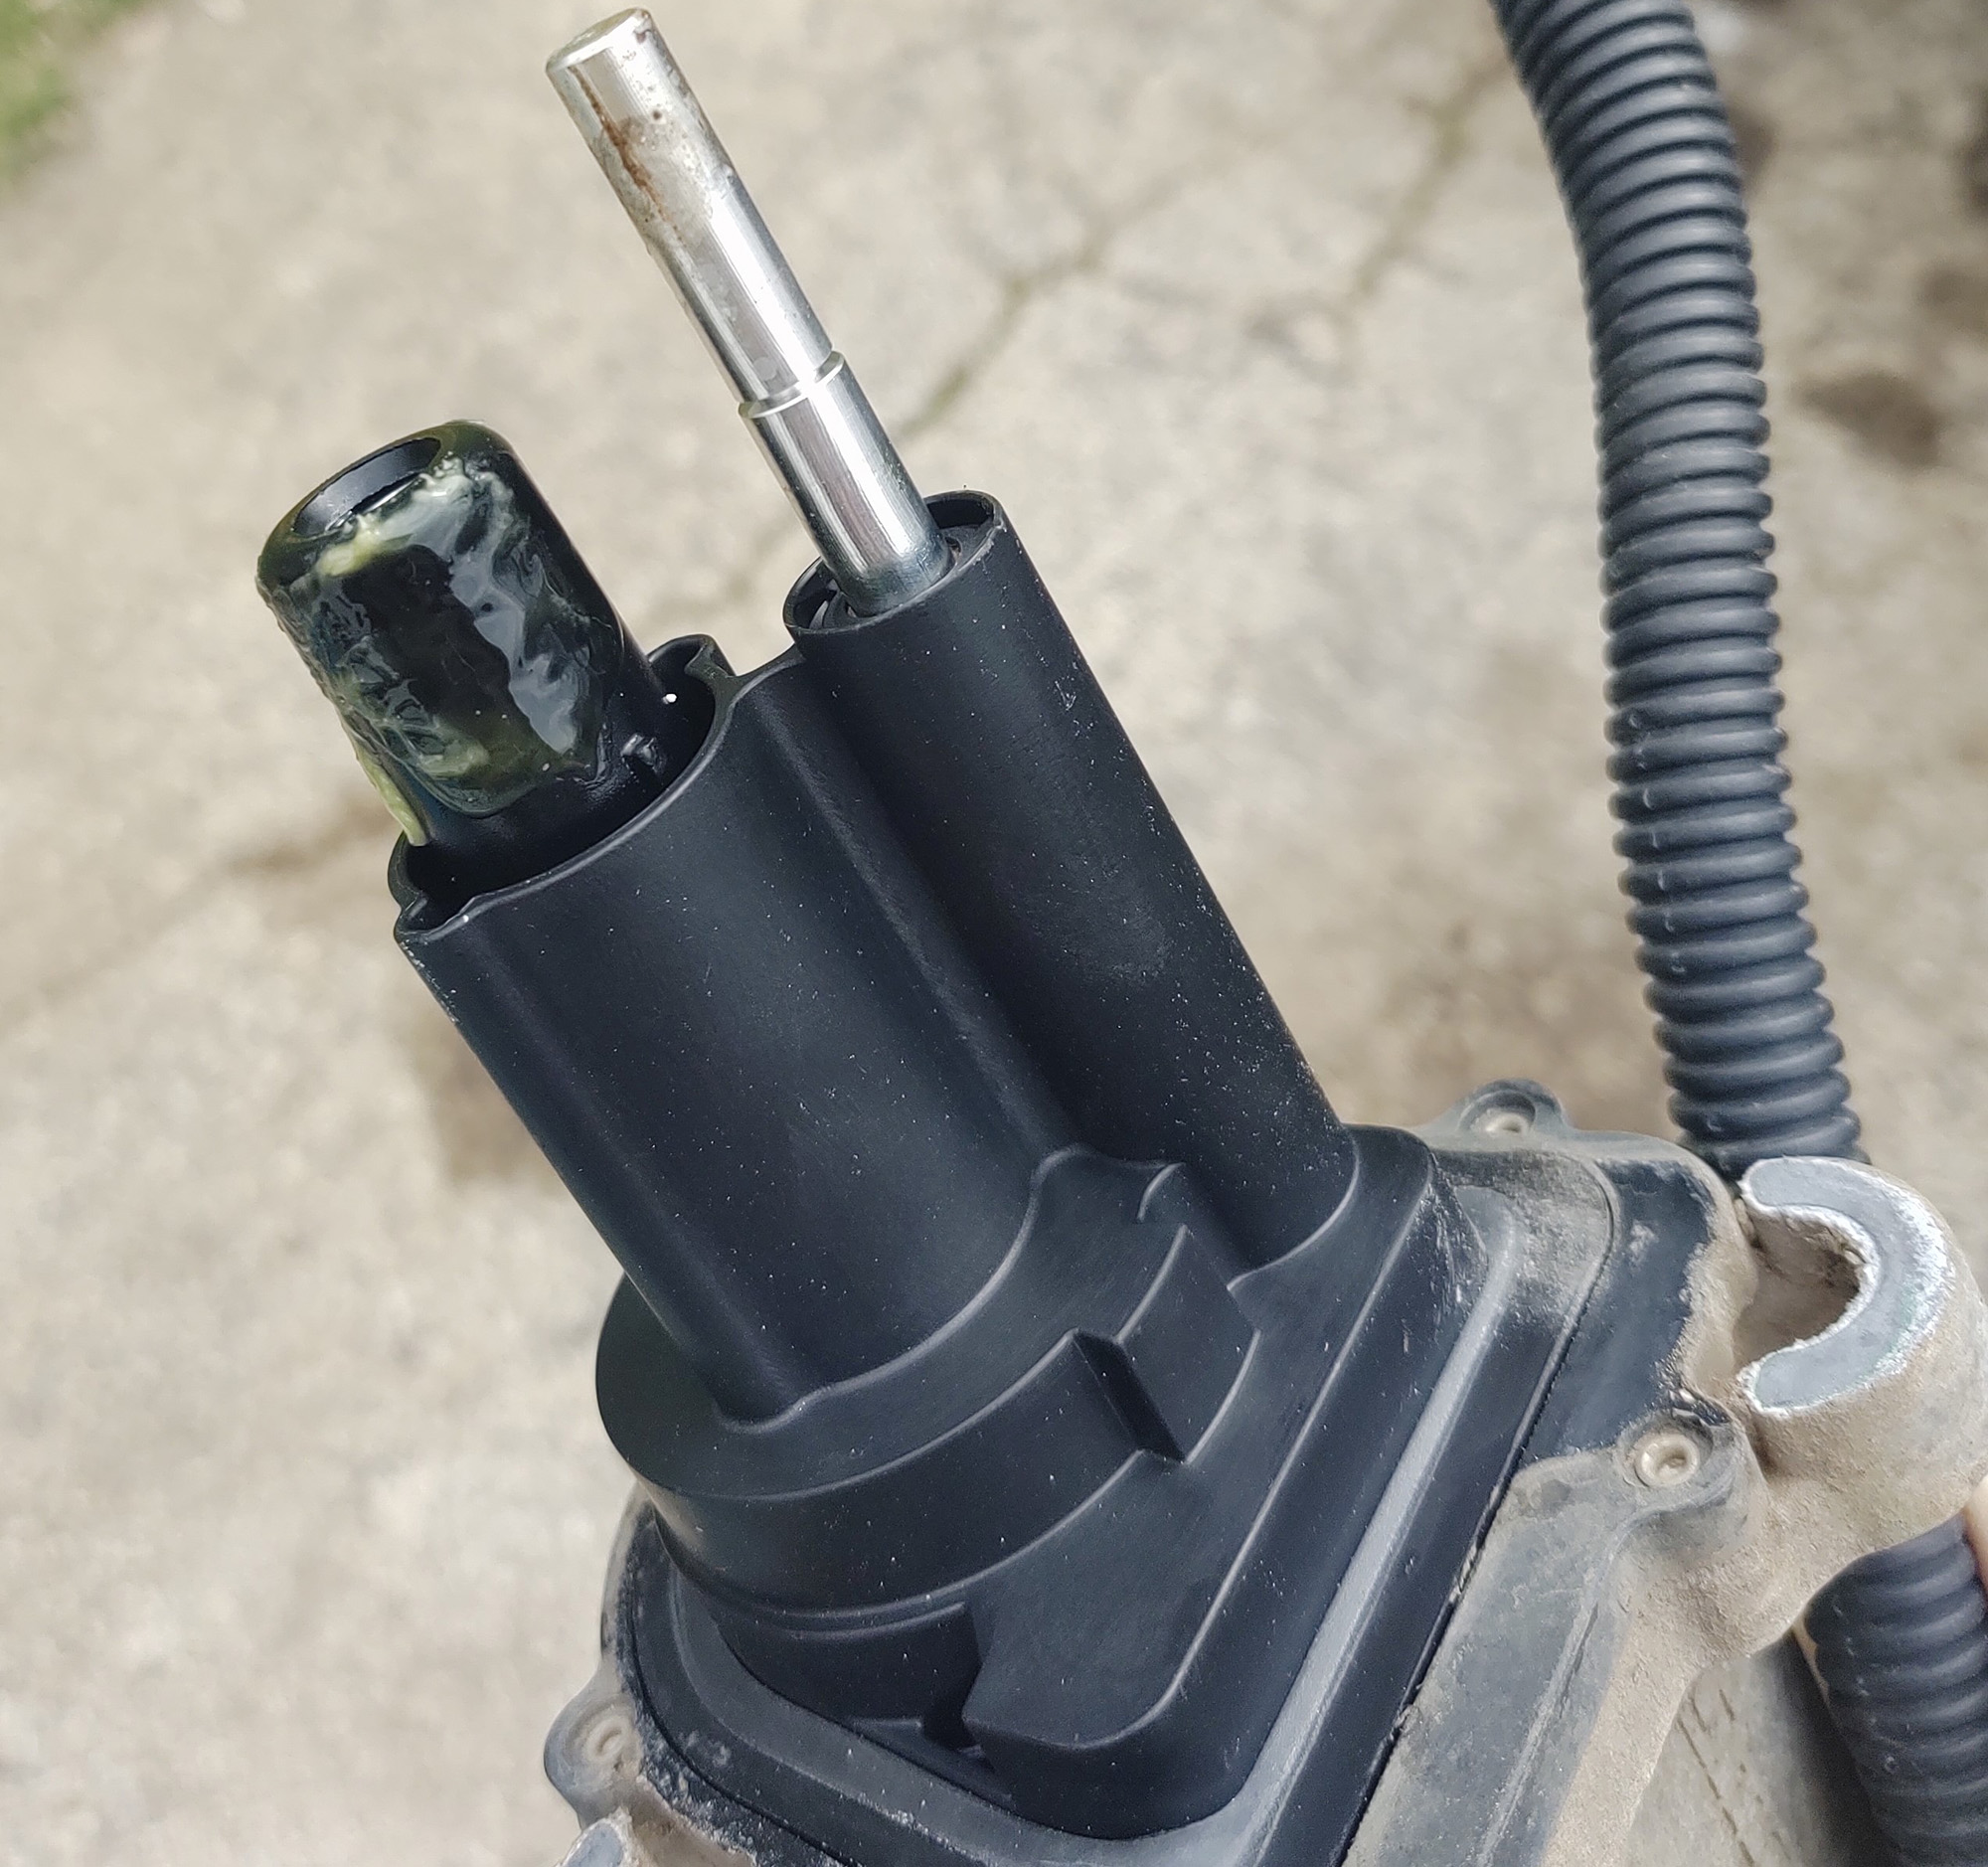
Testing the actuator unit operation is possible with a friend’s assistance. Remove the unit from the sway bar housing by pulling out the three bolts holding it in place with a 15mm socket. It will then slide out towards the driver’s side. While you hold onto the unit, your partner can hit the sway bar button from the driver's seat (with the key in and turned to the ‘on’ position) while you watch to see if the plunger moves. If you've already cleaned up the connection and nothing happens when the button is pressed, there is a very good chance the actuator has been shorted out.
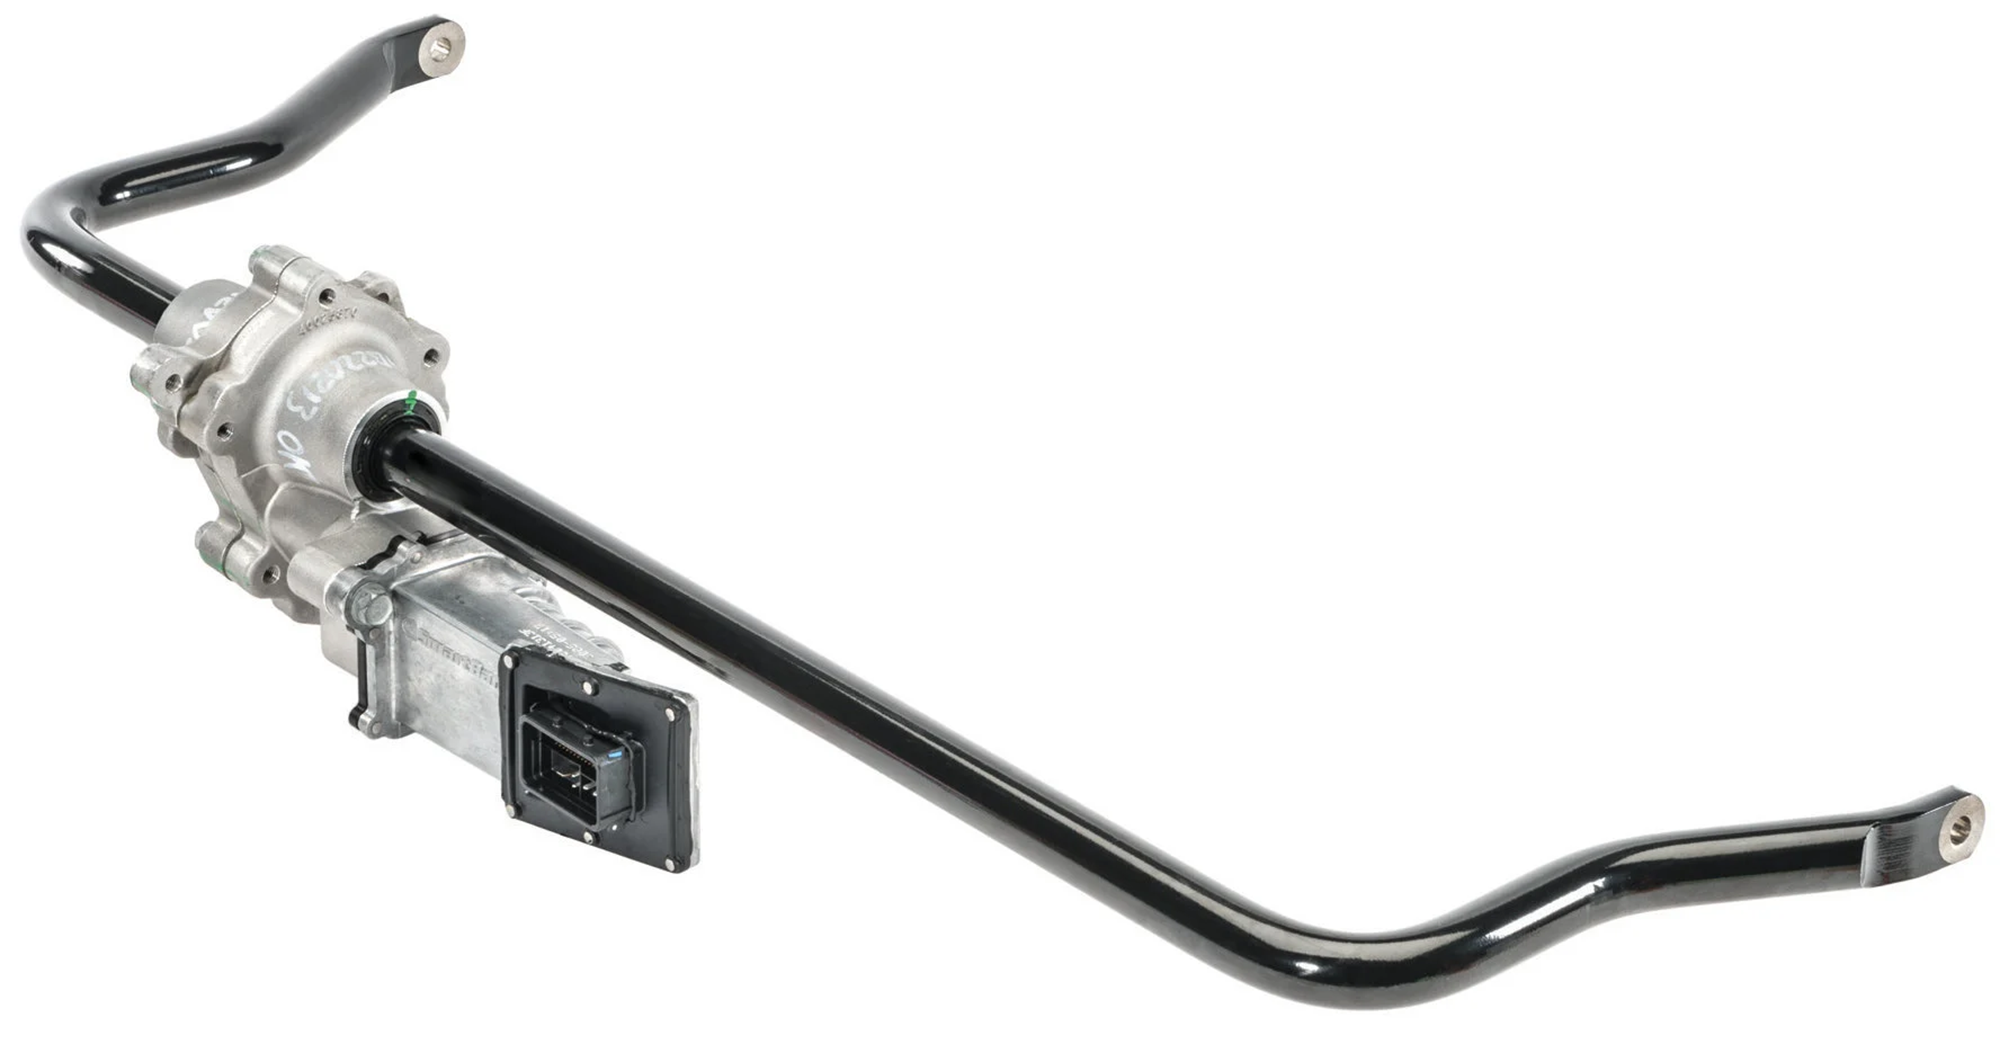
The Mopar Disconnect Front Stabilizer Bar is available through Quadratec, but this genuine Mopar part is only available as a complete setup (swaybar and actuator) making it a bit on the higher end of the price scale. Even then, it does not come with the wiring connector on the wiring harness side—which does not help in the event yours has melted. These are very difficult to locate in good shape on the used market, and were not even available through my local Jeep dealer when mine stopped working.
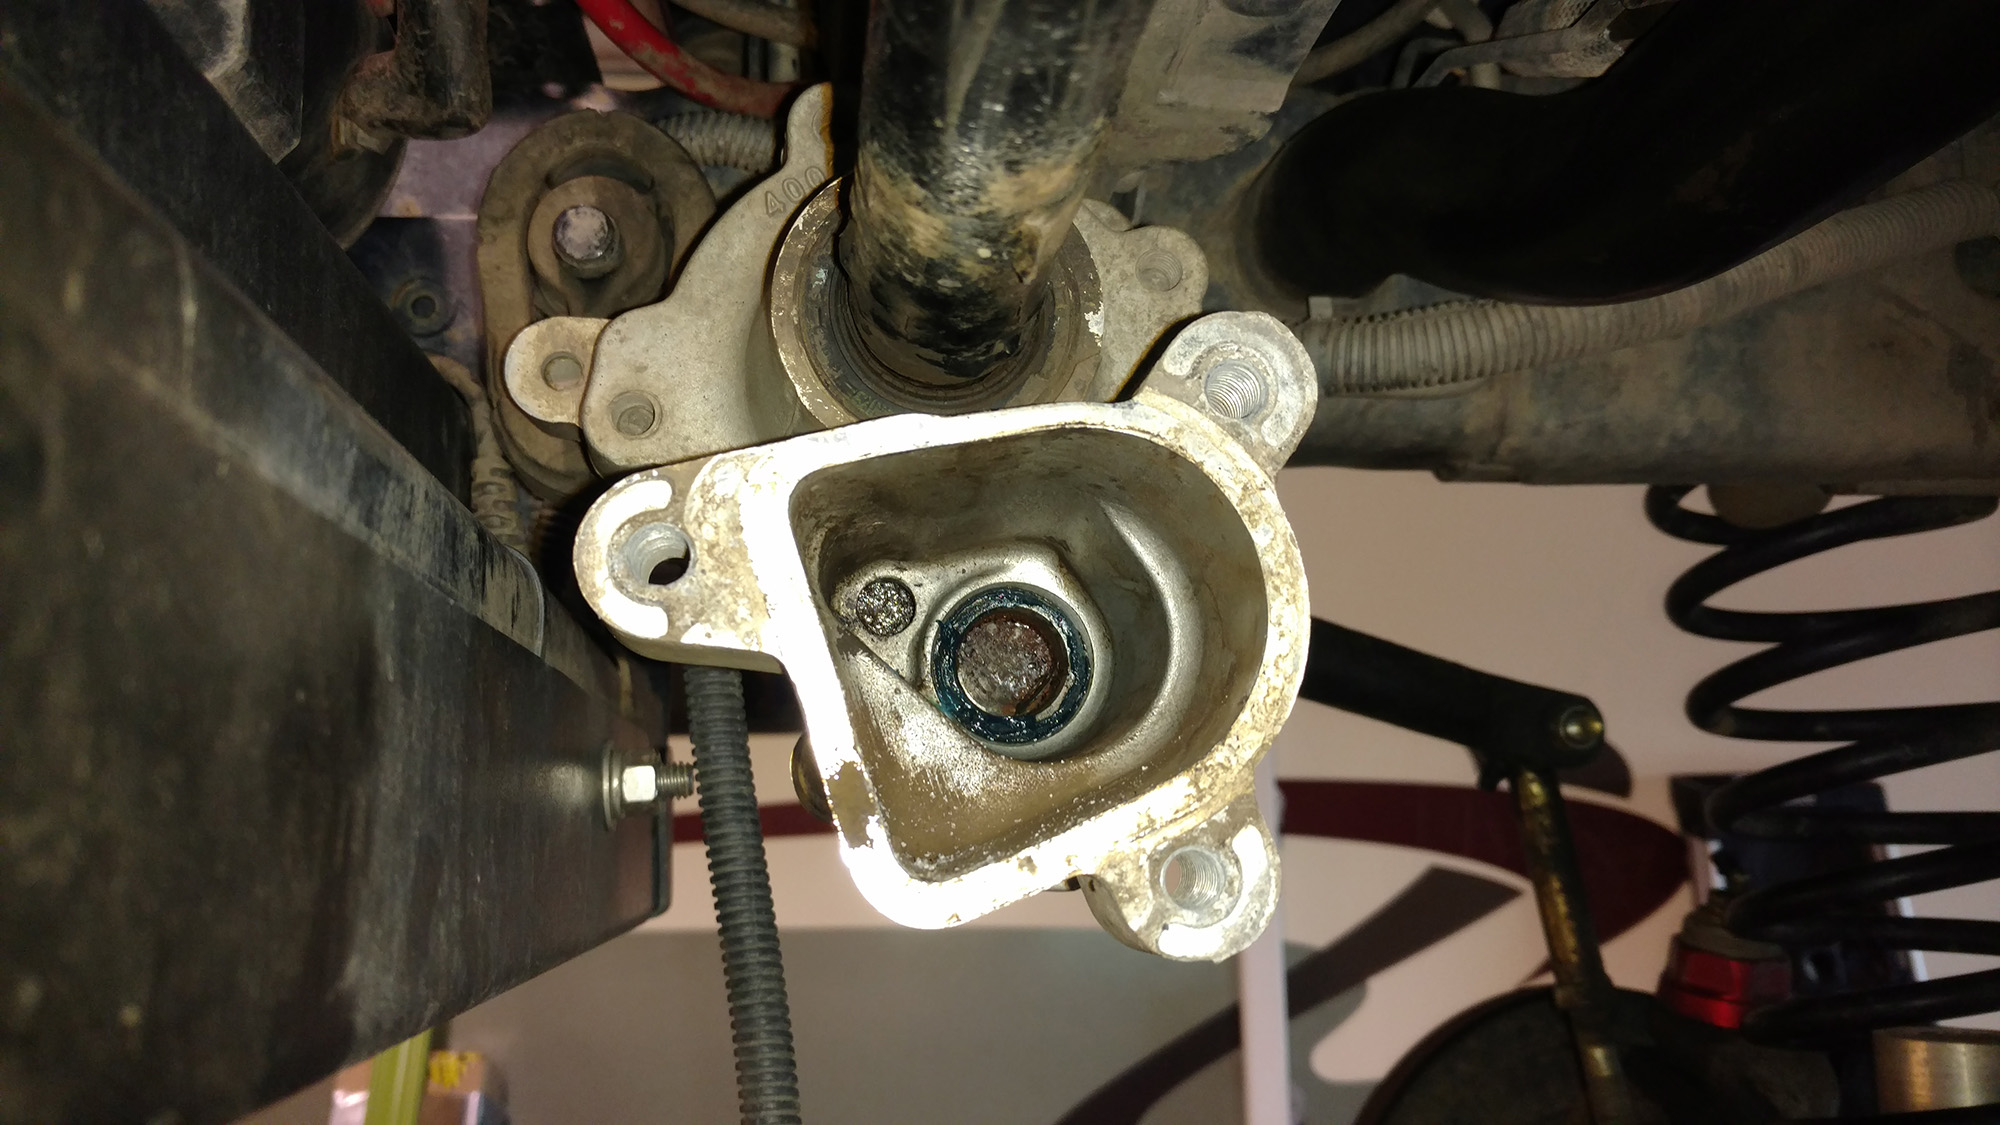
With Project Snake Eyes, not only was the connector full of silt and debris, but the entire mechanical section of the sway bar was as well. To test the mechanical operation, you can use a long screwdriver in place of the actuator. Disconnect the passenger sway bar end link from the axle side, press in to the larger of these two holes, and have a friend see if the passenger side end can be moved independently. Mine did release, but was gritty and stiff, indicating the need for removal and inspection.
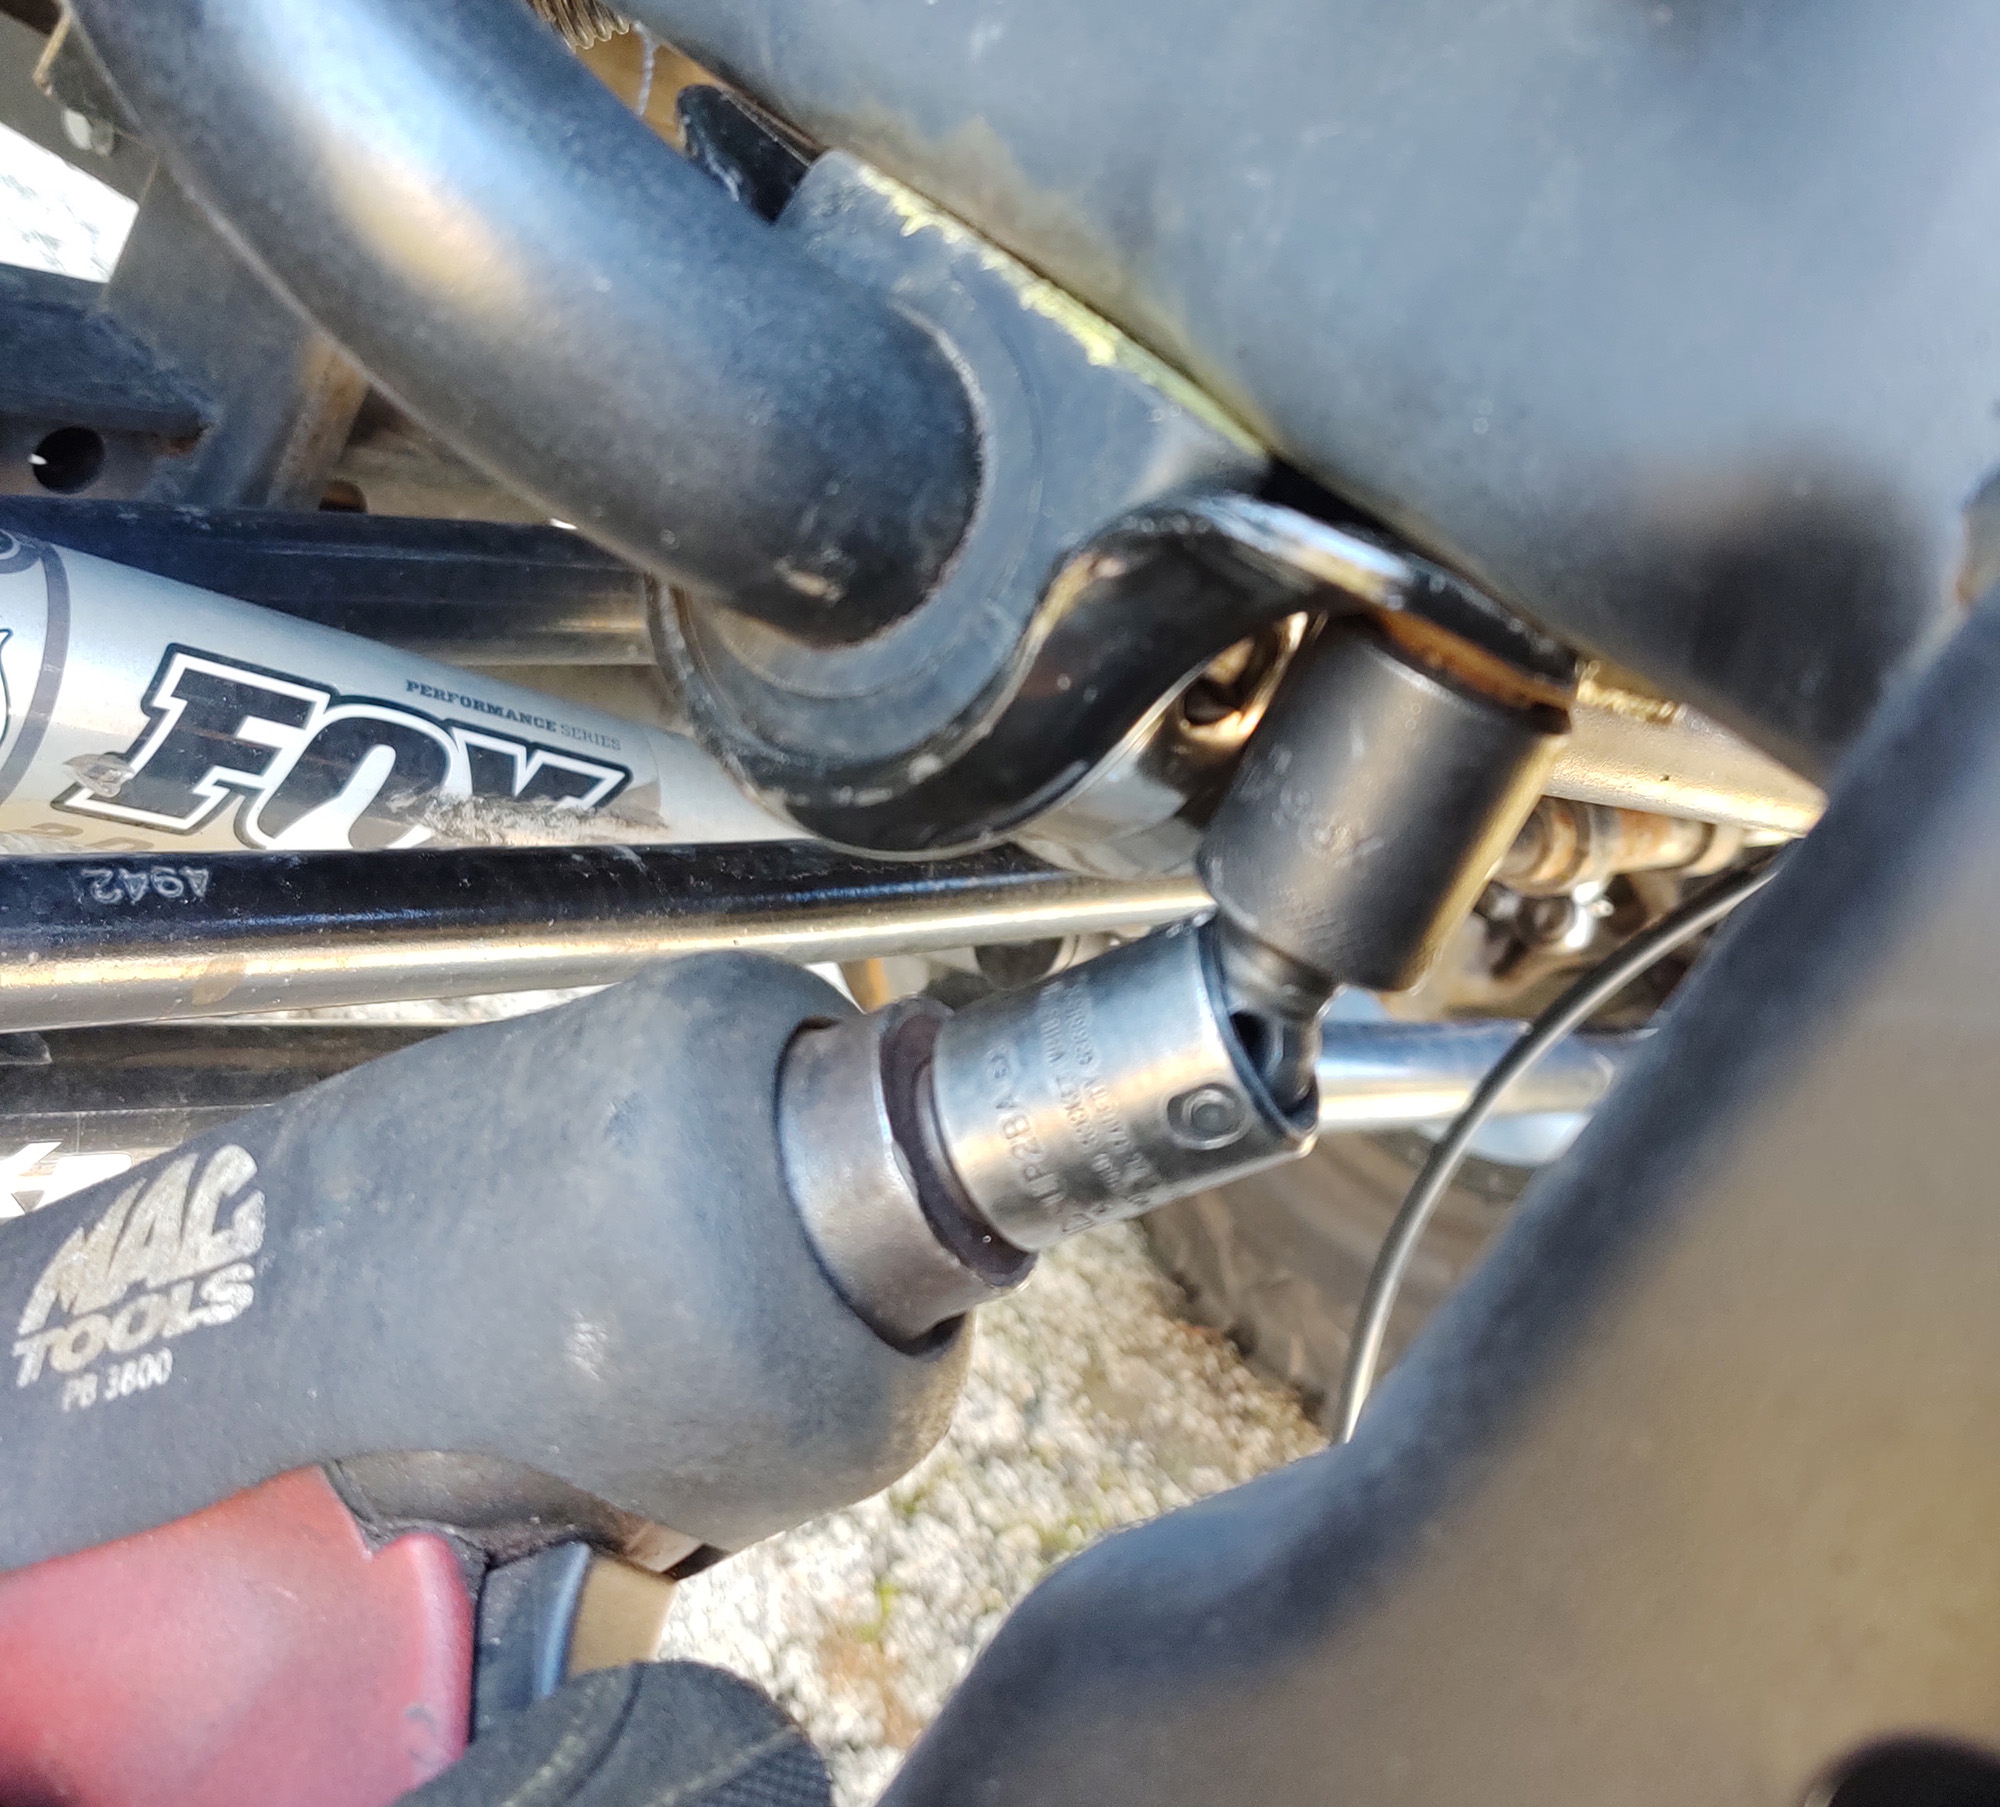
After disconnecting both end links, the sway bar itself is only held to the frame with four bolts, and you can use a 16mm socket to remove. I used a ⅜” impact, but they weren’t too tight at all.
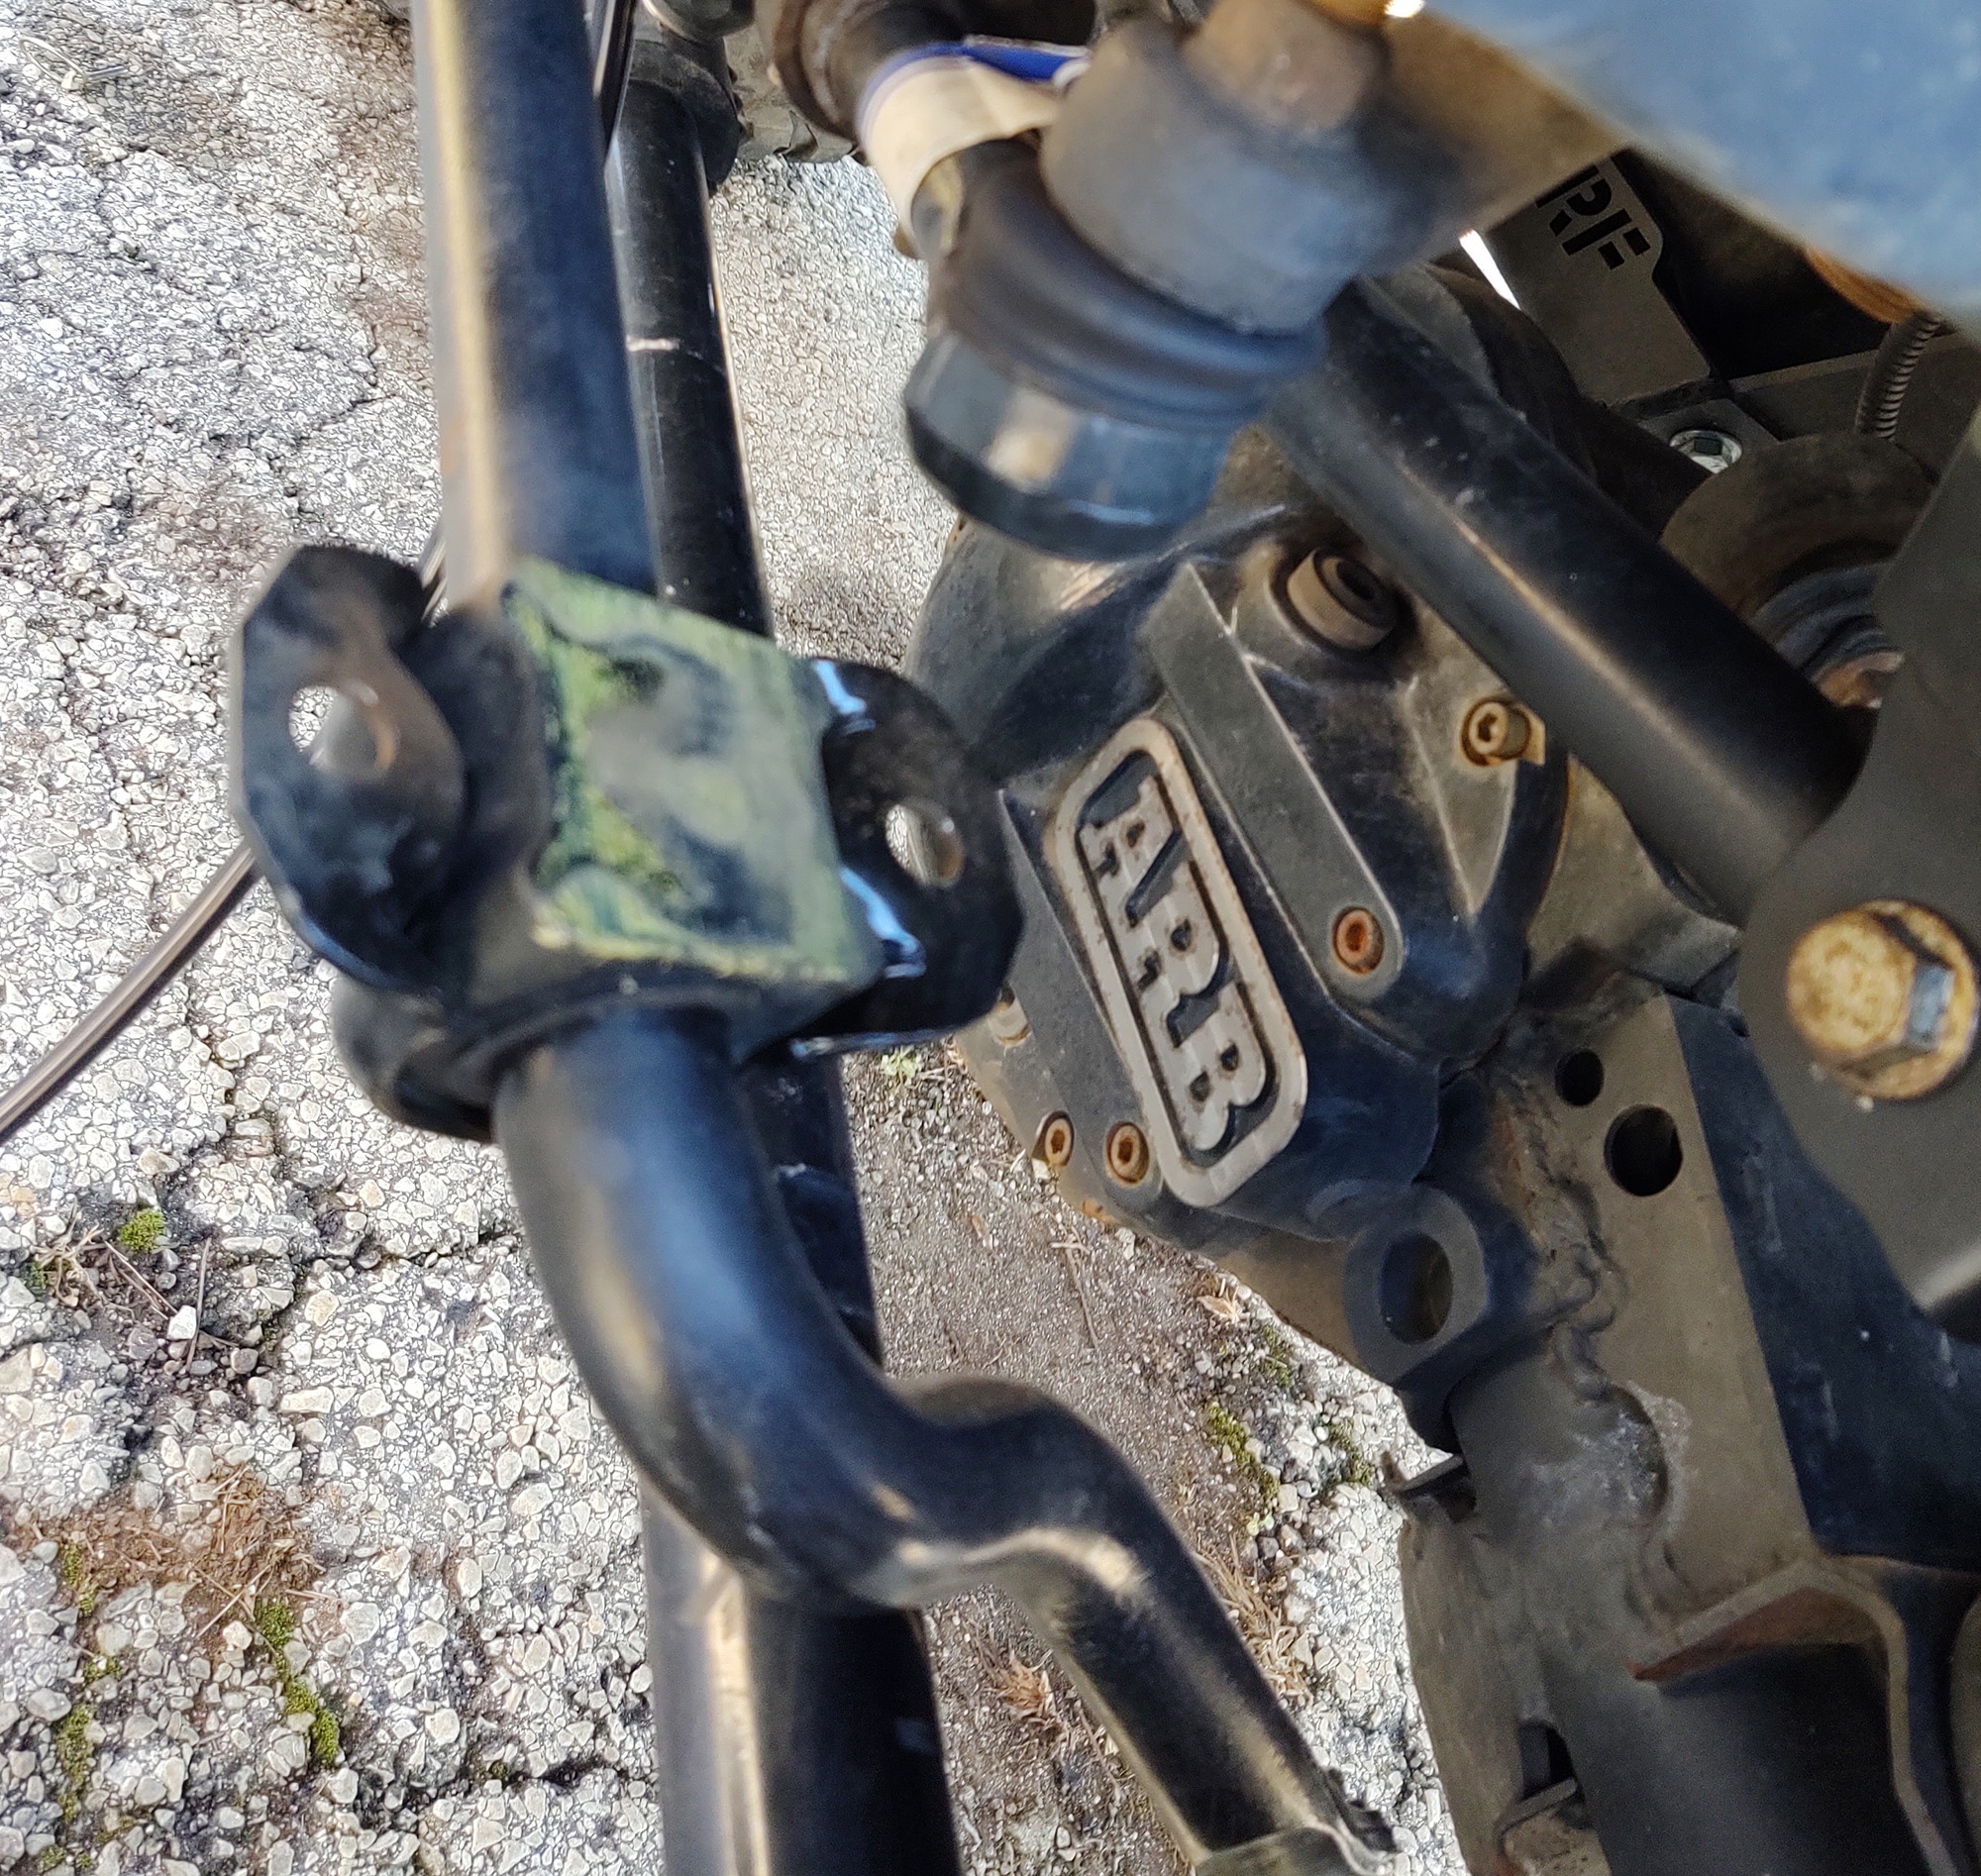
The entire assembly drops out through the bottom.
Using a 15mm wrench, the two sides can be split apart to expose the inner workings. Try tapping the housing with a rubber mallet if they don't separate easily, but be aware that there is a gasket between the two sections that is not available separately—so don’t damage that gasket.
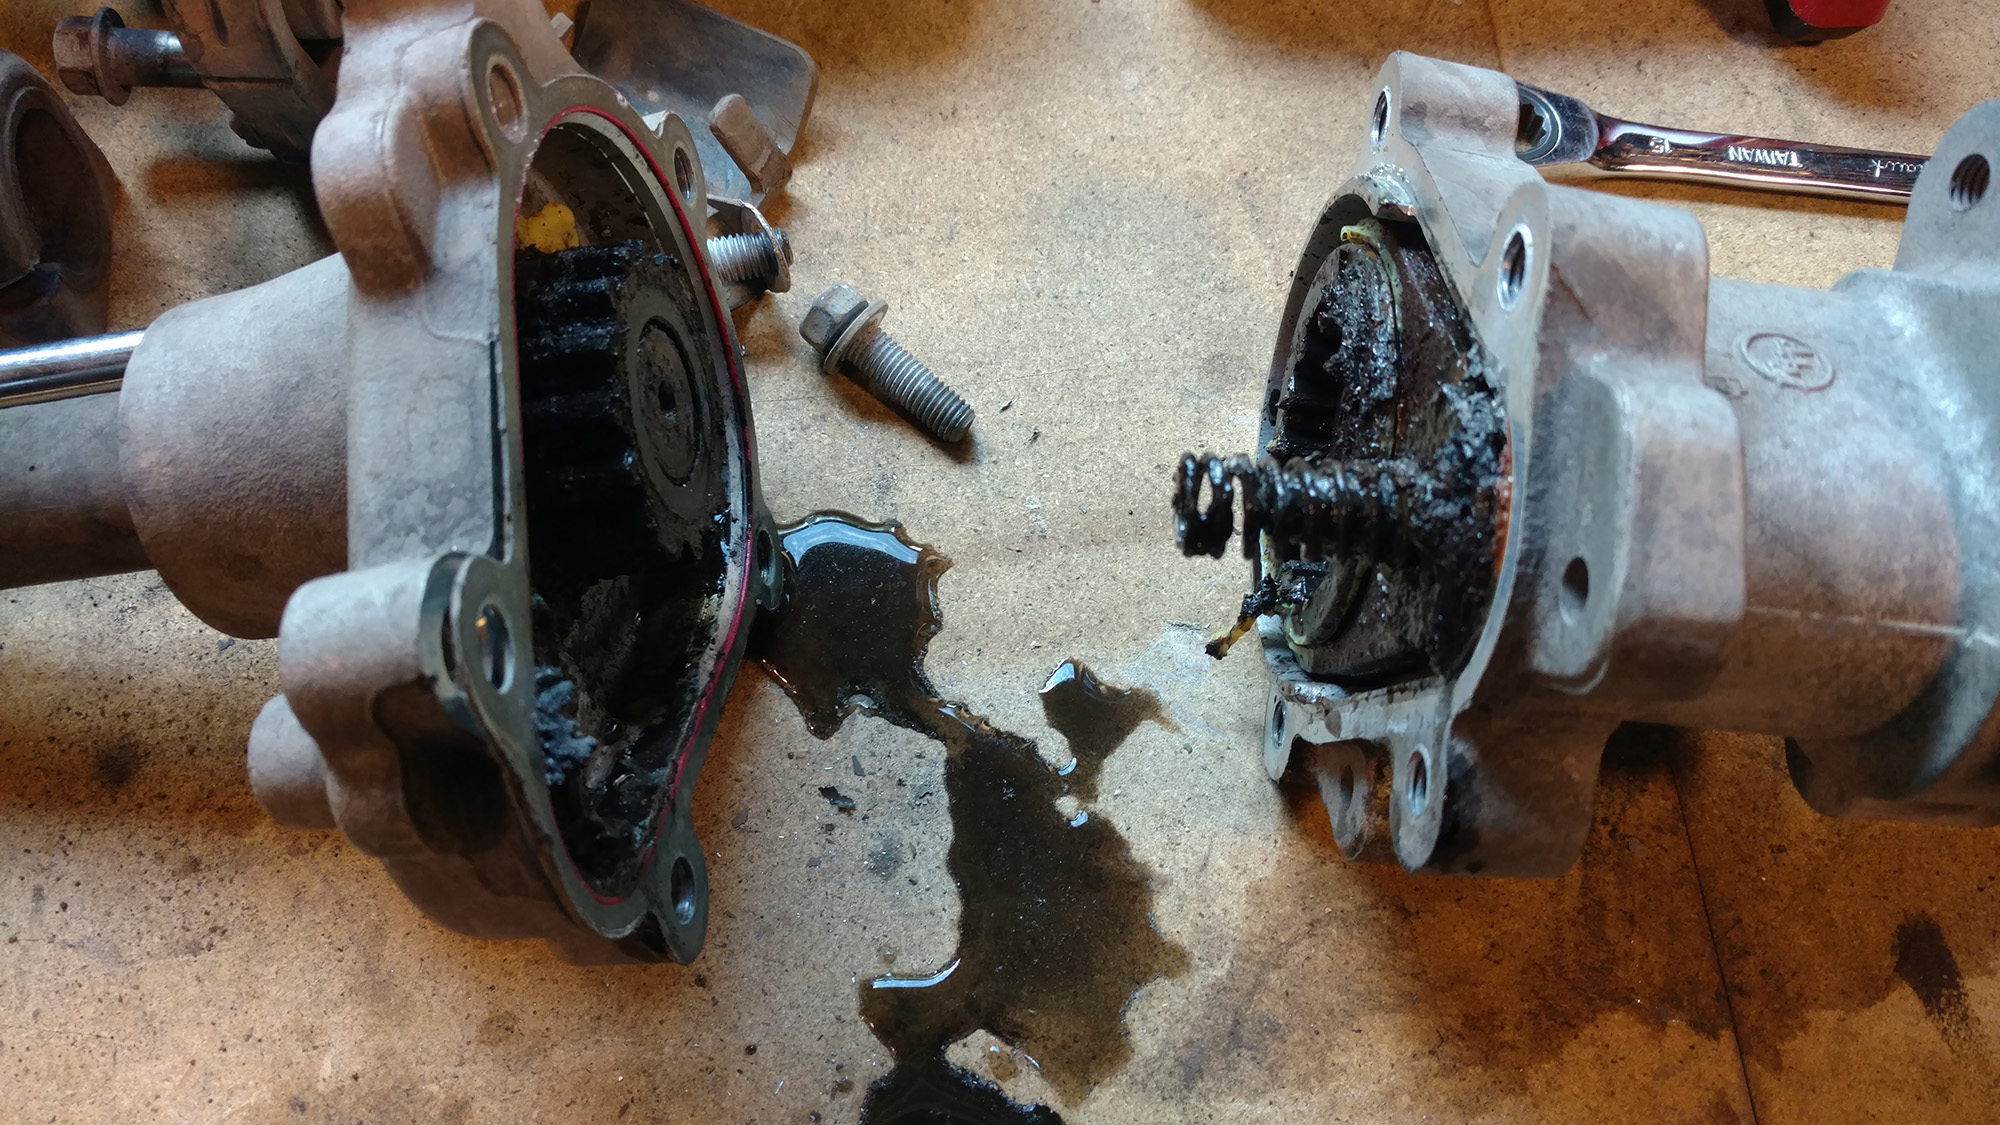
In my case, the mixture of dirty grit-laden grease and Pennsylvania coal country mud smelled horrible. It isn't hard to tell why this was so crunchy when I pushed in the actuation plunger.
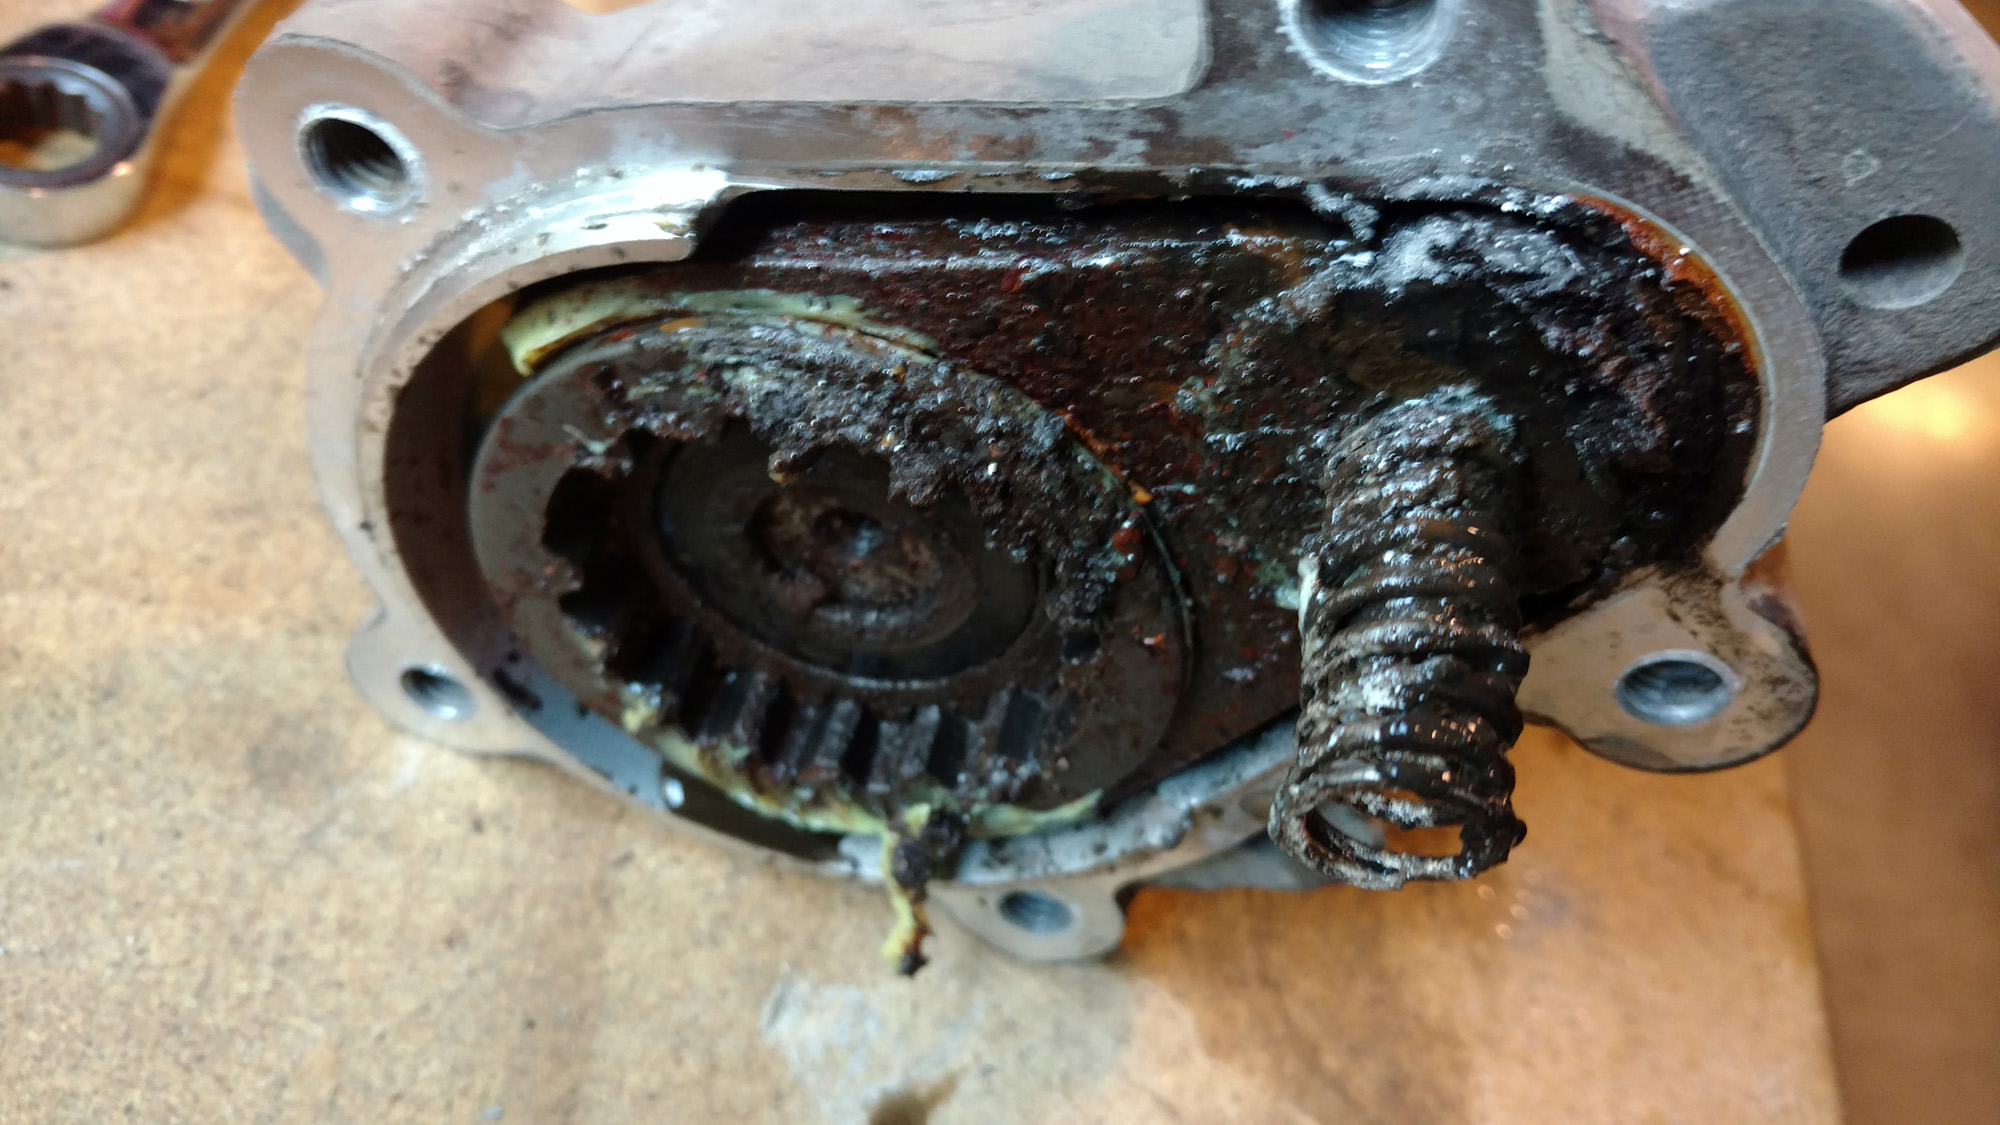
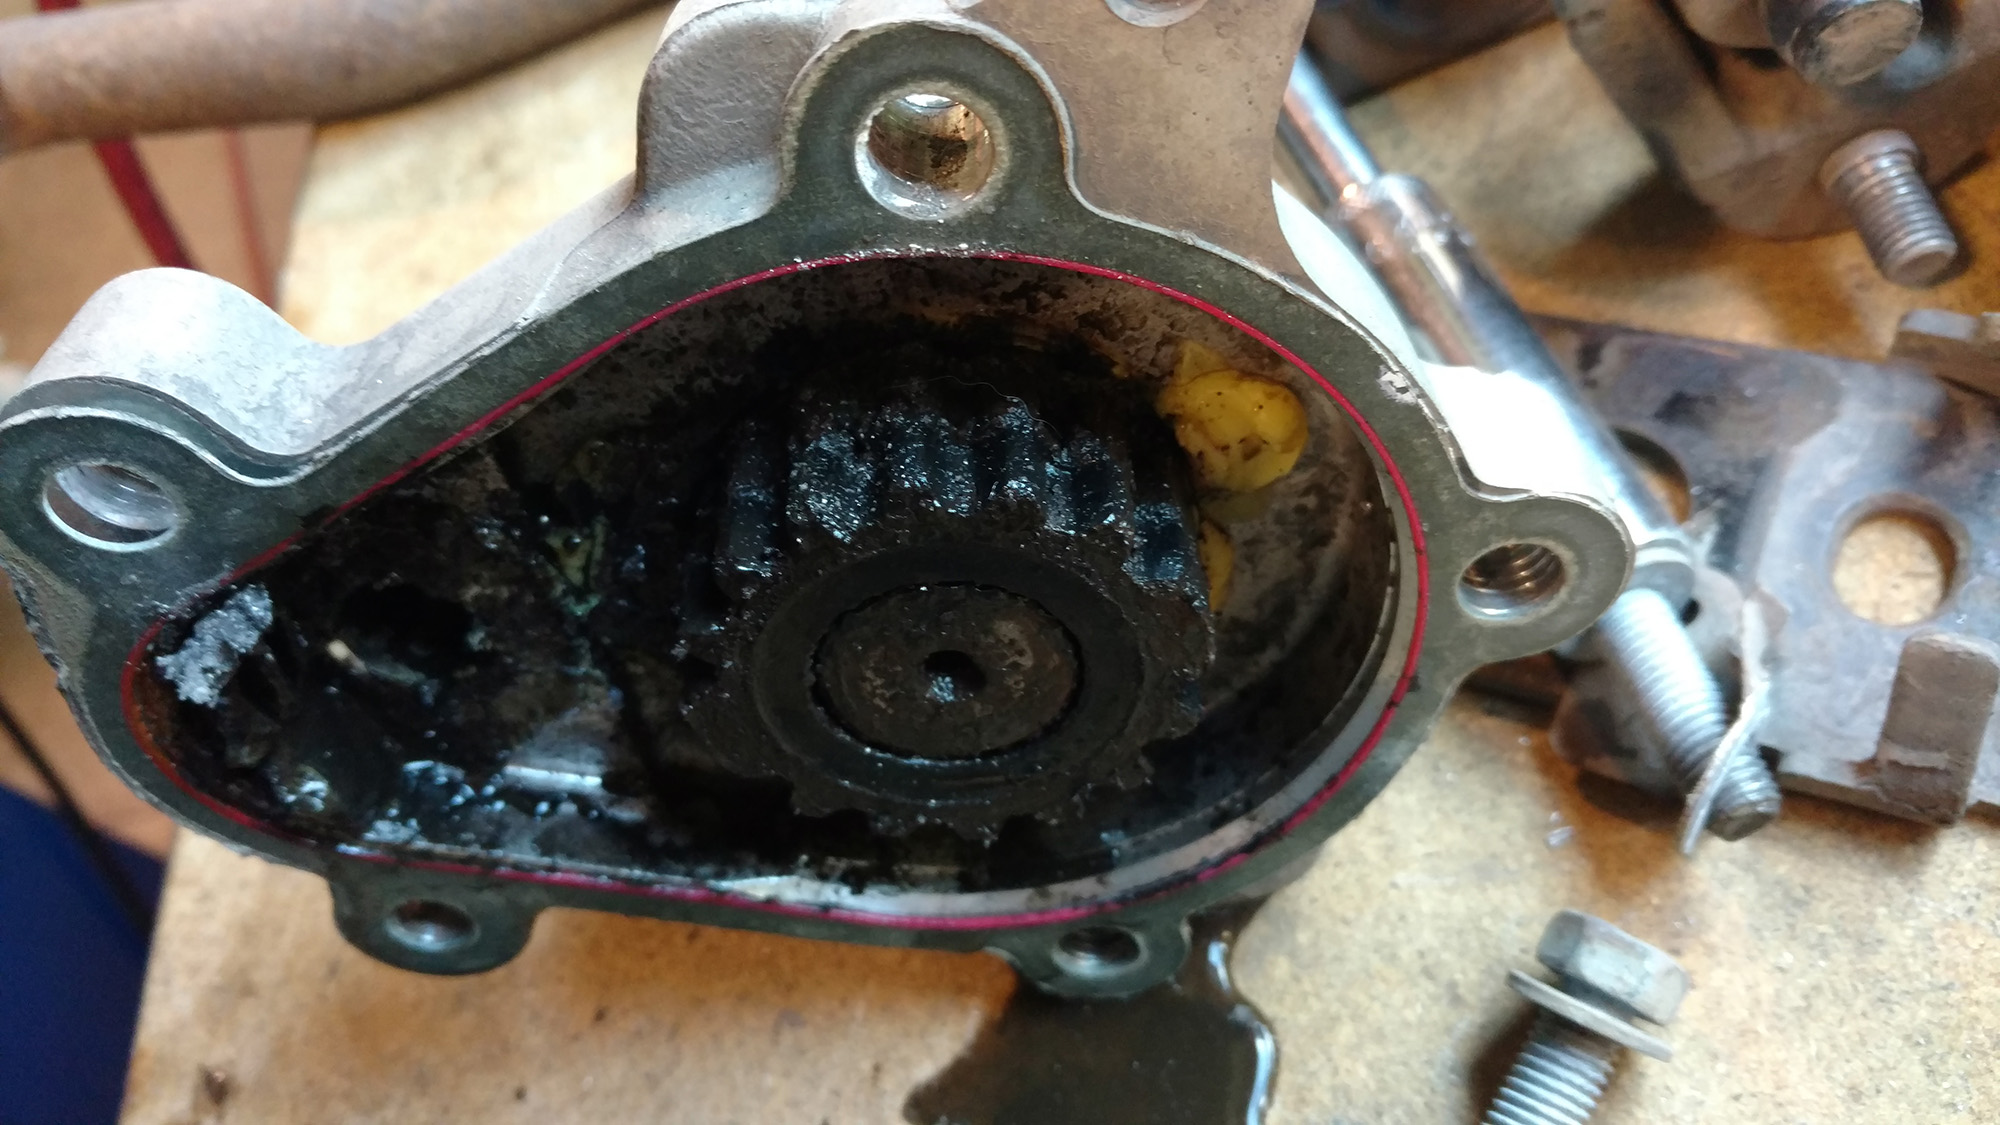
The two sides separated, and I then cleaned everything out in the parts washer to get all the old grease and junk out of the assembly. I added blue grade 0 marine grease to the socket side.
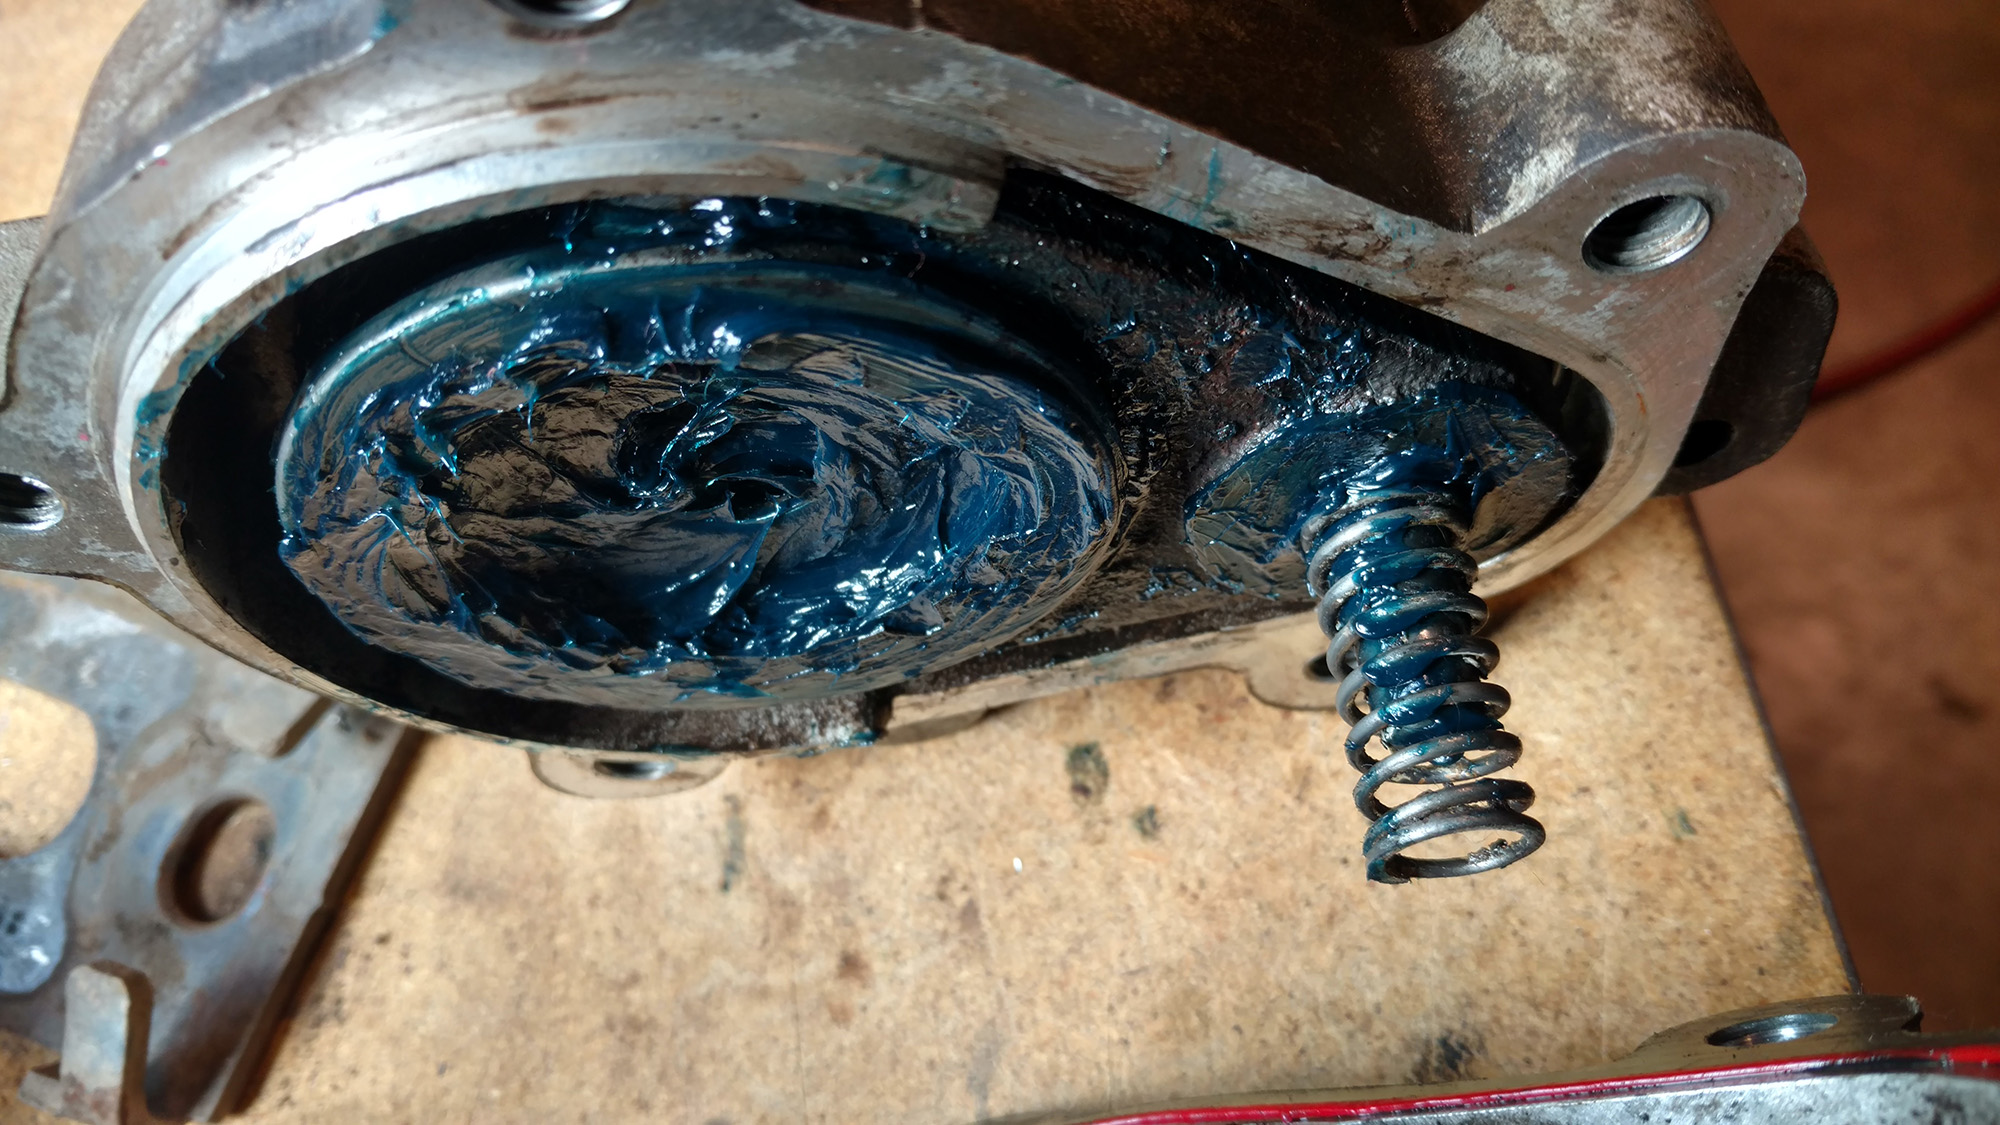
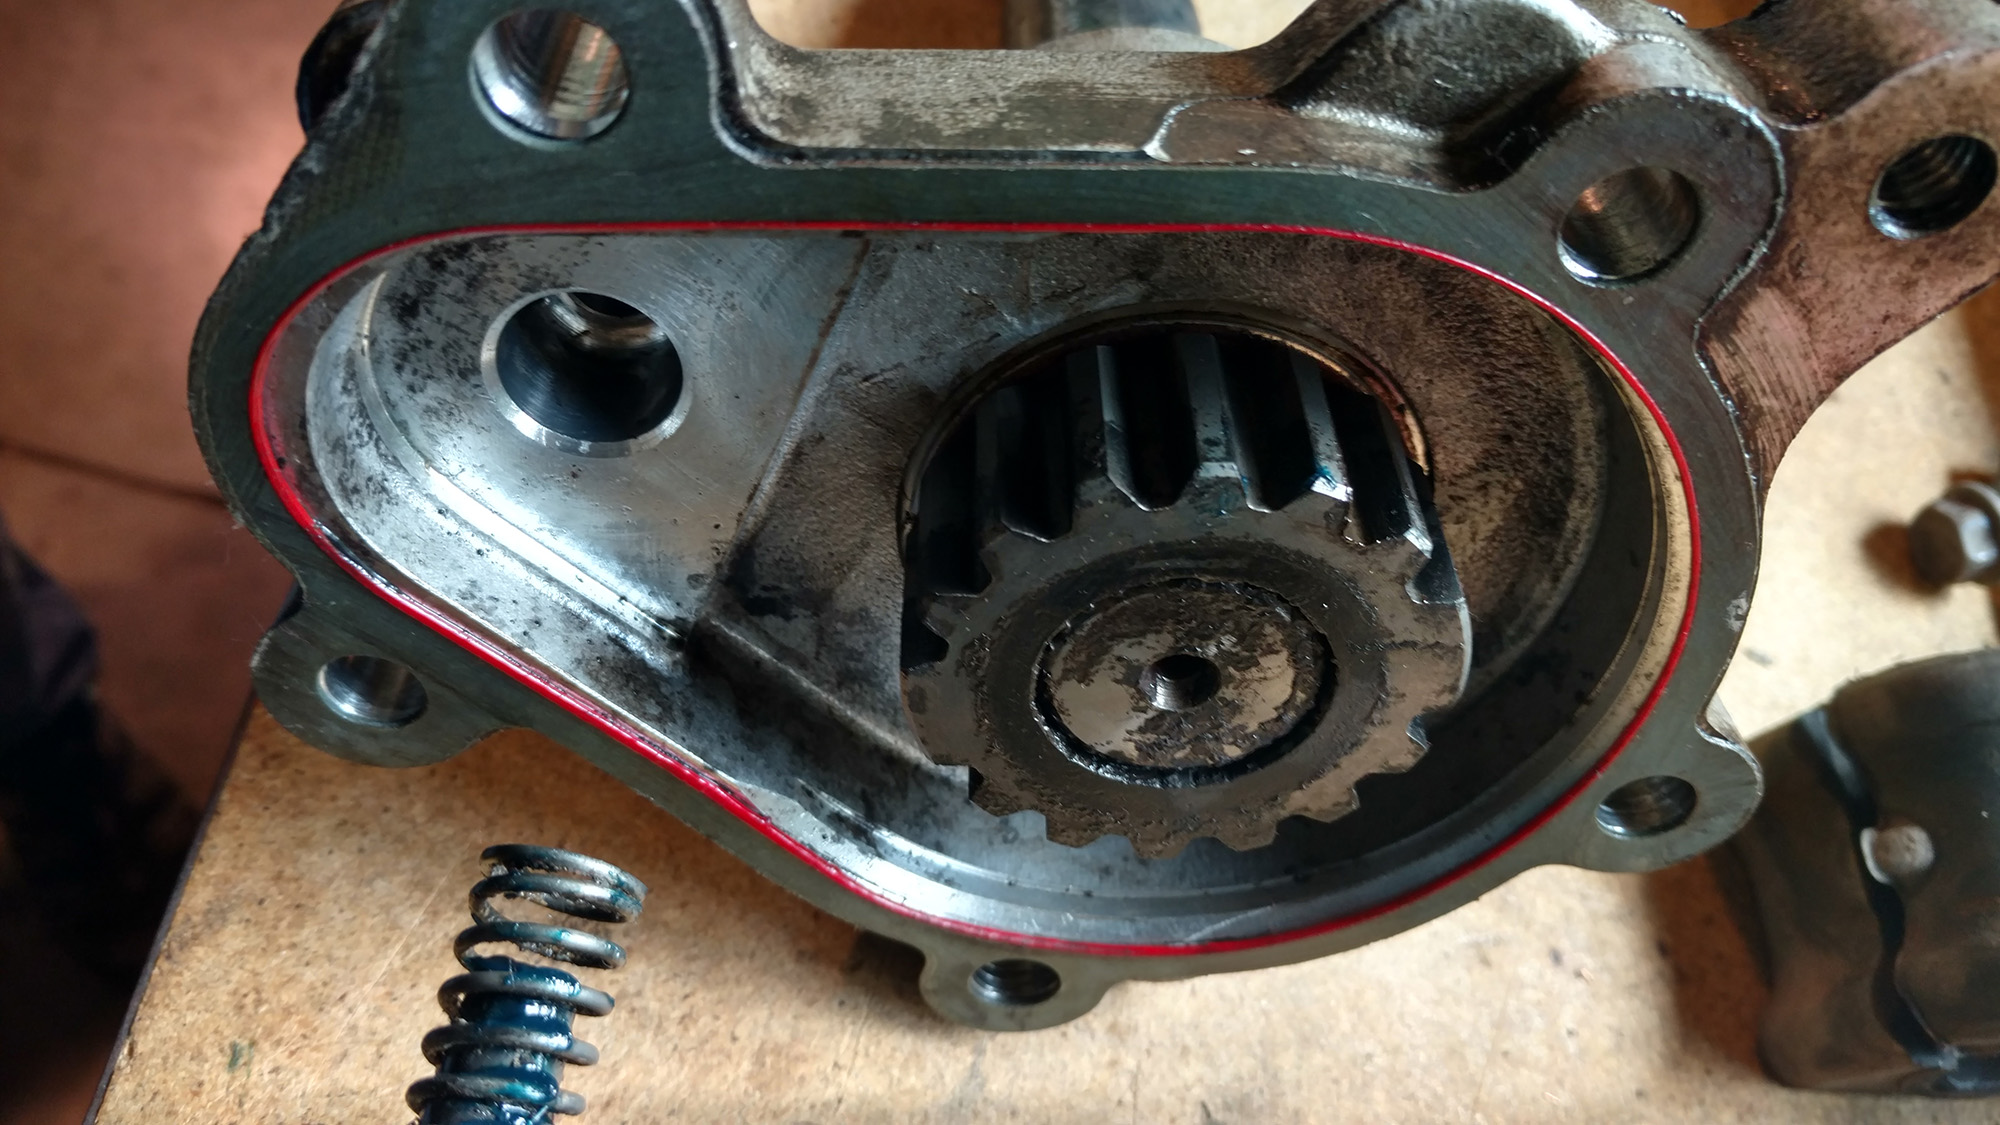
With everything cleaned up, you can see how it is supposed to work. When the actuator is energized, it pushes the armature holding the toothed socket away from the stationary gear, disconnecting the two sides of the sway bar. The gear and socket sides are both keyed, so it only fits together one way.
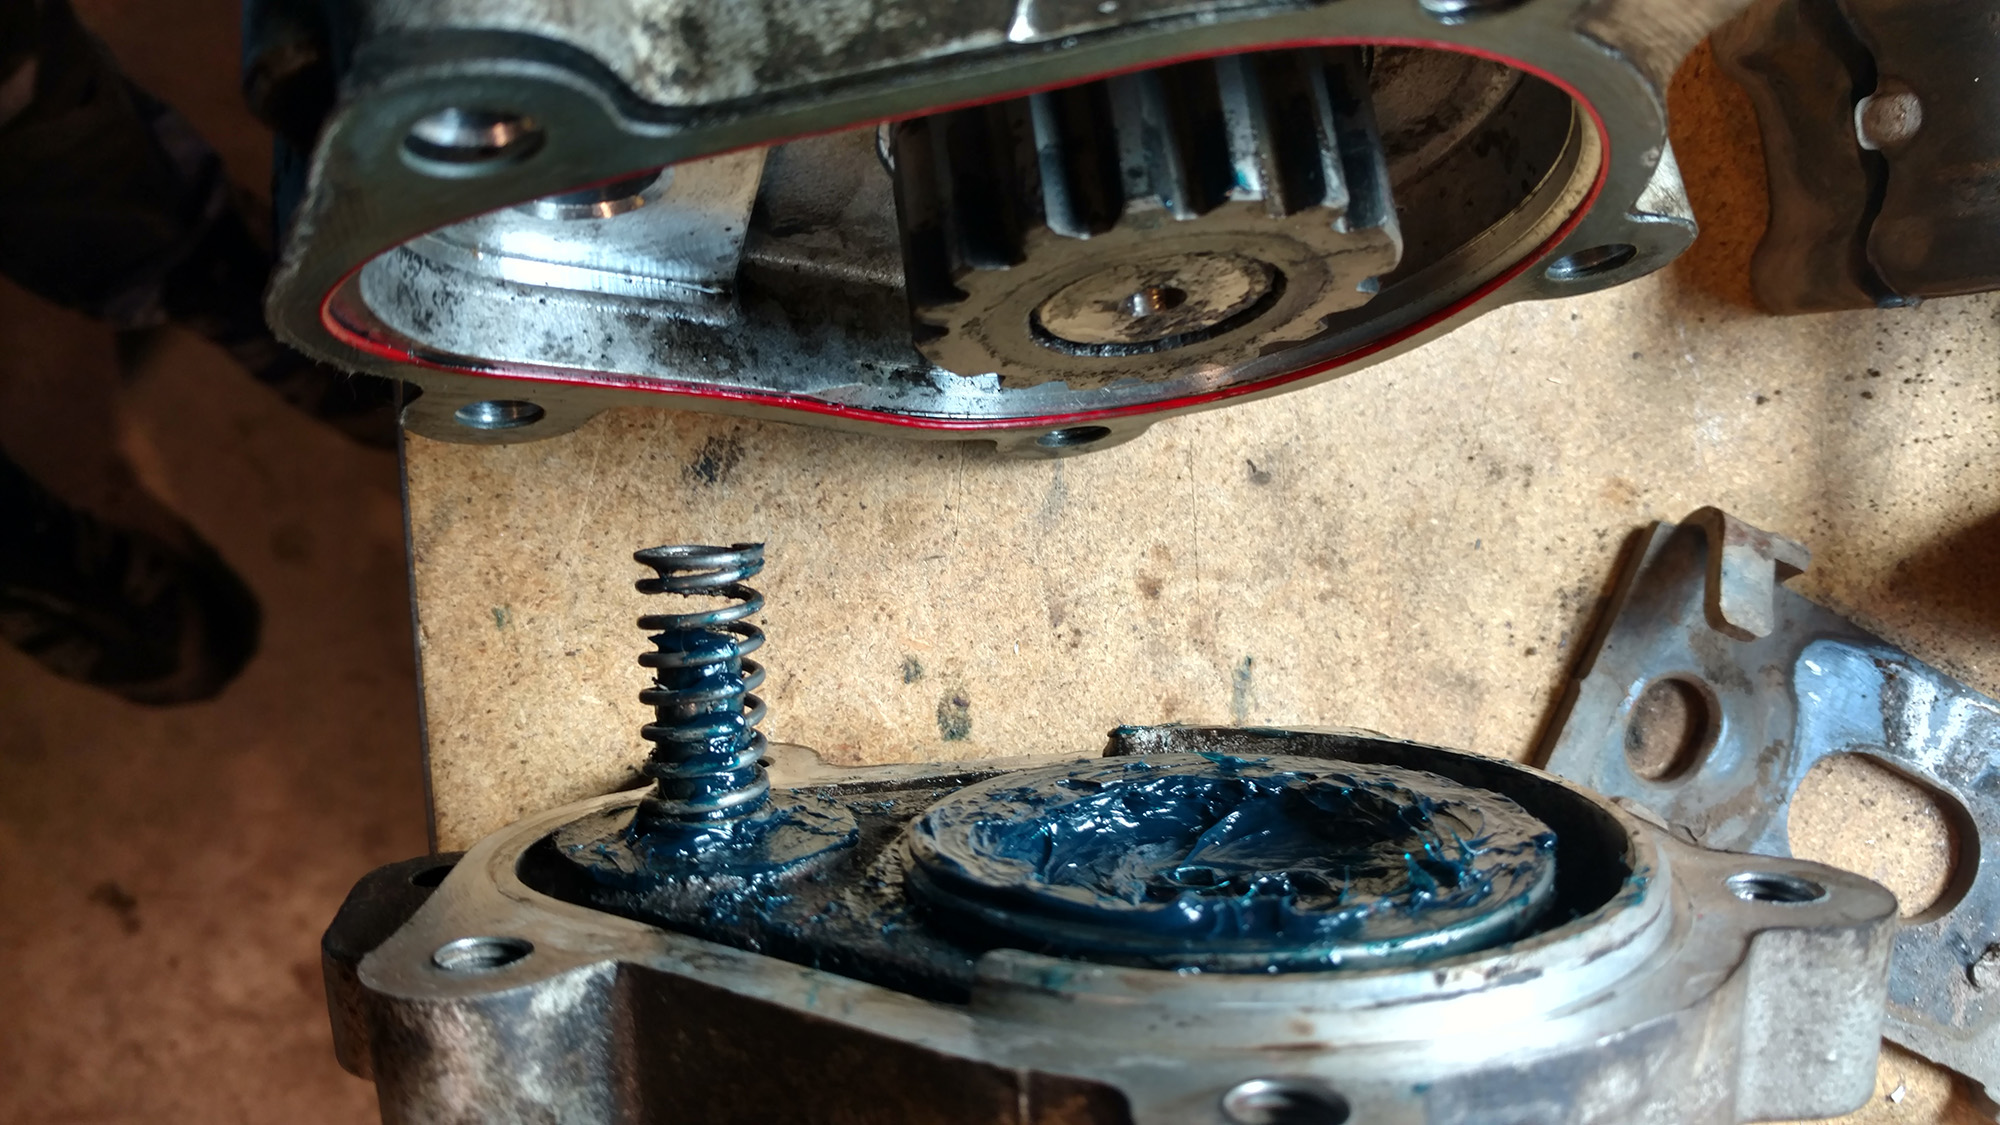
After the actuator is turned off, the plunger would go back in—and because of spring pressure the gear would drop back into its socket the next time the sway bar was on a flat surface. The edges of the gear are diamond cut to allow smoother engagement. Mechanically, everything was in good shape once it was cleaned, lubricated and reassembled.
Now, reinstall the sway bar back on the frame. Using the 16mm socket and a torque wrench, tighten mounting bolts to 75 lb-ft. Then, reconnect your end links and make sure those factory style bolts are tightened to 66 lb-ft on the sway bar side, and 75 lb-ft on the axle side.
If you have aftermarket mounting bolts for the sway bar, such as ones that came with a set of quick disconnects, please verify the torque specs for that installation.
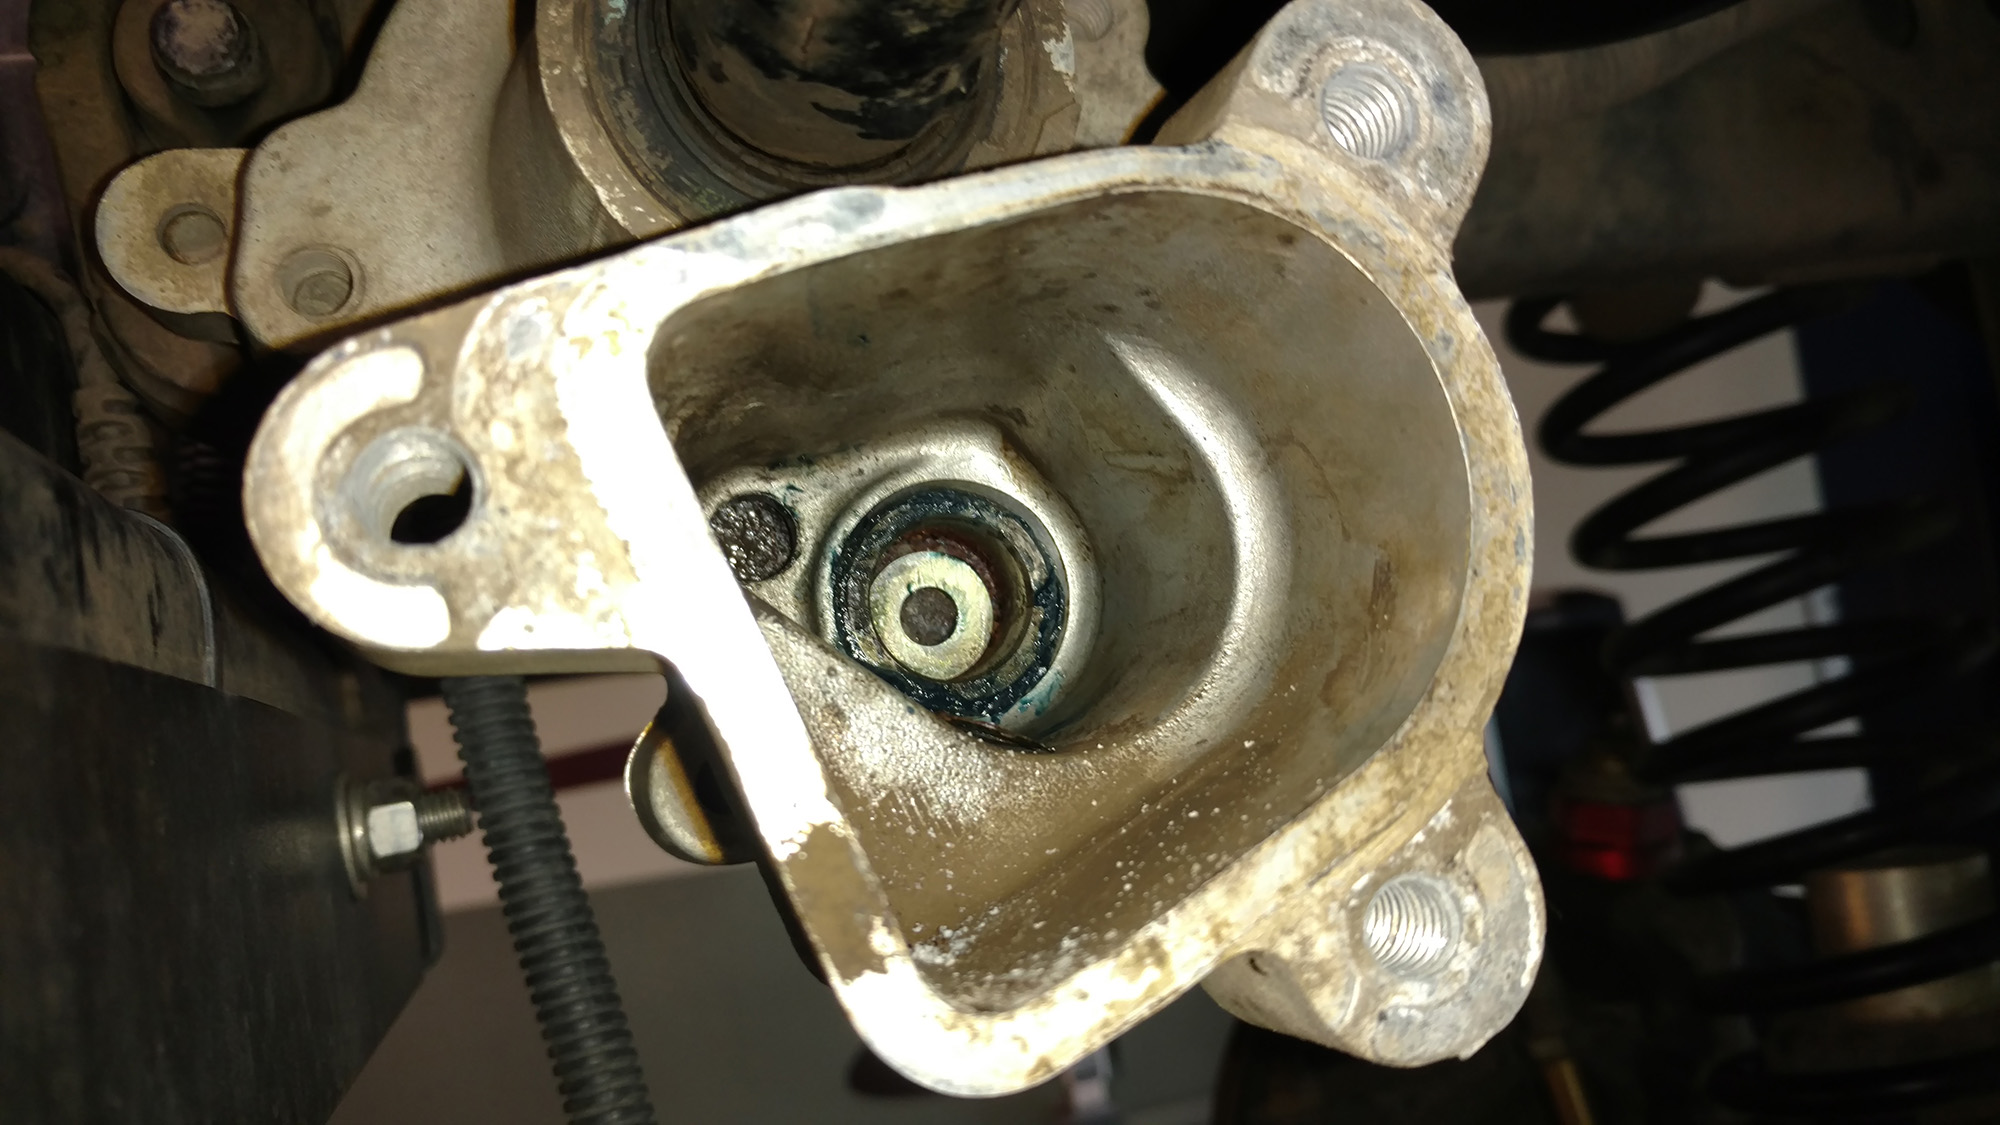
To install the Evo NoLimits Manual Sway Bar Disconnect, the included washer needs to be placed into the recess where the electrical actuator used to attach. With that in place, install the knob assembly with the three factory bolts using a 15mm wrench or socket. Torque these bolts to 45 lb-ft.
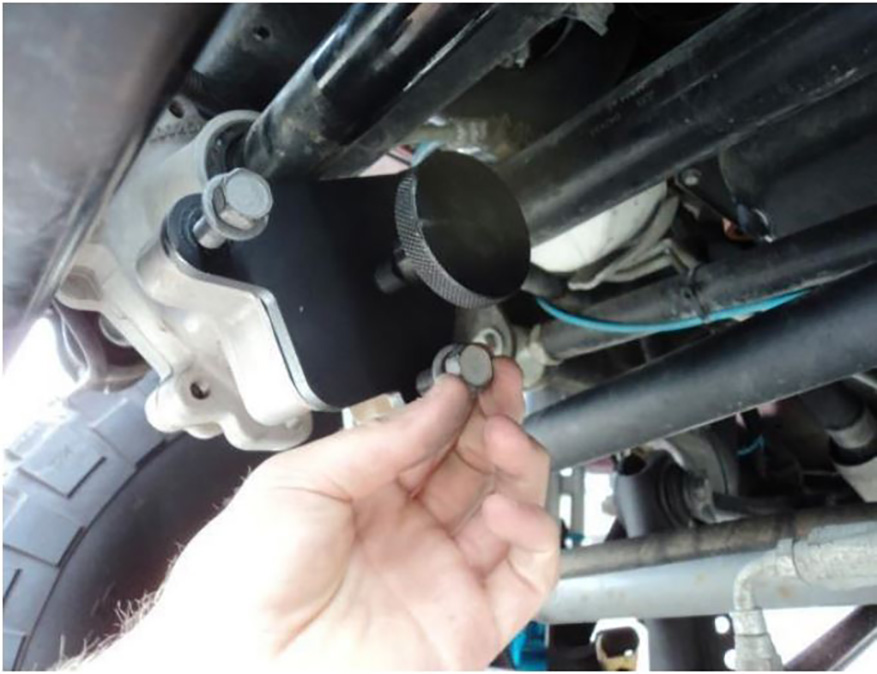
Now, disconnection and reconnection of your Rubicon sway bar is merely the turn of a knob away.
Note: The ‘SWAY BAR’ light will remain either lit or flashing on the dashboard, and to disable this warning you could use either of the following:
The AEV Procal or the Superchips TrailDash2.
It is also possible that your local Jeep dealership could disable this with vehicle coding using their diagnostic computer, but the rates for this would vary based on your location. I chose the TrailDash2 because of all its other added functionality (including engine performance programming. Keep an eye out for a long-term review of that device coming soon.
